Hyundai Ioniq (AE): Interior Trim / Luggage Side Trim. Repair procedures
| Replacement |
|

|

| 1. | Remove the rear seat assembly (Refer to Rear Seat - "Rear Seat Assembly") |
| 2. | Carefully remove the rear door body side weatherstrip. |
| 3. | Carefully remove the tailgate weatherstrip. |
| 4. | Remove the rear door scuff trim. (Refer to Interior Trim - "Door Scuff Trim") |
| 5. | Remove the rear transverse trim. (Refer to Interior Trim - "Rear Transverse Trim") |
| 6. | Remove the rear wheel house trim. (Refer to Interior Trim - "Rear Wheel House Trim") |
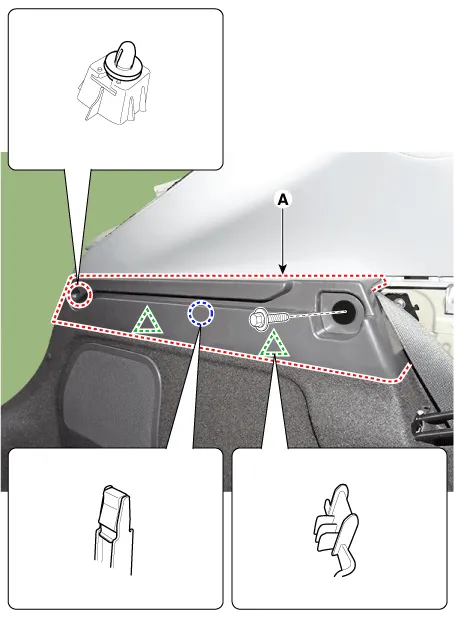
| 7. | Loosen the mounting bolts, remove the sshift side trim covering (A).
|
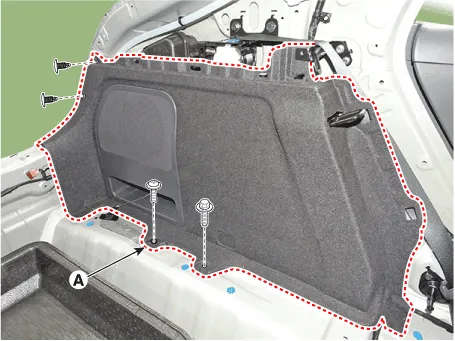
| 8. | After loosening the mounting clips, bolts and screws, remove the luggage side trim (A).
|
| 9. | To install, reverse the removal procedure.
|

Component Location 1. Luggage side trim
Component Location 1. Rear pillar trim
Other information:
Hyundai Ioniq (AE) 2017-2022 Service & Repair Manual: In-car Sensor. Description and operation
DescriptionThe In-car air temperature sensor is built in the heater & A/C control unit.The sensor contains a thermistor which measures the temperature of the inside. The signal decided by the resistance value which changes in accordance with perceived inside temperature, is delivered to heater control unit and according to this signal the contr
Hyundai Ioniq (AE) 2017-2022 Service & Repair Manual: emperature Control Actuator. Repair procedures
Inspection1.Turn the ignition switch OFF.2.Disconnect the temperature control actuator connector.3.Verify that the temperature control actuator operates to the cool position when connecting 12V to terminal 3 and grounding terminal 7.Verify that the temperature control actuator operates to the warm position when connected in reverse.
Categories
- Manuals Home
- Hyundai Ioniq Owners Manual
- Hyundai Ioniq Service Manual
- Suspension System
- Jump starting procedure
- Theft-alarm System
- New on site
- Most important about car
