Hyundai Ioniq (AE): Head Restraints / Rear seat head restraints
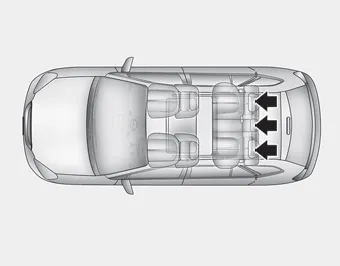
The rear seats are equipped with head restraints in all the seating positions for the passenger's safety and comfort.
Adjusting the height up and down
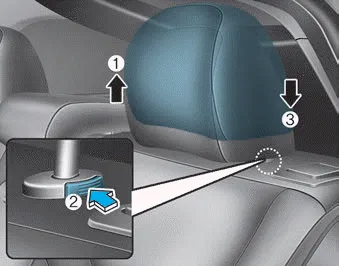
To raise the head restraint:
1. Pull it up to the desired position (1).
To lower the head restraint:
1. Push and hold the release button (2) on the head restraint support.
2. Lower the head restraint to the desired position (3).
Removal/Reinstallation

To remove the head restraint:
1. Raise the head restraint as far as it can go.
2. Press the head restraint release button (1) while pulling the head restraint up (2).
To reinstall the head restraint:
1. Put the head restraint poles into the holes (3) while pressing the release button (1).
2. Adjust the head restraint to the appropriate height.
The vehicle's front and passenger's seats are equipped with adjustable head restraints for the passengers safety and comfort. Adjusting the height up and down To raise the head restraint: 1.
Front seat warmers (if equipped) Seat warmers are provided to warm the seats during cold weather. WARNING The seat warmers can cause a SERIOUS BURN, even at low temperatures and especially if used for long periods of time.
Other information:
Hyundai Ioniq (AE) 2017-2022 Service & Repair Manual: Repair procedures
Replacement1.Remove the battery (-) terminal.2.Remove the engine room under cover.(Refer to Engine Mechanical System - "Engine Room Under Cover")3.Remove the heater hose (A) and AEWP hose (B).4.Disconnect the lock pin to remove the heater hose pump connector (A).
Hyundai Ioniq (AE) 2017-2022 Service & Repair Manual: Schematic diagrams
Trouble Symptom ChartsComponent Parts and Function Outline Component part Function Cruise Control Switch Input the set speed and distance to the SCC ECU. Instrument Cluster Display various information inputted from SCC.
Categories
- Manuals Home
- Hyundai Ioniq Owners Manual
- Hyundai Ioniq Service Manual
- Suspension System
- Theft-alarm System
- Body (Interior and Exterior)
- New on site
- Most important about car
