Hyundai Ioniq (AE): AVN System / Speaker. Repair procedures
Hyundai Ioniq (AE) 2017-2022 Service & Repair Manual / Body Electrical System / AVN System / Speaker. Repair procedures
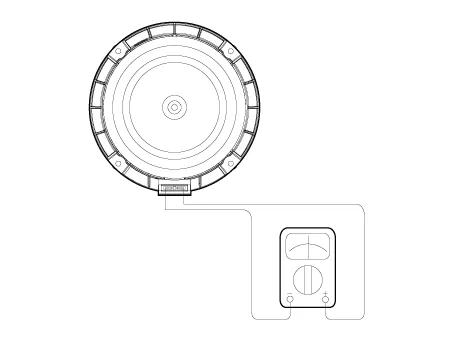
| Inspection |
| 1. | Troubleshooting for Speaker
|


| Removal |
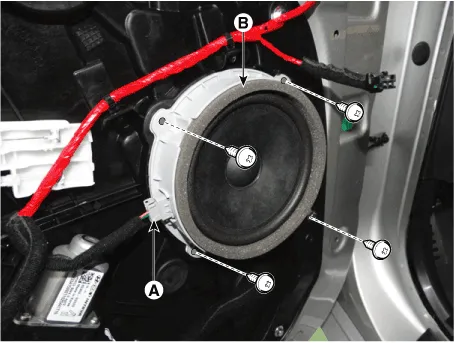
[Front Door Speakers]
| 1. | Disconnect the negative (-) battery terminal. |
| 2. | Remove the front door trim. (Refer to Body - "Front Door Trim") |
| 3. | Remove the front door speaker (B) after disconnecting the connector (A) and loosening the screws.
|
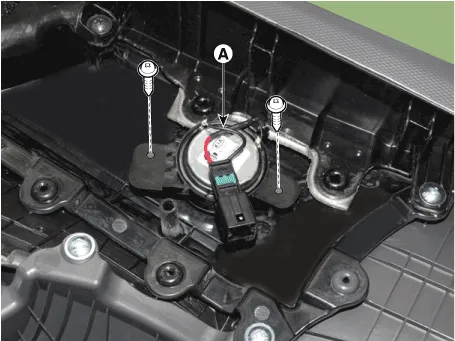
[Front Door Tweeter Speaker]
| 1. | Disconnect the negative (-) battery terminal. |
| 2. | Remove the front door trim. (Refer to Body - "Front Door Trim") |
| 3. | Remove the tweeter speaker (A) after loosening the screws.
|
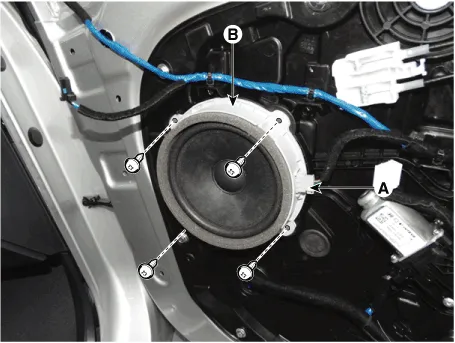
[Rear Door Speakers ]
| 1. | Disconnect the negative (-) battery terminal. |
| 2. | Remove the rear door trim. (Refer to Body - "Rear Door Trim") |
| 3. | Remove the rear door speaker (B) after disconnecting the connector (A) and loosening the screws.
|
| Installation |
Front Door Speaker
| 1. | Install the front door speaker. |
| 2. | Install the front door trim. |
| 3. | Connect the negative (-) battery terminal. |
Front Door Tweeter Speakers
| 1. | Install the front door tweeter speaker. |
| 2. | Install the front door trim. |
| 3. | Connect the negative (-) battery terminal. |
Rear Door Speaker
| 1. | Install the rear door speaker. |
| 2. | Install the front door trim. |
| 3. | Connect the negative (-) battery terminal. |
|
InspectionAntenna Cable1.Check for continuity between the center poles of antenna cable.2.Check for continuity between the outer poles of antenna cable.
Circuit Diagram
Other information:
Hyundai Ioniq (AE) 2017-2022 Service & Repair Manual: Auto Defogging Sensor. Repair procedures
Diagnosis With GDS1.The heating, ventilation and air conditioning can be quickly diagnosed failed parts with vehicle diagnostic system (GDS).※ The diagnostic system (GDS) provides the following information.(1) Self diagnosis : Checking the failure code (DTC) and display.
Hyundai Ioniq (AE) 2017-2022 Service & Repair Manual: Cruise Control Switch. Repair procedures
Removal1.Disconnect the negative (-) battery terminal.2.Remove the steering wheel assembly.(Refer to Steering System - "Steering Wheel")3.Remove the steering back cover (A).4.Remove the steering remote control connector (A).5.Remove the steering remote control after loosening the screws.
Categories
- Manuals Home
- Hyundai Ioniq Owners Manual
- Hyundai Ioniq Service Manual
- Engine Clutch System
- General Information
- Repair procedures
- New on site
- Most important about car

Copyright © 2026 www.hioniqae.com - 0.0251