
Hyundai Ioniq (AE): Audio / Antenna. Repair procedures
| Inspection |
| 1. | Check for continuity between the center poles of antenna cable.
|
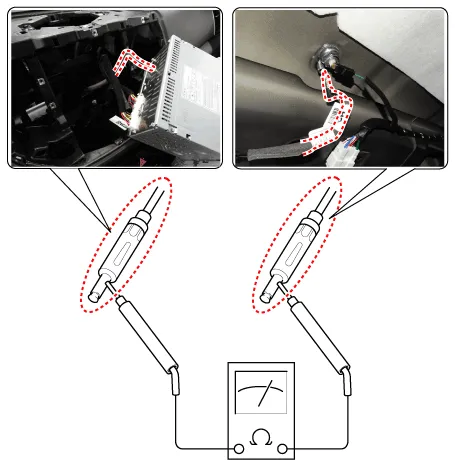
| 2. | Check for continuity between the outer poles of antenna cable. There should be continuity.
|

| 3. | If there is no continuity, replace the antenna cable. |
| 4. | If there is no continuity, replace the antenna amplifier. |
| 5. | Check for continuity between the center pole (A) and outer pole (B) of antenna cable. There should be no continuity.
|
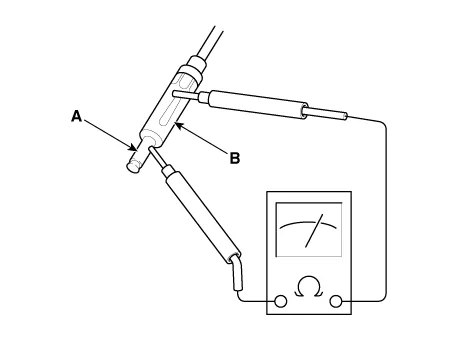
| 6. | If there is continuity, replace the antenna cable. |
| Removal |
| 1. | Disconnect the negative (-) battery terminal. |
| 2. | Remove the roof trim. (Refer to Body - "Roof Trim Assembly") |
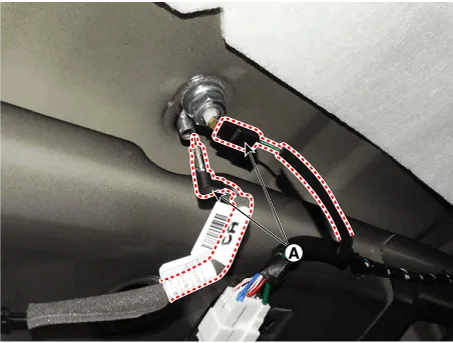
| 3. | Disconnect the roof antenna connector (A).
|
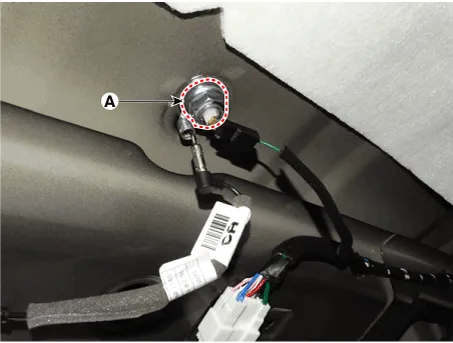
| 4. | Remove the roof antenna after loosening a nut (A).
|
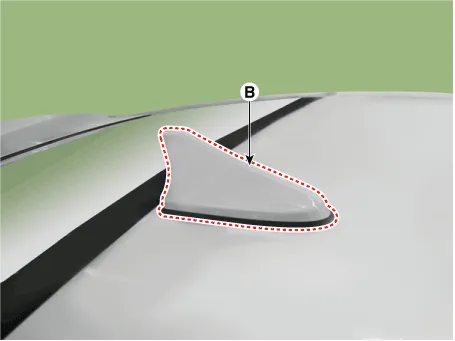
| Installation |
| 1. | Connect the roof antenna connectors. |
| 2. | Install the roof trim assembly.
|

Inspection1.Troubleshooting for Speaker(1)Basic inspection of speakerInspect the sound from speaker after verifying that the speaker mounting screws is removed and the wiring connector is connected precisely to remove vibration transmitted from body trims and surrounding parts.
Components1. Left Remote Control Switch (Audio + Hands free)2. Right Remote Control Switch(Cruise+Trip Computer)
Other information:
Hyundai Ioniq (AE) 2017-2022 Service & Repair Manual: Auto Defoging Actuator. Description and operation
DescriptionThe auto defogging sensor is installed on front window glass. The sensor judges and sends signal if moisture occurs to blow out wind for defogging. The air conditioner control module receives a signal from the sensor and restrains moisture and eliminates defog by the intake actuator, A/C, auto defogging actuator, blower motor rpm and mod
Hyundai Ioniq (AE) 2017-2022 Service & Repair Manual: Auto Defoging Actuator. Repair procedures
Inspection1.Turn the ignition switch OFF. 2.Disconnect the auto defogging connector. 3.Verify that the auto defogging actuator operates to the open position when connecting 12V to terminal 3 and grounding terminal 4. Verify that the auto defogging actuator operates to the close position when connected in reverse.
Categories
- Manuals Home
- Hyundai Ioniq Owners Manual
- Hyundai Ioniq Service Manual
- Suspension System
- Components and components location
- Repair procedures
- New on site
- Most important about car
