Hyundai Ioniq (AE): Air Conditioning System / Condenser. Repair procedures
Hyundai Ioniq (AE) 2017-2022 Service & Repair Manual / Heating, Ventilation and Air Conditioning / Air Conditioning System / Condenser. Repair procedures
| Inspection |
| 1. | Check the condenser fins for clogging and damage. If clogged, clean them with water, and blow them with compressed air. If bent, gently bend them using a screwdriver or pliers. |
| 2. | Check the condenser connections for leakage, and repair or replace it, if required. |
| Replacement |
| 1. | Recover the refrigerant with a recovery / recycling / charging station.
|

| 2. | Disconnect the negative (-) battery terminal. |
| 3. | Remove the front bumper. (Refer to Body - "Front Bumper Cover") |
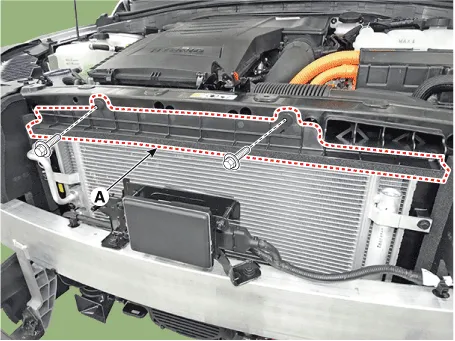
| 4. | Loosen the mounting bolts, remove the radiator upper cover (A).
|
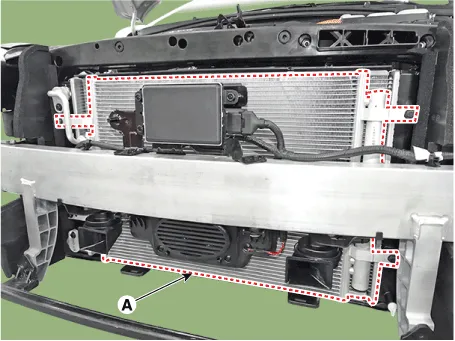
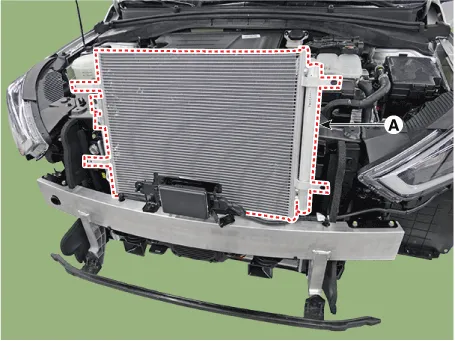
| 5. | After loosening the mounting bolts, remove the condenser (A).
|
| 6. | To install, reverse the removal procedure.
|

Components Location1. Condenser
Replacement1.Remove the condenser.2.Remove the cap (A) on the bottom of the condenser with a L wrench. Tightening torque : 9.81 - 14.71 N.
Other information:
Hyundai Ioniq (AE) 2017-2022 Service & Repair Manual: Auto Defogging Sensor. Repair procedures
Diagnosis With GDS1.The heating, ventilation and air conditioning can be quickly diagnosed failed parts with vehicle diagnostic system (GDS).※ The diagnostic system (GDS) provides the following information.(1) Self diagnosis : Checking the failure code (DTC) and display.
Hyundai Ioniq (AE) 2017-2022 Service & Repair Manual: Components and components location
C
Categories
- Manuals Home
- Hyundai Ioniq Owners Manual
- Hyundai Ioniq Service Manual
- Hybrid Control System
- Suspension System
- Engine Control/Fuel System
- New on site
- Most important about car

Copyright © 2026 www.hioniqae.com - 0.0203