Hyundai Ioniq (AE): Engine Control System / Engine Coolant Temperature Sensor (ECTS). Description and operation
| Description |
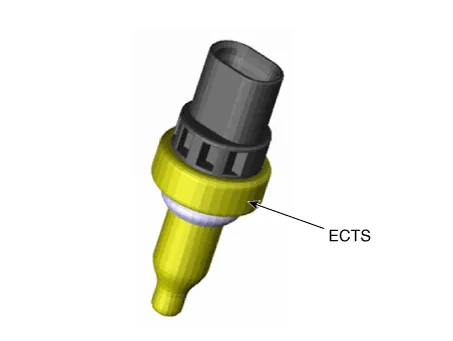
Inspection1.Turn the ignition switch OFF.2.Disconnect the IATS connector.3.Measure resistance between the IATS terminals 3 and 4.4.Check that the resistance is within the specification.
Specification Temperature Resistance (kΩ) °C °F -40-4048.
Other information:
Hyundai Ioniq (AE) 2017-2022 Service & Repair Manual: Photo Sensor. Description and operation
Description The photo sensor is located at the center of the defrost nozzles.The photo sensor contains a photovoltaic (sensitive to sunlight) diode. The solar radiation received by its light receiving portion, generates an electromotive force in proportion to the amount of radiation received which is transferred to the automatic temperature control
Hyundai Ioniq (AE) 2017-2022 Service & Repair Manual: Front Radar Unit. Repair procedures
Removal1.Remove the front bumper.(Refer to Body - "Front Bumper")2.Disconnect the smart cruise control unit connector (A).3.Remove the smart cruise control nuit assembly (B) from thevehicle after loosening mounting bolts.Installation1.Install in the reverse order of removal.
Categories
- Manuals Home
- Hyundai Ioniq Owners Manual
- Hyundai Ioniq Service Manual
- How to Connect Portable Charger (ICCB: In-Cable Control Box)
- Jump starting procedure
- If the 12 Volt Battery is Discharged (Hybrid Vehicle)
- New on site
- Most important about car
