Hyundai Ioniq (AE): Front Door / Repair procedures
| Adjustment |
|

| 1. | Remove the front door trim. (Refer to Front Door - "Front Door Trim") |
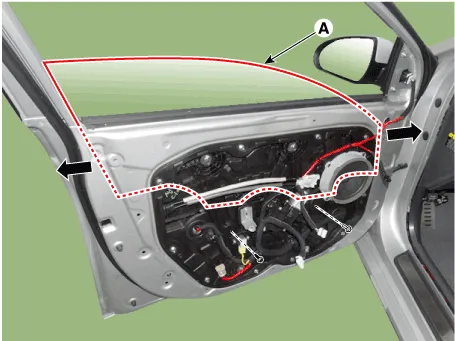
| 2. | Separate the mounting plug hole (A) from the front door module.
|

| 3. | After loosening the glass mounting bolts, adjust the spacing of the glass (A) by moving the glass from side to side and then tighten the bolts.
|
| 4. | Check the glass for normal operation. |
|
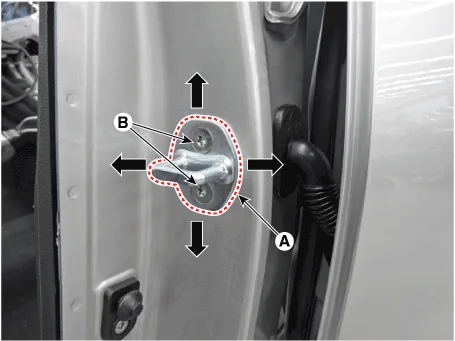
| 1. | After loosening the mounting screw, adjust the striker (A) by moving it forward and backward or from side to side and then tighten the bolts (B).
|
| 2. | Tap on the striker with a plastic hammer to adjust the striker. The striker will not move much, but will give some adjustment. |
| 3. | Hold the outer handle out, and push the door against the body to be sure the striker allows a flush fit. If the door latches properly, tighten the screws and recheck. |
|
| 1. | Check that the door and body edges are parallel.
|
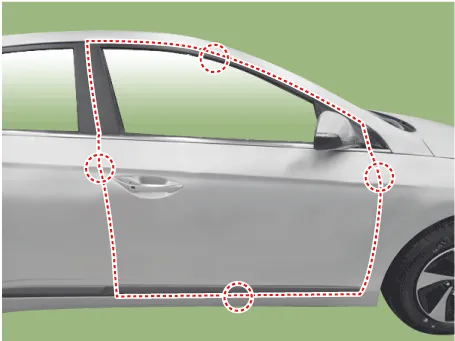
| 2. | Place the vehicle on a level surface before adjusting the doors. |
| 3. | Adjust the hinges (A) :
|
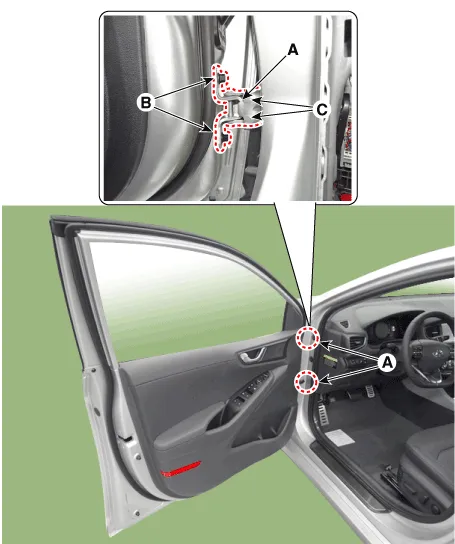
| 4. | Grease the pivot portions of the hinges indicated. |
| 5. | Check for water leaks. |
Components 1. Front door trim 2. Front door pull cap3. Front door belt inside weatherstrip4. Front door quadrant inner cover 5. Front door module 6. Front door panel 7.
Component Location 1. Front door trim
Other information:
Hyundai Ioniq (AE) 2017-2022 Service & Repair Manual: emperature Control Actuator. Repair procedures
Inspection1.Turn the ignition switch OFF.2.Disconnect the temperature control actuator connector.3.Verify that the temperature control actuator operates to the cool position when connecting 12V to terminal 3 and grounding terminal 7.Verify that the temperature control actuator operates to the warm position when connected in reverse.
Hyundai Ioniq (AE) 2017-2022 Service & Repair Manual: Rear Corner Radar Unit. Repair procedures
Removal1.Disconnect the negative (-) battery terminal.2.Remove the rear bumper.(Refer to Body - "Rear Bumper")3.Remove the rear corner radar unit (A) after loosening the mounting nuts. • Take care not to separate the bracket from rear bumper when removing the rear corner radar sensor.
Categories
- Manuals Home
- Hyundai Ioniq Owners Manual
- Hyundai Ioniq Service Manual
- Engine Control/Fuel System
- Brake System
- Maintenance
- New on site
- Most important about car
