
Hyundai Ioniq (AE): Floor Carpet / Repair procedures
Hyundai Ioniq (AE) 2017-2022 Service & Repair Manual / Body (Interior and Exterior) / Floor Carpet / Repair procedures
| Replacement |
|

|

| 1. | Remove the floor console assembly. (Refer to Floor Console - "Floor Console Assembly") |
| 2. | Remove the front seat assembly. (Refer to Front Seat - "Front Seat Assembly") |
| 3. | Remove the rear seat cushion assembly. (Refer to Rear Seat - "Rear Seat Assembly") |
| 4. | Remove the cowl side trim. (Refer to Interior Trim - "Cowl Side Trim") |
| 5. | Remove the center pillar lower trim. (Refer to Interior Trim - "Center Pillar Trim") |
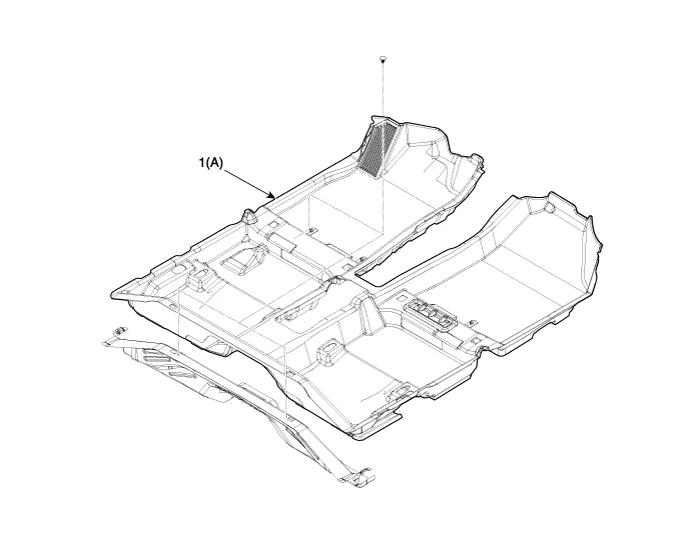
| 6. | Remove the floor carpet assembly (A). |
| 7. | To install, reverse the removal procedure.
|

Other information:
Hyundai Ioniq (AE) 2017-2022 Service & Repair Manual: Photo Sensor. Description and operation
Description The photo sensor is located at the center of the defrost nozzles.The photo sensor contains a photovoltaic (sensitive to sunlight) diode. The solar radiation received by its light receiving portion, generates an electromotive force in proportion to the amount of radiation received which is transferred to the automatic temperature control
Hyundai Ioniq (AE) 2017-2022 Service & Repair Manual: Front View Camera Unit. Repair procedures
Removal1.Disconnect the negative (-) battery terminal.2.Remove the front view camera cover (A).3.Disconnect the front view camera connector (A).4.Remove the front view camera after disengaging the mounting bracket (A).Installation1.Align front view camera with windshield bracket using forward edge point (A).
Categories
- Manuals Home
- Hyundai Ioniq Owners Manual
- Hyundai Ioniq Service Manual
- Transmission Gear Oil. Repair procedures
- General Information
- Engine Control/Fuel System
- New on site
- Most important about car

Copyright © 2026 www.hioniqae.com - 0.0133