Hyundai Ioniq (AE): Air Conditioning System / Duct Sensor. Repair procedures
Hyundai Ioniq (AE) 2017-2022 Service & Repair Manual / Heating, Ventilation and Air Conditioning / Air Conditioning System / Duct Sensor. Repair procedures
| Inspection |
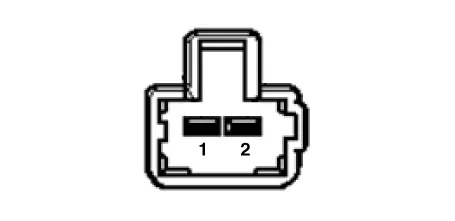
| 1. | Check that the voltage values of No. 1, 2 duct sensors change
Specification
|
| Replacement |
| [Duct sensor - Floor] |
| 1. | Disconnect the negative (-) battery terminal. |
| 2. | Remove the crash pad lower panel. (Refer to Body - "Crash Pad Lower Panel") |
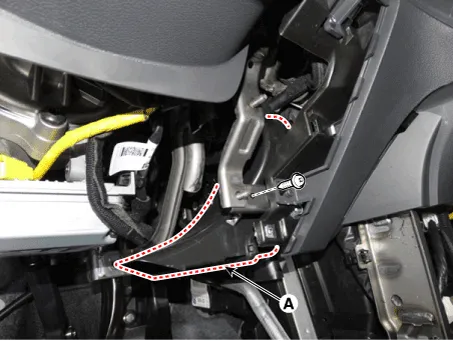
| 3. | Remove the driver's side shower duct (A) after loosening the screw.
|
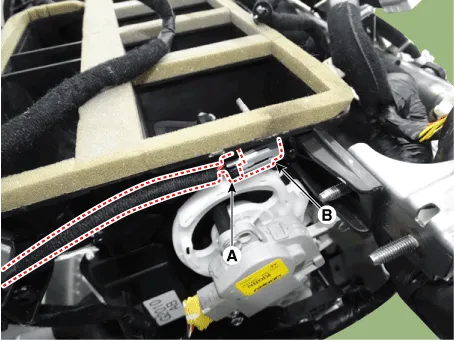
| 4. | Disconnect the duct sensor connector (A). |
| 5. | Hold the end of duct sensor (A) and then rotate it 90° clockwise. Remove the duct sensor (B) by pulling it.
|

| 6. | To install, reverse the removal procedure. |
| [Duct sensor - Vent] |
| 7. | Disconnect the negative (-) battery terminal. |
| 8. | Remove the main crash pad assembly. (Refer to Body - "Main Crash Pad Assembly") |
| 9. | Disconnect the duct sensor connector (A). |
| 10. | Hold the end of duct sensor (A) and then rotate it 90° clockwise. Remove the duct sensor (B) by pulling it.
|
| 11. | To install, reverse the removal procedure. |
Components Location1. Duct sensor (Vent)2. Duct sensor (Floor)
Other information:
Hyundai Ioniq (AE) 2017-2022 Service & Repair Manual: Repair procedures
Service Point Target Auto Calibration (SPTAC)When you need calibration :– Front view camera is removed and mounted– Replace front view camera with a new one – Windshield glass changed– Front view camera coupler of the windshield glass is deformedService Point T
Hyundai Ioniq (AE) 2017-2022 Service & Repair Manual: Specifications
S
Categories
- Manuals Home
- Hyundai Ioniq Owners Manual
- Hyundai Ioniq Service Manual
- Transmission Gear Oil. Repair procedures
- Jump starting procedure
- Suspension System
- New on site
- Most important about car

Copyright © 2026 www.hioniqae.com - 0.0105