Hyundai Ioniq (AE): Rear Suspension System / Rear Coil Spring. Repair procedures
Hyundai Ioniq (AE) 2017-2022 Service & Repair Manual / Suspension System / Rear Suspension System / Rear Coil Spring. Repair procedures
| Removal |
| 1. | Loosen the wheel nuts slightly. Raise the vehicle, and make sure it is securely supported. |
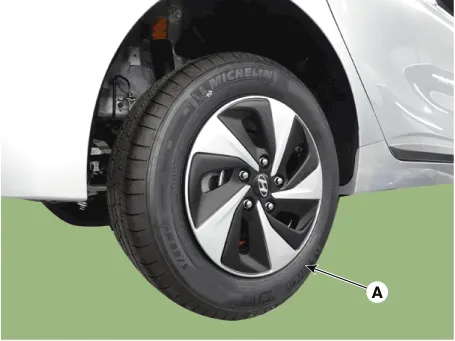
| 2. | Remove the rear wheel and tire (A) from the rear hub.
|

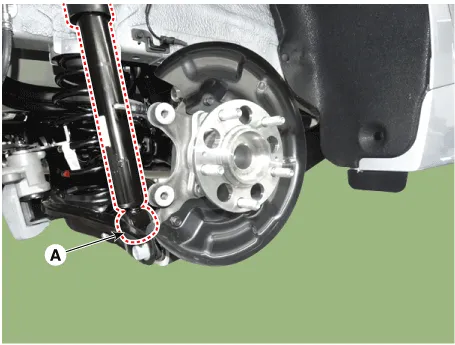
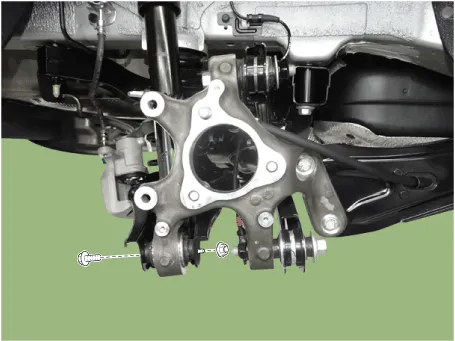
| 3. | Loosen the bolt & nut and then remove the rear shock absorber (A) from the torsion beam axle.
|
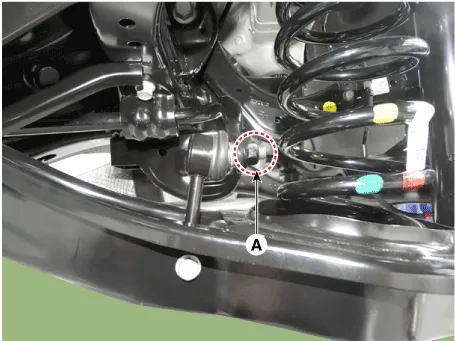
| 4. | Loosen the nut and then remove the rear stabilizer link (A).
|
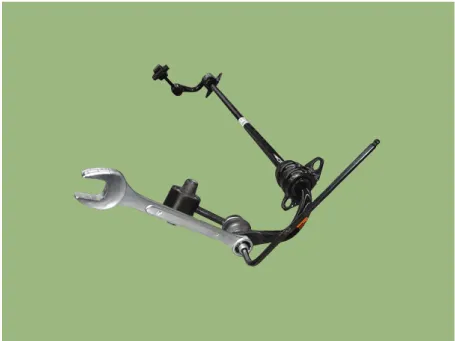
| 5. | Loosen the bolt & nut and then remove the rear lower arm from the rear axle.
|
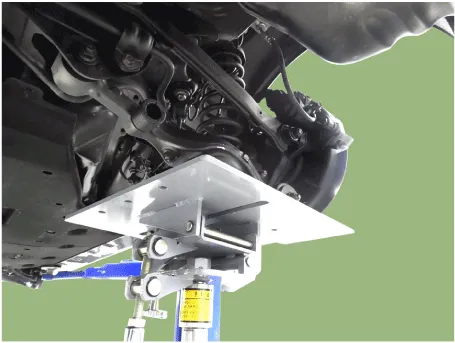
| 6. | Loosen the bolt & nut slightly and then pull the rear lower arm (A) in direction of a down
|
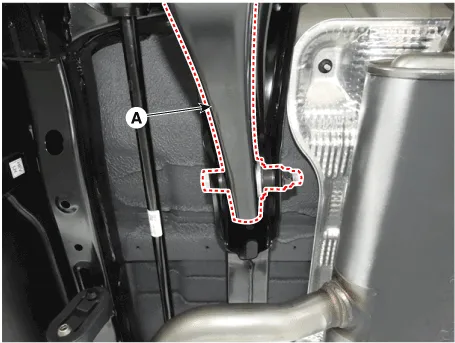
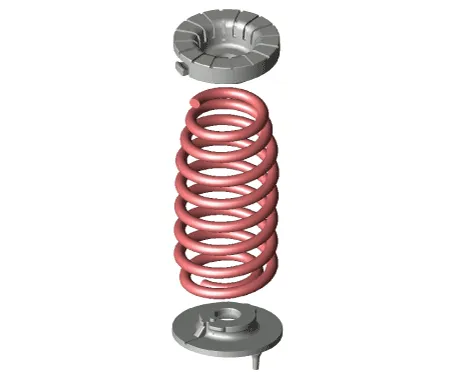
| 7. | Remove the coil spring, upper pad, lower pad.
|
| 8. | Install in the reverse order of removal. |
| 9. | Check the rear alignment. (Refer to Tire/Wheels - "Alignment") |
| Inspection |
| 1. | Check the spring for distortion, aging or damage. |
| 2. | Check the spring upper pad and lower pad for aging or damage. |
Removal1.Loosen the wheel nuts slightly.Raise the vehicle, and make sure it is securely supported.2.Remove the rear wheel and tire (A) from the rear hub.
Removal1.Loosen the wheel nuts slightly.Raise the vehicle, and make sure it is securely supported.2.Remove the rear wheel and tire (A) from the rear hub.
Other information:
Hyundai Ioniq (AE) 2017-2022 Service & Repair Manual: Ambient Temperature Sensor. Components and components location
C
Hyundai Ioniq (AE) 2017-2022 Service & Repair Manual: Description and operation
System OverviewParking Distance Warning (PDW) is an electronic driving aid that warns the driver to be cautious while parking or driving at low speed. The sensor uses ultrasonic waves to detect objects within proximity of the vehicle.PDW consists of four RPS sensors which are detecting the obstacles and transmit the result separated into three war
Categories
- Manuals Home
- Hyundai Ioniq Owners Manual
- Hyundai Ioniq Service Manual
- Checking the Coolant Level
- Transmission Gear Oil. Repair procedures
- DCT(Dual Clutch Transmission) System
- New on site
- Most important about car

Copyright © 2026 www.hioniqae.com - 0.0164