Hyundai Ioniq: Floor Console / Rear Console Cover. Repair procedures
•
| Put on gloves to prevent hand injuries. |
|
•
| When removing with a flat-tip screwdriver or remover, wrap protective tape around the tools to prevent damage to components. |
•
| Use a plastic panel removal tool to remove interior trim pieces without marring the surface. |
•
| Take care not to bend or scratch the trim and panels. |
|
1. | Remove the floor console assembly. (Refer to Floor Console - "Floor Console Assembly") |
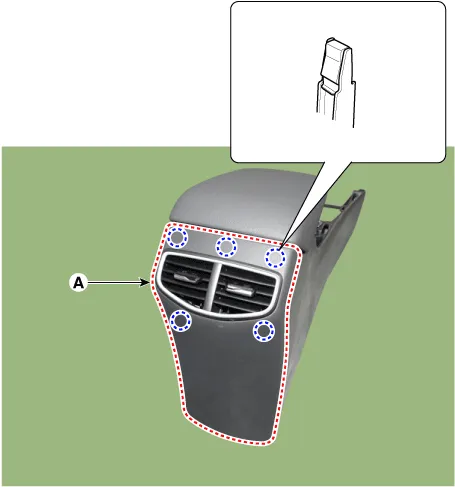
2. | Loosen the rear console mounting screws. |
3. | Using a screwdriver or remover, remove the rear console cover (A). |
4. | To install, reverse the removal procedure. •
| Make sure the connector is connected properly. |
•
| Replace any damaged clips (or pin-type retainers). |
|
|
Other information:
Removal1.Disconnect the negative (-) battery terminal.2.Remove the cluster fascia panal.(Refer to Body - "Center Fascia Panal")3.Remove the crash pad garnish RH.(Refer to Body - "Crash Pad Garnish")4.Remove the audio assembly (A) after loosening mounting screws...
WARNING
Over-inflation or under-inflation can reduce tire life, adversely affect vehicle
handling, and lead to sudden tire failure that may cause loss of vehicle control
resulting in an accident.
Each tire, including the spare (if provided), should be checked monthly when
cold and inflated to the inflation pressure recommended by the vehicle manufacturer
on the vehicle placard or tire inflation pressure label...
Categories
The seatback pocket is provided on the back of the front passenger's seatback.
WARNING
To prevent the Occupant Classification System from malfunctioning:
read more