Hyundai Ioniq (AE): Interior Trim / Rear Transverse Trim. Repair procedures
| Replacement |
|

|

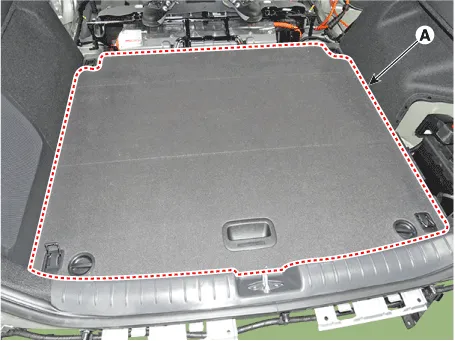
| 1. | Remove the luggage boad (A).
|
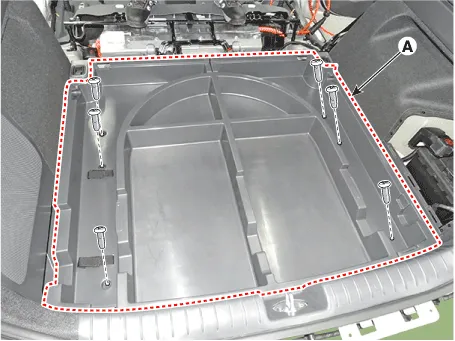
| 2. | Loosen the mounting screws, remove the luggage side trim & center tray trim (A).
|
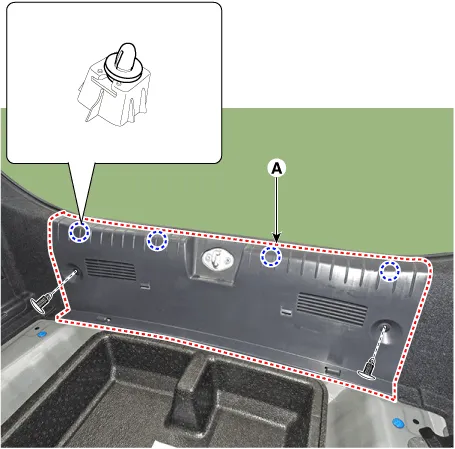
| 3. | Loosen the mounting clips and remove the rear transverse trim (A).
|
| 4. | To install, reverse the removal procedure.
|
Component Location 1. Rear transverse trim
Component Location 1. Luggage side trim
Other information:
Hyundai Ioniq (AE) 2017-2022 Service & Repair Manual: A/C Pressure Transducer. Description and operation
DescriptionThe A/C Pressure Transducer (APT) converts the pressure value of high pressure line into voltage value after measuring it. By converted voltage value, engine ECU controls the cooling fan by operating it high speed or low speed. Engine ECU stops the operation of the compressor when the temperature of refrigerant line is very high or very
Hyundai Ioniq (AE) 2017-2022 Service & Repair Manual: emperature Control Actuator. Description and operation
DescriptionThe temperature control actuator is located at the heater unit. It regulates the temperature by the procedure as follows. The signal from the control unit adjusts the position of the temperature door by operating the temperature switch. Then the temperature will be regulated by the hot/cold air ratio decided by the position of the temper
Categories
- Manuals Home
- Hyundai Ioniq Owners Manual
- Hyundai Ioniq Service Manual
- Engine Clutch System
- How to Connect Portable Charger (ICCB: In-Cable Control Box)
- Suspension System
- New on site
- Most important about car
