Hyundai Ioniq (AE): Trunk Trim / Repair procedures
Hyundai Ioniq (AE) 2017-2022 Service & Repair Manual / Body (Interior and Exterior) / Trunk Trim / Repair procedures
| Replacement |
|

|

| 1. | Remove the rear seat cushion assembly. (Refer to Rear Seat - "Rear Seat Assembly") |
| 2. | Remove the rear seat back assembly. (Refer to Rear Seat - "Rear Seat Assembly") |
| 3. | Remove the rear door scuff trim. (Refer to Interior Trim - "Door Scuff Trim") |
| 4. | After loosening the mounting bolts, then remove the shift side trim covering (A). |
| 5. | Remove the luggage covering mat (B). |
| 6. | Remove the rear transverse trim (C). |
| 7. | After loosening the mounting screws, remove the luggage side trim (D). |
| 8. | To install, reverse the removal procedure.
|

[General type]
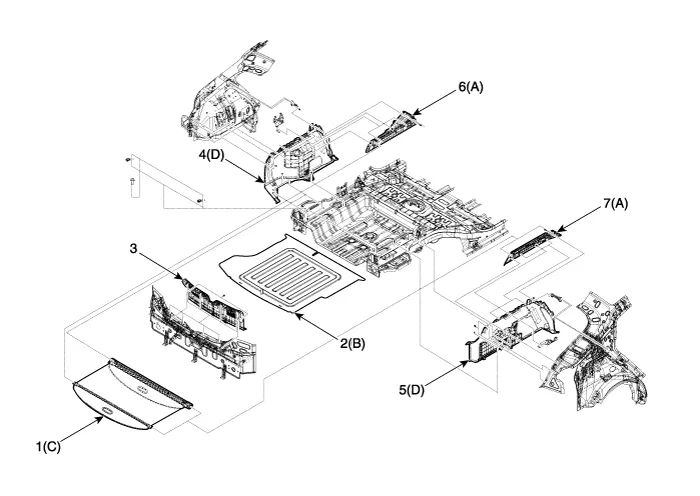
| 1. Cargo screens 2. Rear transverse trim 3. Luggage mat 4. Luggage side trim [LH] | 5. Luggage side trim [RH] 6. Shift side trim covering [LH] 7. Shift side trim covering [RH] |
[Wooper type]
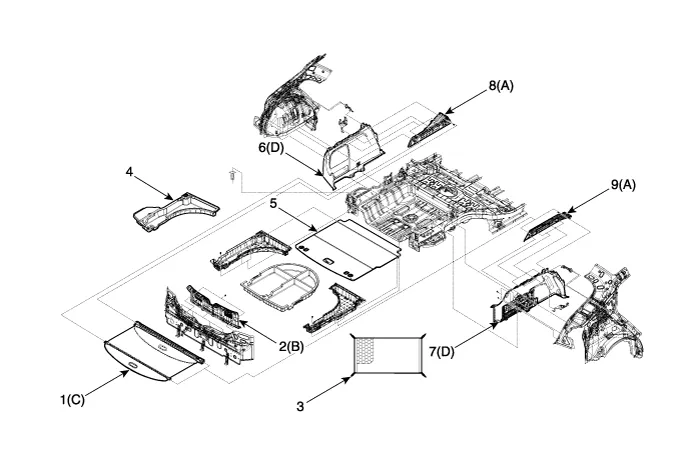
| 1. Cargo screens 2. Rear transverse trim 3. Luggage mat 4. Luggage side tay assembly 5. Luggage board | 6. Luggage side trim [LH] 7. Luggage side trim [RH] 8. Shift side trim covering [LH] 9. Shift side trim covering [RH] |
Other information:
Hyundai Ioniq (AE) 2017-2022 Service & Repair Manual: Photo Sensor. Description and operation
Description The photo sensor is located at the center of the defrost nozzles.The photo sensor contains a photovoltaic (sensitive to sunlight) diode. The solar radiation received by its light receiving portion, generates an electromotive force in proportion to the amount of radiation received which is transferred to the automatic temperature control
Hyundai Ioniq (AE) 2017-2022 Service & Repair Manual: Description and operation
DescriptionThe smart cruise control system allows a driver to program the vehicle to control the speed and following distance by detecting the vehicle ahead without depressing the brake pedal and the accelerator pedal.1.Cruise speed control : The vehicle maintains the selected speed if there are not vehicles ahead.
Categories
- Manuals Home
- Hyundai Ioniq Owners Manual
- Hyundai Ioniq Service Manual
- Jump Starting
- Hybrid Control System
- Transmission Gear Oil. Repair procedures
- New on site
- Most important about car

Copyright © 2026 www.hioniqae.com - 0.012