
Hyundai Ioniq (AE): AVN System / AVN Remote Controller. Repair procedures
| Inspection |
| 1. | Check for resistance between terminals in each switch position (LH).
[LH : Audio+B/TOOTH+VOICE]
|
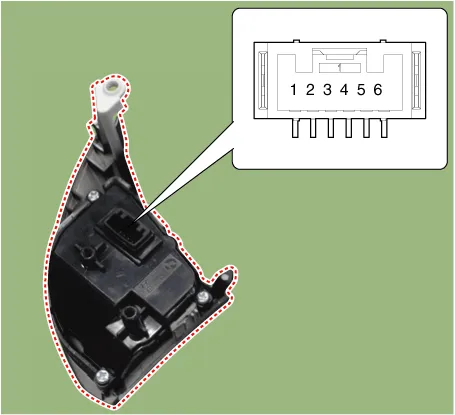
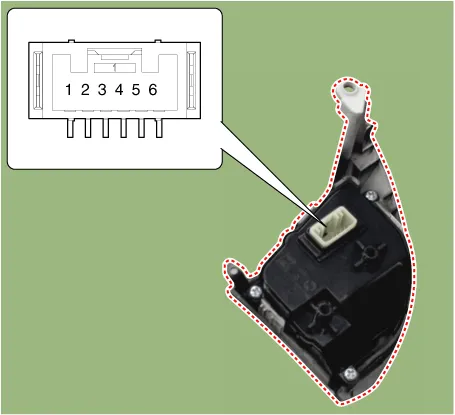
| 2. | Check for resistance between terminals in each switch position (RH).
[RH : Trip+Cruise+SCC]
|
| Removal |
| 1. | Disconnect the negative (-) battery terminal. |
| 2. | Remove the steering wheel assembly. (Refer to Steering System - "Steering Wheel") |
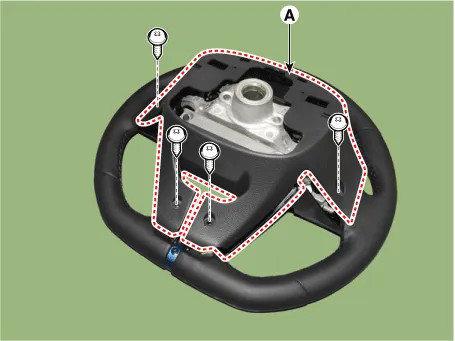
| 3. | Remove the steering back cover (A).
|
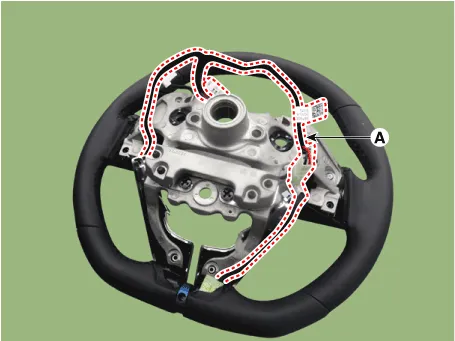
| 4. | Remove the steering remote control connector (A).
|
| 5. | Remove the steering remote control after loosening the screws.
|
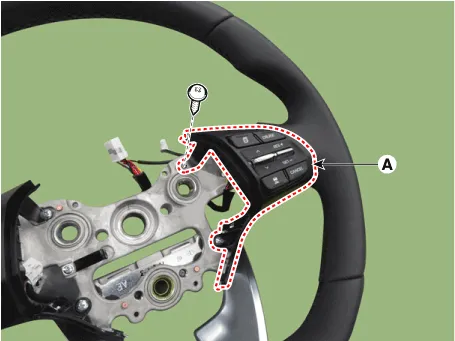
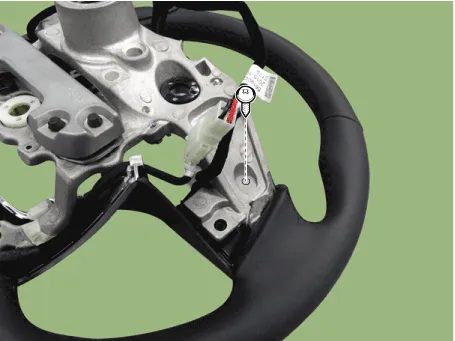
| Installation |
| 1. | Install the steering wheel remote control after connecting the connector. |
| 2. | Connect the negative (-) battery terminal. |
Circuit Diagram[Audio+B/Tooth][Audio+B/Tooth+Voice][Trip][Trip+Cruise][Trip+Cruise+SCC]
ComponentsComponentsRADIO+GNSS+eCallRADIO+GNSSRADIO+GNSS+DAB+eCallRADIO+GPS
Other information:
Hyundai Ioniq (AE) 2017-2022 Service & Repair Manual: Auto Defogging Sensor. Description and operation
DescriptionThe auto defogging sensor is installed on the front window glass. The sensor judges and sends signal if moisture occurs to blow out wind for defogging. The air conditioner control module receives signal from the sensor and restrains moisture and eliminate defog by controlling the intake actuator, A/C, auto defogging actuator, blower moto
Hyundai Ioniq (AE) 2017-2022 Service & Repair Manual: Warning Indicator. Repair procedures
RemovalWarning Indicator1.Disconnect the negative (-) battery terminal.2.Remove the mirror (A).InstallationWarning Indicator1.Install the outside mirror.2.Connect the negative (-) battery terminal.Inspection1.Apply battery voltage to each terminal as shown in the table and verify that the mirror operates properly.
Categories
- Manuals Home
- Hyundai Ioniq Owners Manual
- Hyundai Ioniq Service Manual
- Engine Clutch System
- Hybrid Control System
- Brake System
- New on site
- Most important about car
