Hyundai Ioniq (AE): Crash Pad / Crash Pad Lower Panel. Repair procedures
Hyundai Ioniq (AE) 2017-2022 Service & Repair Manual / Body (Interior and Exterior) / Crash Pad / Crash Pad Lower Panel. Repair procedures
| Replacement |
|

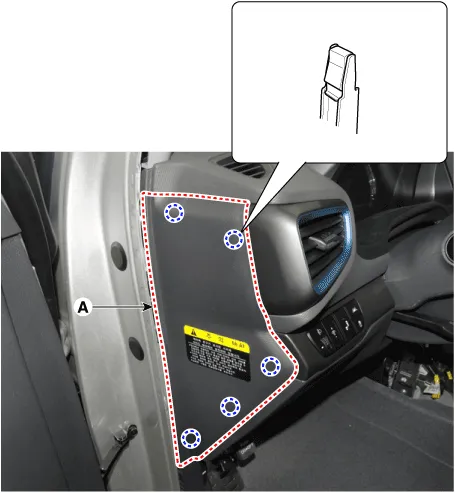
| 1. | Using a remover and remove the crash pad side cover [LH] (A).
|
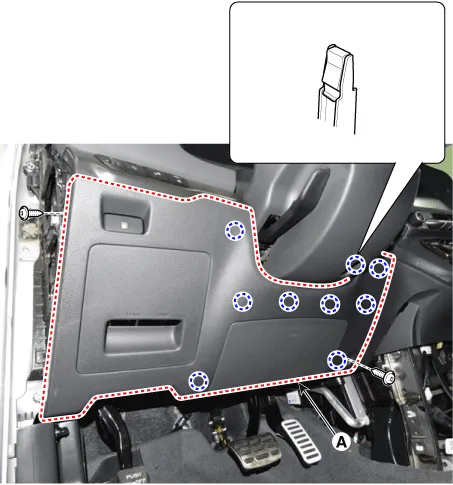
| 2. | Loosen the mounting screws and remove the crash pad lower panel (A).
|
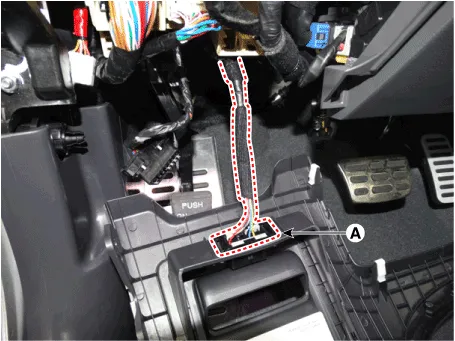
| 3. | Press the lock pin and separate the diagnosis connector (A)
|
| 4. | To install, reverse the removal procedure.
|

Component Location 1. Crash pad lower panel
Component Location 1. Crash pad center garnish2. Crash pad garnish [RH]
Other information:
Hyundai Ioniq (AE) 2017-2022 Service & Repair Manual: Schematic diagrams
Trouble Symptom ChartsComponent Parts and Function Outline Component part Function Cruise Control Switch Input the set speed and distance to the SCC ECU. Instrument Cluster Display various information inputted from SCC.
Hyundai Ioniq (AE) 2017-2022 Service & Repair Manual: Description and operation
Cruise ControlThe cruise control system is engaged by the cruise "ON/OFF" main switch located on right of steering wheel column. The system has the capability to cruise, coast, accelerate and resume speed.It also has a safety interrupt, engaged upon depressing brake or shifting select lever.
Categories
- Manuals Home
- Hyundai Ioniq Owners Manual
- Hyundai Ioniq Service Manual
- Transmission Gear Oil. Repair procedures
- Jump starting procedure
- Maintenance
- New on site
- Most important about car

Copyright © 2026 www.hioniqae.com - 0.0186