Hyundai Ioniq (AE): Hybrid Motor Cooling System / Electric Water Pump(EWP). Repair procedures
Hyundai Ioniq (AE) 2017-2022 Service & Repair Manual / Hybrid Motor System / Hybrid Motor Cooling System / Electric Water Pump(EWP). Repair procedures
| Removal |
| 1. | Remove the 12 V battery (-) cable. |
| 2. | Remove the undercover. (Refer to Engine Mechanical System - "Engine Room Undercover".) |
| 3. | Drain the coolant from the hybrid cooling system. (Refer to Hybrid Motor Cooling System - "Coolant".) |
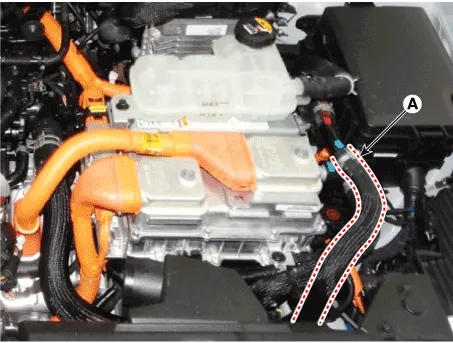
| 4. | Disconnect the hose (A) from the reservoir tank.
|
| 5. | Disconnect the hose (A).
|
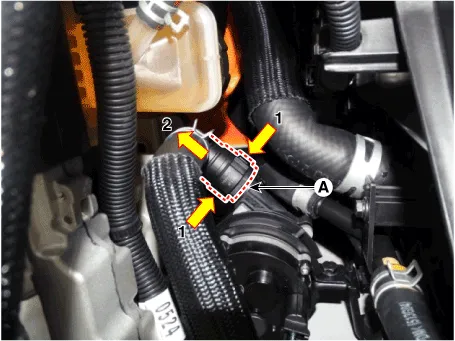
| 6. | Unscrew the mounting bolt (A).
|

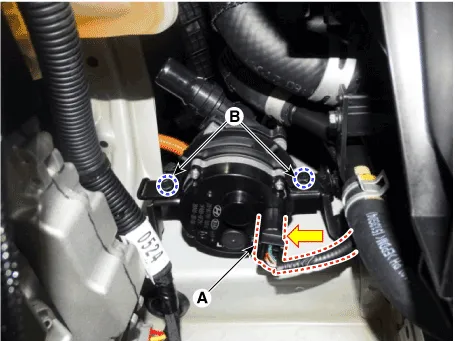
| 7. | Disconnect the connector (A). |
| 8. | Remove the electric water pump (EWP) after removing the bolts(B).
|

| Installation |
| 1. | To install, reverse the removal procedure.
|

Component location1. HPCU (Hybrid Power Control Unit)(LDC+MCU+HCU+Reservoir)2. Hybrid drive motor3. Hybrid starter generator (HSG)4. Electrical radiator5.
Changing the Coolant and Performing Air Bleeding Never remove the cap while the engine is hot. When you remove the cap from the reservoir, hot coolant may spew out due to the high pressure, causing serious injury.
Other information:
Hyundai Ioniq (AE) 2017-2022 Service & Repair Manual: Ambient Temperature Sensor. Description and operation
DescriptionThe ambient temperature sensor is located at the front of the condenser and detects ambient air temperature. It is a negative type thermistor; resistance will increase with lower temperature, and decrease with higher temperature.The sensor output will be used for discharge temperature control, temperature regulation door contrl, blower m
Hyundai Ioniq (AE) 2017-2022 Service & Repair Manual: Cruise Control Switch. Components and components location
C
Categories
- Manuals Home
- Hyundai Ioniq Owners Manual
- Hyundai Ioniq Service Manual
- Body (Interior and Exterior)
- Suspension System
- Repair procedures
- New on site
- Most important about car

Copyright © 2026 www.hioniqae.com - 0.0237