Hyundai Ioniq (AE): Rear Door / Rear Door Window Glass. Repair procedures
Hyundai Ioniq (AE) 2017-2022 Service & Repair Manual / Body (Interior and Exterior) / Rear Door / Rear Door Window Glass. Repair procedures
| Replacement |
| 1. | Remove the rear door trim. (Refer to Rear Door - "Rear Door Trim") |
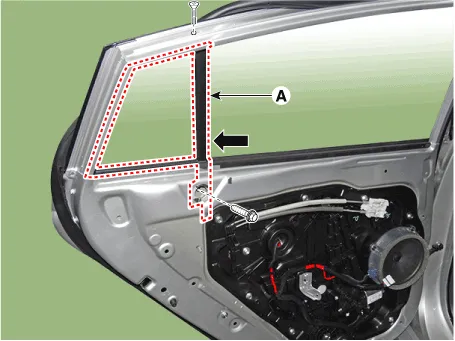
| 2. | Remove the rear door belt inside weatherstrip (A).
|

| 3. | Pull down rear door window glass by pressing the power window glass switch. |
| 4. | Completely loosen the rear door channel mounting bolts and unscrew the loosely as possible without removing them from the rear door panel. |
| 5. | Slightly push the rear door channel (A) in the direction of arrow as below.
|
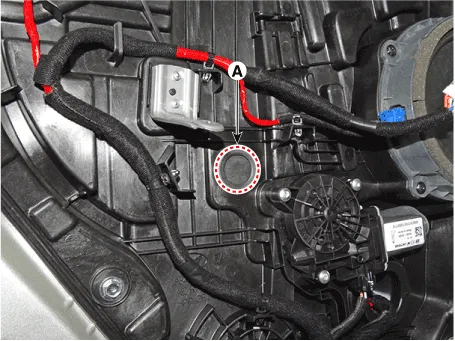
| 6. | Remove the rear door window glass mounting hole plug (A).
|


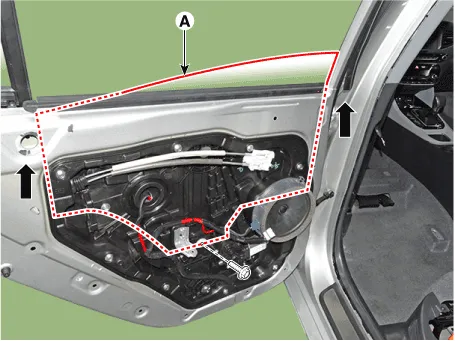
| 7. | Carefully adjust the rear door window glass (A) until the bolts are visible, then loosen them. Separate the glass from the glass run and carefully pull the glass out through the window slot.
|
| 8. | To install, reverse the removal procedure.
|
Component Location 1. Rear door window glass
Component Location 1. Rear door module
Other information:
Hyundai Ioniq (AE) 2017-2022 Service & Repair Manual: emperature Control Actuator. Repair procedures
Inspection1.Turn the ignition switch OFF.2.Disconnect the temperature control actuator connector.3.Verify that the temperature control actuator operates to the cool position when connecting 12V to terminal 3 and grounding terminal 7.Verify that the temperature control actuator operates to the warm position when connected in reverse.
Hyundai Ioniq (AE) 2017-2022 Service & Repair Manual: Schematic diagrams
System Block DiagramComponent Parts and Function Outline Component part Function Vehicle-speed sensor, ESP/ABS Control ModuleConverts vehicle speed to pulse.VCUReceives signals from sensor and control switches.
Categories
- Manuals Home
- Hyundai Ioniq Owners Manual
- Hyundai Ioniq Service Manual
- How to Connect Portable Charger (ICCB: In-Cable Control Box)
- Jump Starting
- Repair procedures
- New on site
- Most important about car

Copyright © 2026 www.hioniqae.com - 0.0137