Hyundai Ioniq (AE): Rear Seat / Rear Seat Back Cover. Repair procedures
Hyundai Ioniq (AE) 2017-2022 Service & Repair Manual / Body (Interior and Exterior) / Rear Seat / Rear Seat Back Cover. Repair procedures
| Replacement |
| [LH] |
|

|

| 1. | Remove the rear seat assembly [LH]. (Refer to Rear Seat - "Rear Seat Assembly") |
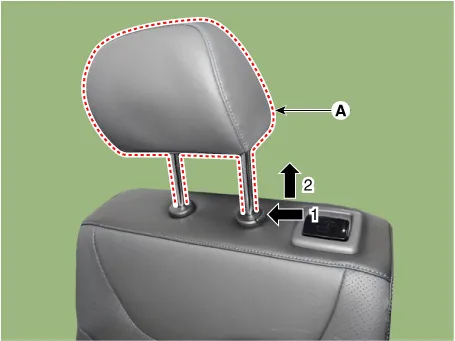
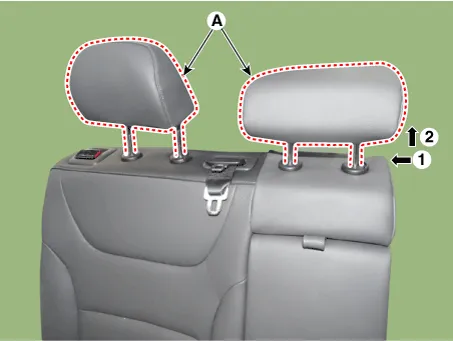
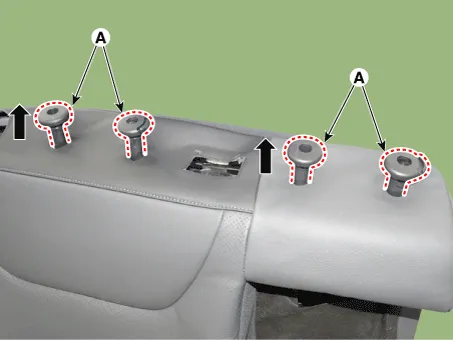
| 2. | Push the lock pins, and remove the rear seat headrest (A).
|
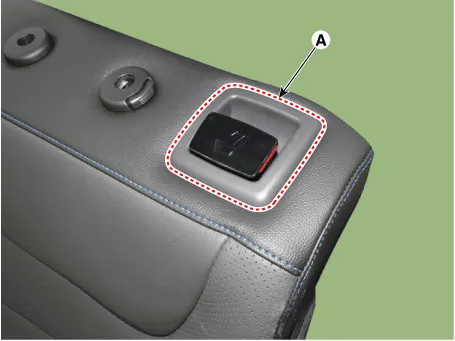
| 3. | Using a screwdriver or remover, remove the rear seat folding bezel (A).
|
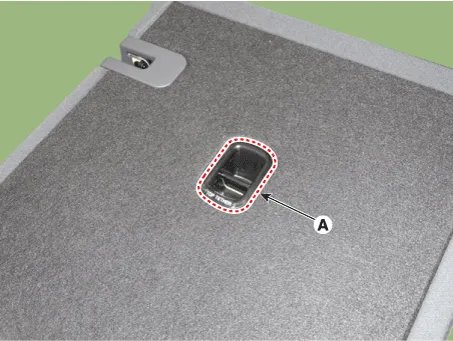
| 4. | Using a screwdriver or remover, remove the teddy anchor garnish (A).
|
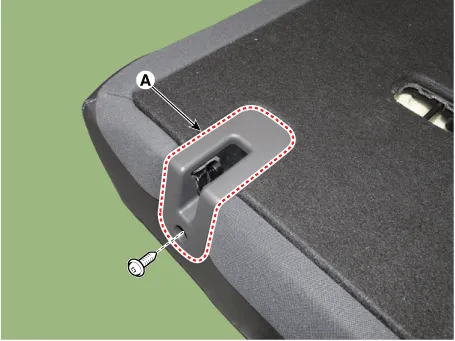
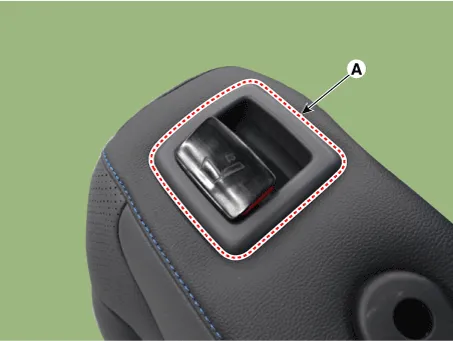
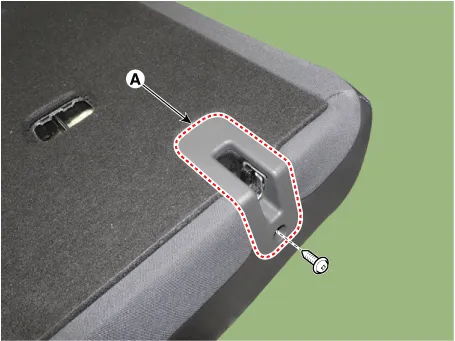
| 5. | After loosening the mounting screws, remove the rear seat back latch cover (A).
|
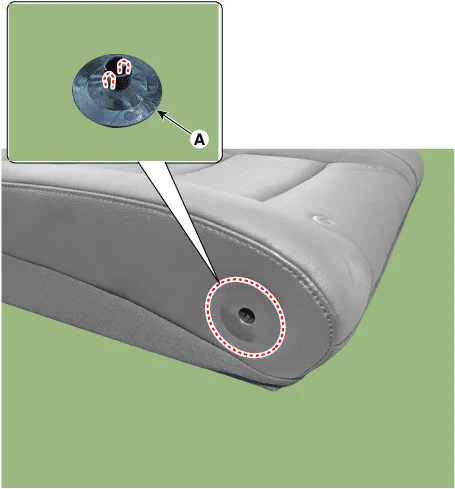
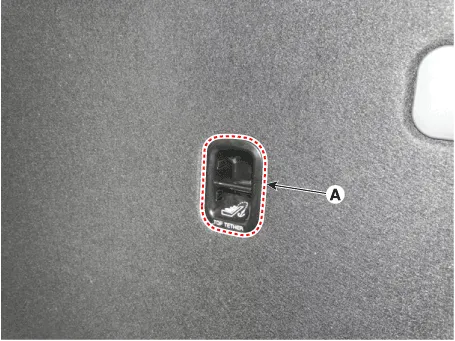
| 6. | Using a screwdriver or remover, remove the cap (A).
|

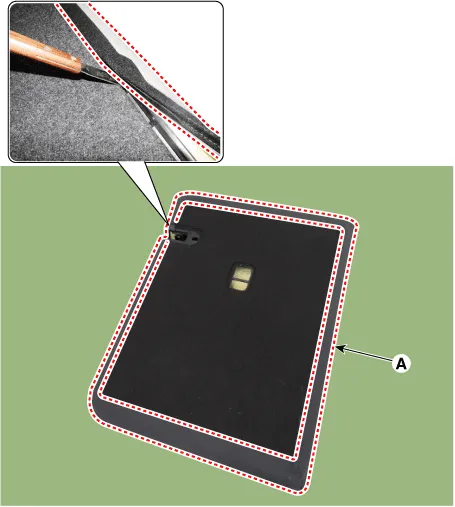
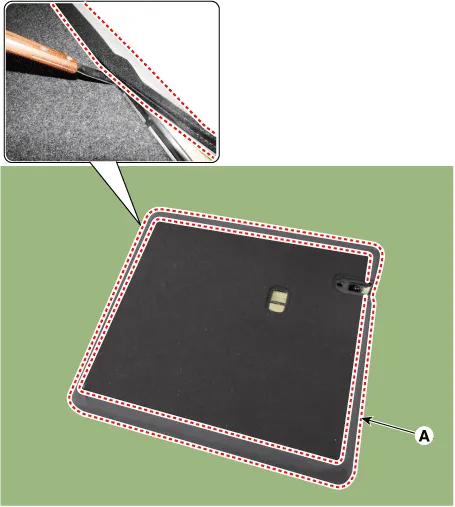
| 7. | Using a screwdriver or remover, remove the rear seat back cover (A).
|
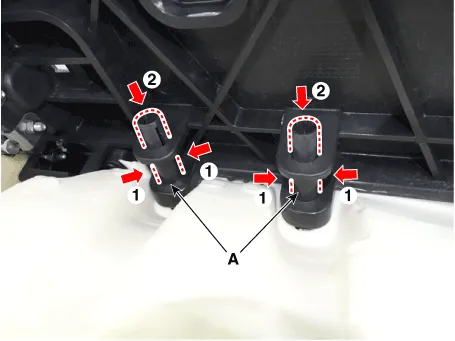
| 8. | Pull out the rear seat headrest guides (A) while pinching both sides of the lower part of the guides, and remove them.
|
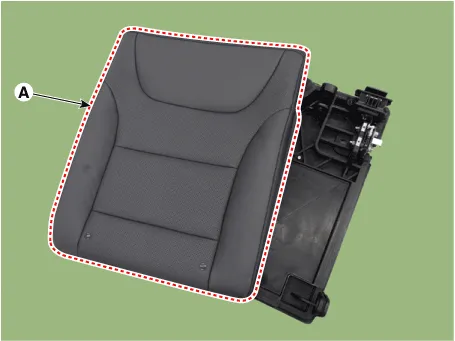
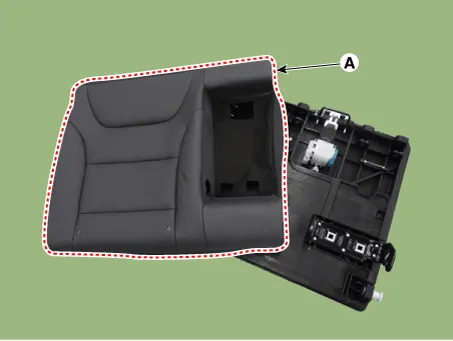
| 9. | Remove the rear seat back cover assembly (A) from the rear seat back frame.
|
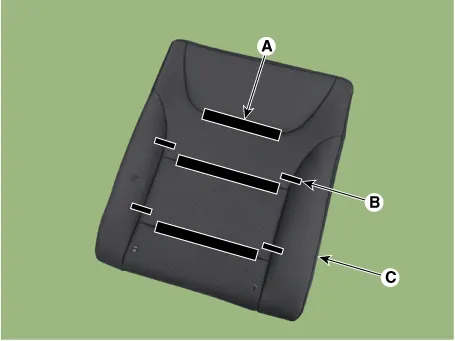
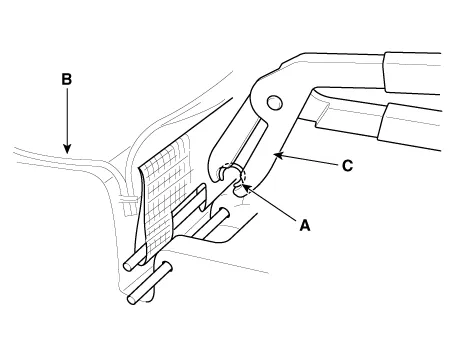
| 10. | After removing the Velcro tape (A) and hog-ring clips (B) inside the rear seat cushion cover, remove the seat back cover (C).
|
| 11. | To install, reverse the removal procedure.
|
| [RH] |
|
|

| 1. | Remove the rear seat assembly [RH]. (Refer to Rear Seat - "Rear Seat Assembly") |
| 2. | Remove the rear back armrest. (Refer to Rear Seat - "Rear Back Armrest") |
| 3. | Push the lock pins, and remove the rear seat headrest (A).
|
| 4. | Remove the rear seat armrest board (A).
|

| 5. | Using a screwdriver or remover, remove the cap (A).
|
| 6. | Using a screwdriver or remover, remove the rear seat folding bezel (A).
|
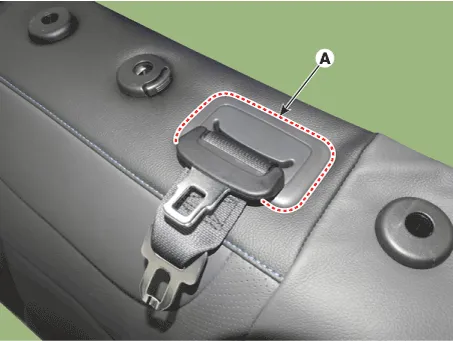
| 7. | Using a screwdriver or remover, remove the rear seat belt center cover (A).
|
| 8. | Using a screwdriver or remover, remove the teddy anchor garnish (A).
|
| 9. | After loosening the mounting screws, remove the rear seat back latch cover (A).
|
| 10. | Using a screwdriver or remover, remove the rear seat back cover (A).
|
| 11. | Pull out the rear seat headrest guides (A) while pinching both sides of the lower part of the guides, and remove them.
|

| 12. | Remove the rear seat back cover assembly (A) from the rear seat back frame.
|
| 13. | After removing the Velcro tape (A) and hog-ring clips (B) inside the rear seat cushion cover, remove the seat cushion cover (C).
|

| 14. | To install, reverse the removal procedure.
|
Component Location 1. Rear seat back cover [LH]2. Rear seat back cover [RH]
Component Location 1. Rear seat cushion cover
Other information:
Hyundai Ioniq (AE) 2017-2022 Service & Repair Manual: In-car Sensor. Repair procedures
Diagnosis With GDS1.The heating, ventilation and air conditioning can be quickly diagnosed failed parts with vehicle diagnostic system (GDS).※ The diagnostic system (GDS) provides the following information.(1) Self diagnosis : Checking the failure code (DTC) and display.
Hyundai Ioniq (AE) 2017-2022 Service & Repair Manual: Repair procedures
Replacement1.Remove the battery (-) terminal.2.Remove the engine room under cover.(Refer to Engine Mechanical System - "Engine Room Under Cover")3.Remove the heater hose (A) and AEWP hose (B).4.Disconnect the lock pin to remove the heater hose pump connector (A).
Categories
- Manuals Home
- Hyundai Ioniq Owners Manual
- Hyundai Ioniq Service Manual
- Body (Interior and Exterior)
- How to Connect Portable Charger (ICCB: In-Cable Control Box)
- Jump starting procedure
- New on site
- Most important about car

Copyright © 2026 www.hioniqae.com - 0.0172