
Hyundai Ioniq (AE): BCM (Body Control Module) / Repair procedures
| Removal |
| 1. | Disconnect the negative (-) battery terminal. |
| 2. | Remove the glove box. (Refer to Body - "Glove Box Upper Cover Assembly") |
| 3. | Remove the smart key unit. (Refer to Body - "Smart Key Unit") |
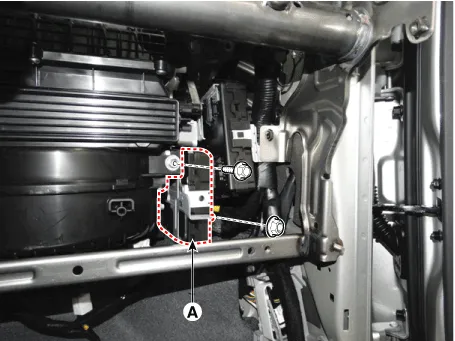
| 4. | Disconnect the body control module connectors (B).
|

| 5. | Remove the body control module (A) after loosening the mounting nuts.
|
| Installation |
| 1. | Install the body control module. |
| 2. | Connect the body control module. |
| 3. | Install the glove box upper cover assembly. |
| BCM Diagnosis with GDS |
| 1. | The body electrocal system can be quickly diagnosed failed parts with vehicle diagnostic system (GDS). The diagnostic system (GDS) provides the following information.
|
| 2. | Select the "Car Model" and the system to be checked in order to check the vehicle with the tester. |
| 3. | Select the "Body Control Module (BCM)" to check body control module. |
| 4. | Select the "Current Data" menu to search the current state of the input/output data. The input/output data for the sensors corresponding to the "Body Control Module (BCM)" can be checked.
|

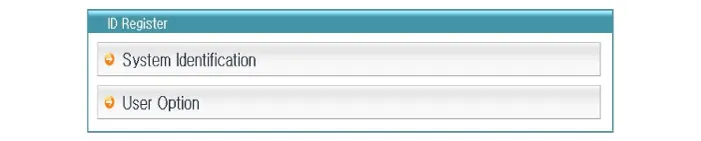
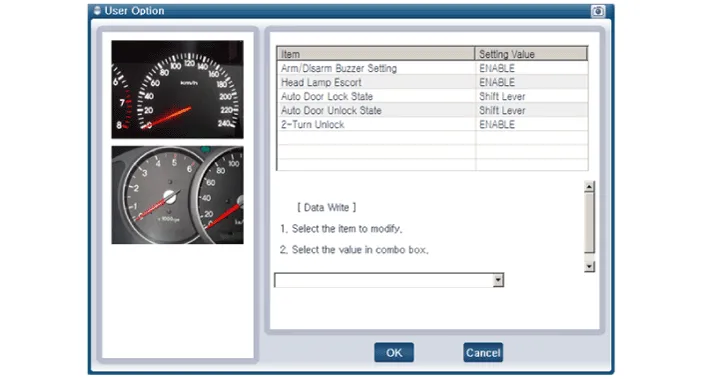
| 5. | If you want to change user option, select "User Option".
|
DescriptionBody Control Module (BCM) function No Item Description 1Washer Linked Wiper– If the washer switch is pressed ON for 0.
Other information:
Hyundai Ioniq (AE) 2017-2022 Service & Repair Manual: Intake Actuator. Repair procedures
Inspection1.Turn the ignition switch OFF.2.Disconnect the intake actuator connector.3.Verify that the intake actuator operates to the fresh position when connecting 12V to terminal 3 and grounding terminal 4.Verify that the intake actuator operates to the recirculation position when connected in reverse.
Hyundai Ioniq (AE) 2017-2022 Service & Repair Manual: Warning Indicator. Repair procedures
RemovalWarning Indicator1.Disconnect the negative (-) battery terminal.2.Remove the mirror (A).InstallationWarning Indicator1.Install the outside mirror.2.Connect the negative (-) battery terminal.Inspection1.Apply battery voltage to each terminal as shown in the table and verify that the mirror operates properly.
Categories
- Manuals Home
- Hyundai Ioniq Owners Manual
- Hyundai Ioniq Service Manual
- DCT(Dual Clutch Transmission) System
- Maintenance
- Transmission Gear Oil. Repair procedures
- New on site
- Most important about car
