Hyundai Ioniq (AE): SRSCM / Side Impact Sensor (SIS). Repair procedures
Hyundai Ioniq (AE) 2017-2022 Service & Repair Manual / Restraint / SRSCM / Side Impact Sensor (SIS). Repair procedures
| Removal |
[Pressure Side Impact Sensor]
|

| 1. | Disconnect the battery negative cable, and wait for at least three minutes before beginning work. |
| 2. | Remove the front door trim. (Refer to Body - "Front Door Trim") |
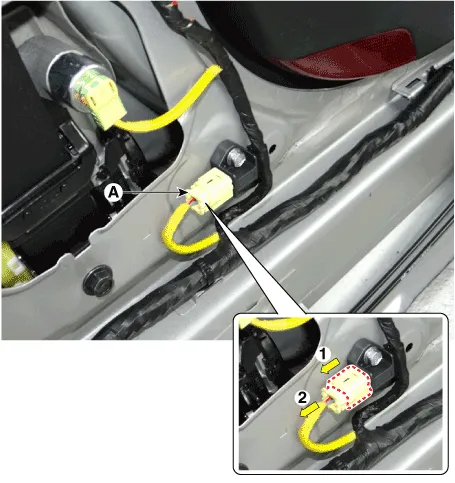
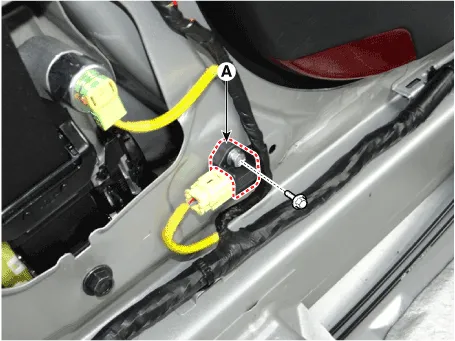
| 3. | Disconnect the pressure side impact sensor connector (A).
|

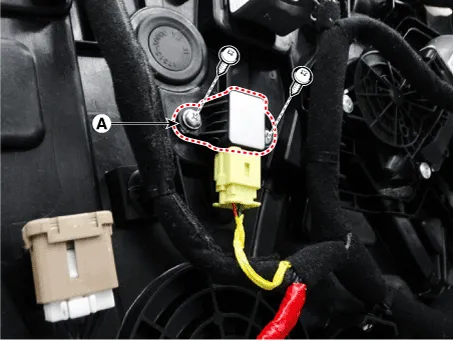
| 4. | Remove the side impact sensor (A) after loosening the side impact sensor mounting screws.
|
[Gravity Side Impact Sensor]
| 1. | Disconnect the battery negative cable and wait for at least three minutes before beginning work. |
| 2. | Remove the center pillar trim. (Refer to Body - "Interior Trim") |
| 3. | Disconnect the side impact sensor connector (A).
|
| 4. | Remove the side impact sensor (A) after loosening the side impact sensor mounting bolt.
|
| Installation |
[Pressure Side Impact Sensor]
| 1. | Install the pressure side impact sensor with the screw then connect the pressure side impact sensor connector.
|
| 2. | Install the front door trim. (Refer to Body - "Front Door Trim") |
| 3. | Reconnect the battery negative cable. |
| 4. | After installing the pressure side impact sensor, confirm proper system operation:
|
[Gravity Side Impact Sensor]
|
| 1. | Install the side impact sensor with the bolt then connect the side impact sensor connector.
|
| 2. | Install the door scuff trim. (Refer to Body - "Interior Trim") |
| 3. | Reconnect the battery negative cable. |
| 4. | After installing the Side Impact Sensor, confirm proper system operation : Turn the ignition switch ON; the SRS indicator light should be turned on for about six seconds and then go off. |
Components1. Front Pressure Side Impact Sensor (P-SIS)2. Front Gravity Side Impact Sensor (G-SIS)
Other information:
Hyundai Ioniq (AE) 2017-2022 Service & Repair Manual: emperature Control Actuator. Repair procedures
Inspection1.Turn the ignition switch OFF.2.Disconnect the temperature control actuator connector.3.Verify that the temperature control actuator operates to the cool position when connecting 12V to terminal 3 and grounding terminal 7.Verify that the temperature control actuator operates to the warm position when connected in reverse.
Hyundai Ioniq (AE) 2017-2022 Service & Repair Manual: Repair procedures
Self Diagnosis1.Self-diagnosis process. • When operating the self-diagnostics, the below fault (self-diagnostics code) will blink at 0.5 seconds interval on the temperature display settings (driver's side only) and the remaining symbols are OFF .
Categories
- Manuals Home
- Hyundai Ioniq Owners Manual
- Hyundai Ioniq Service Manual
- Checking the Coolant Level
- Hybrid Control System
- Maintenance
- New on site
- Most important about car

Copyright © 2026 www.hioniqae.com - 0.0175