Hyundai Ioniq (AE): Timing System / Timing Chain Cover. Repair procedures
Hyundai Ioniq (AE) 2017-2022 Service & Repair Manual / Engine Mechanical System / Timing System / Timing Chain Cover. Repair procedures
| Removal |
Engine removal is not required for this procedure.
|

|

|

| 1. | Shut off the High Voltage circuit. (Refer to General Information - "High Voltage Shutoff Procedure") |
| 2. | Disconnect the battery negative terminal. |
| 3. | Loosen the drain plug, and drain the engine oil. Remove the oil filter cap to help drain the engine oil faster. (Refer to Lubrication System - "Engine Oil") |
| 4. | Remove the air cleaner assembly. (Refer to Intake And Exhaust System - "Air Cleaner") |
| 5. | Remove the RH front wheel. (Refer to Suspension System - "Wheel") |
| 6. | Remove the engine room under cover. (Refer to Engine And Transaxle Assembly - "Engine Room Under Cover") |
| 7. | Remove the drive belt. (Refer to Timing System - "Drive Belt") |
| 8. | Remove the engine mounting support bracket. (Refer to Engine And Transaxle Assembly - "Engine Mounting") |
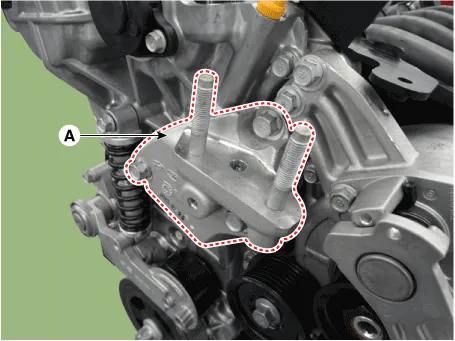
| 9. | Remove the engine support bracket.
|
| 10. | Remove the drive belt tensioner. (Refer to Timing System - "Drive Belt Tensioner") |
| 11. | Remove the idler. (Refer to Timing System - "Idler") |
| 12. | Remove the crankshaft damper pulley. (Refer to Timing System - "Crankshaft Damper Pulley") |
| 13. | Remove the water pump pulley. (Refer to Cooling System - "Water Pump") |
| 14. | Remove the cylinder head cover. (Refer to Cylinder Head Assembly - "Cylinder Head Cover") |
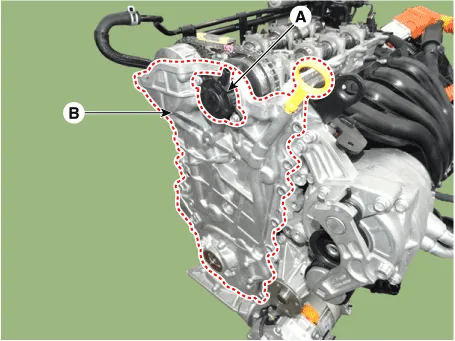
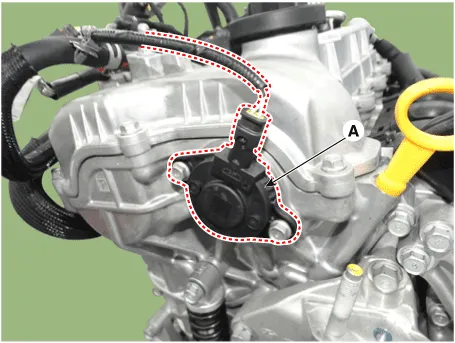
| 15. | Remove the oil control solenoid (OCS) (A) and then remove the timing chain cover (B).
|
| Installation |
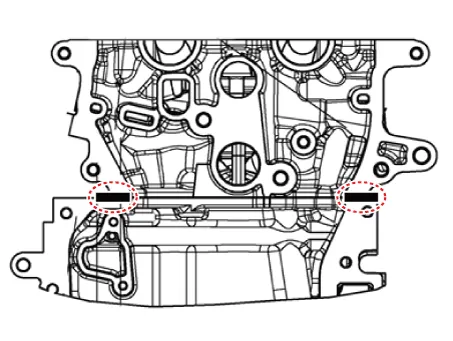
| 1. | Install the timing chain cover.
|
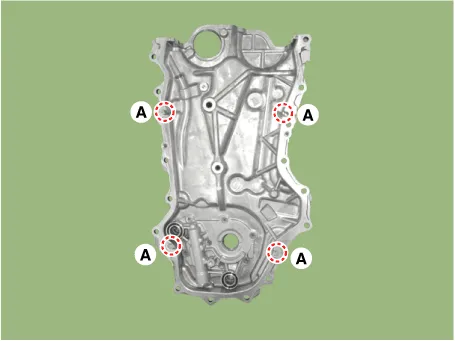
| 2. | Install the oil control solenoid (OCS) (A).
|
| 3. | Replace the front oil seal if necessary. (Refer to Timing System - "Front Oil Seal") |
| 4. | Install the other parts reverse order of removal. |
| 5. | Connect the High Voltage circuit. (Refer to General Information - "High Voltage Shutoff Procedure") |
| 6. | Add all the necessary fluids and check for leaks. Connect GDS. Check for codes, note, and clear. Recheck.
|
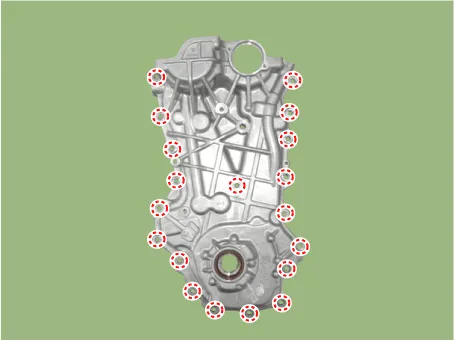
Components1. Timing chain cover2. Oil control solenoid (OCS)
Components1. Timing chain2. Timing chain guide3. Timing chain tensioner arm4. Timing chain tensioner
Other information:
Hyundai Ioniq (AE) 2017-2022 Service & Repair Manual: Components and components location
C
Hyundai Ioniq (AE) 2017-2022 Service & Repair Manual: Schematic diagrams
Trouble Symptom ChartsComponent Parts and Function Outline Component part Function Cruise Control Switch Input the set speed and distance to the SCC ECU. Instrument Cluster Display various information inputted from SCC.
Categories
- Manuals Home
- Hyundai Ioniq Owners Manual
- Hyundai Ioniq Service Manual
- Brake System
- Hybrid Vehicle Engine Compartment
- Repair procedures
- New on site
- Most important about car

Copyright © 2026 www.hioniqae.com - 0.024