
Hyundai Ioniq (AE): Indicators And Gauges / Instrument Cluster. Schematic diagrams
| Circuit Diagram |
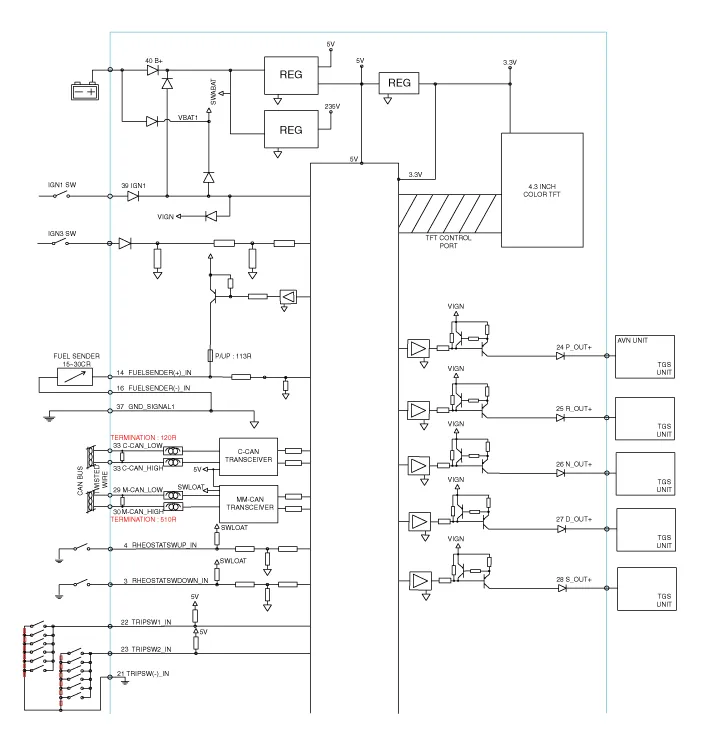

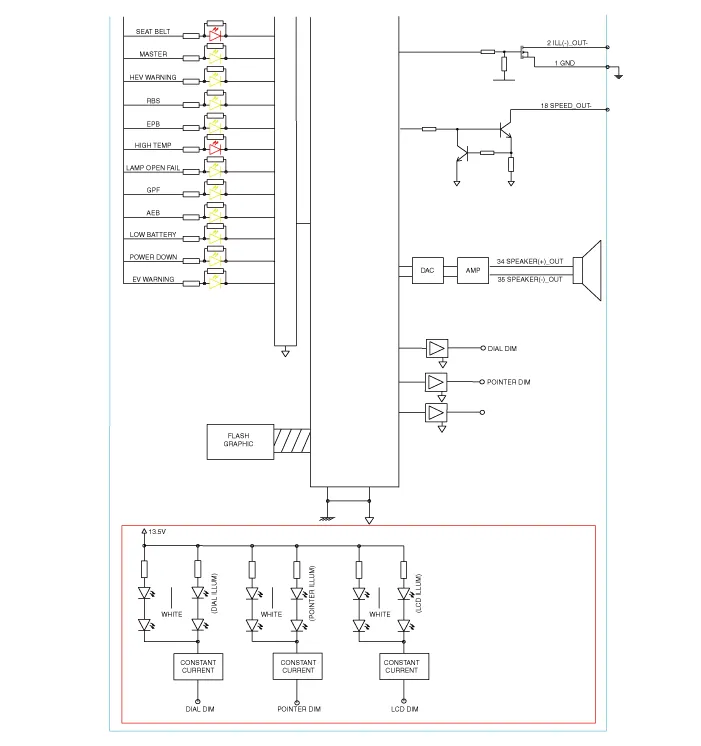
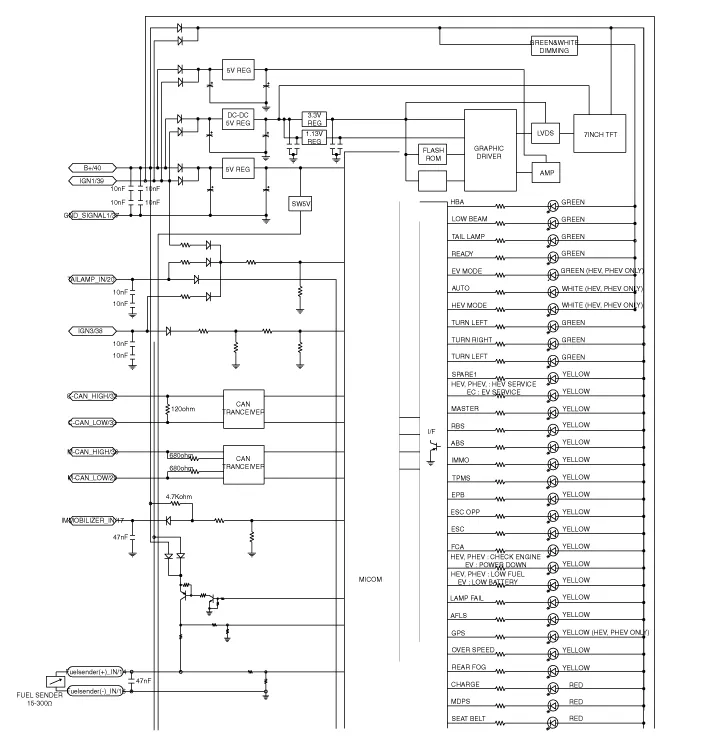
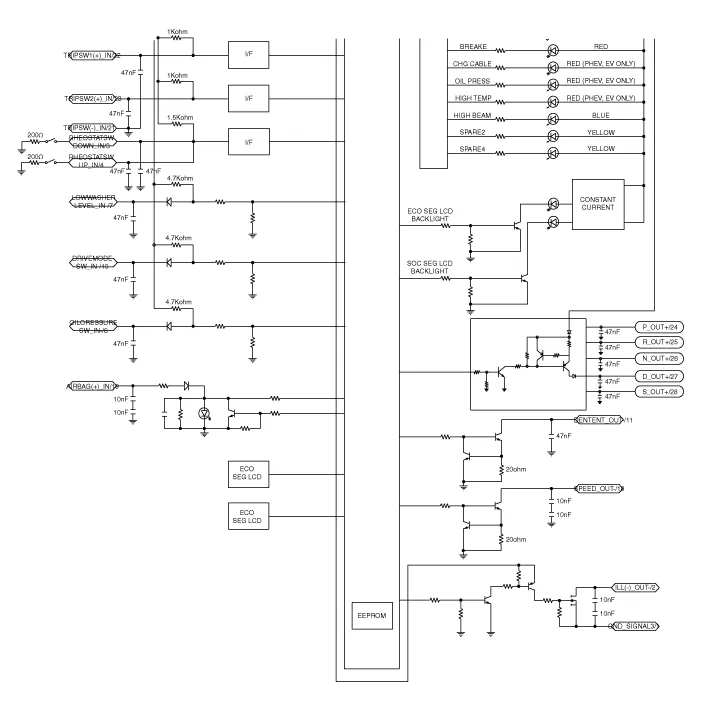
DescriptionCommunication Network Diagram Abbreviation Expalnation AAFActive Air FlapACUAirbag Control UnitAEBAutonomous Emergency BrakingAHBActive Hybrid Brake SystemAMPAmplifierAVNHead Unit (Audio / AVN)B_CANBody Controller Area NetworkBCMBody Control ModuleBMSBattery Management SystemBSDBlind Spot DetectionC_CANChassis Controller Area NetworkCARMERARear View CarmeraCLUCluster ModuleDATCDual Automatic Temp ControlFPCMFuel Pump Control ModuleHPCUHybrid Power UnitIGPMIntergrated Gateway & Power control ModuleLDWSLane Departure Warning SystemM_CANMulti media Controller Area NetworkMDPS Motor Driven Power SteeringP_CANPowertrain Controller Area NetworkPASParking Assist SystemSJBSmart Junction BlockSMKSmart Key UnitTCM(DCT)Double Clutch Transmission UnitVESSVirtual Engine Sound SystemCluster Variant CodingAs we have more options (ESC, MDPS, SCC, etc.
Removal • Put on gloves to protect your hands.• When prying with a flat-tip screwdriver, wrap it with protective tape, and apply protective tape around the related parts, to prevent damage.
Other information:
Hyundai Ioniq (AE) 2017-2022 Service & Repair Manual: Mode Control Actuator. Repair procedures
Inspection1.Turn the ignition switch OFF.2.Disconnect the mode control actuator connector.3.Verify that the mode control actuator operates to the defrost mode when connecting 12V to terminal 3 and grounding terminal 4.Verify that the mode control actuator operates to the vent mode when connected in reverse.
Hyundai Ioniq (AE) 2017-2022 Service & Repair Manual: Repair procedures
Removal1.Disconnect the negative (-) battery terminal.2.Remove the tailgate lid trim.(Refer to Body - "TailGate Lid Trim")3.Disconnect the Rear view camera connector (A).4.Remove the Rear view camera assembly after loosening the mounting screws.Installation1.
Categories
- Manuals Home
- Hyundai Ioniq Owners Manual
- Hyundai Ioniq Service Manual
- Troubleshooting
- Maintenance
- Brake System
- New on site
- Most important about car
