Hyundai Ioniq (AE): Rear Suspension System / Rear Lower Arm. Repair procedures
| Removal |
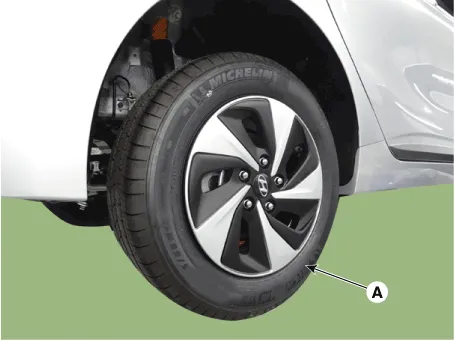
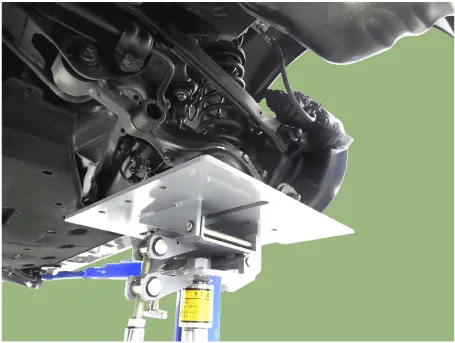
| 1. | Loosen the wheel nuts slightly. Raise the vehicle, and make sure it is securely supported. |
| 2. | Remove the rear wheel and tire (A) from the rear hub.
|

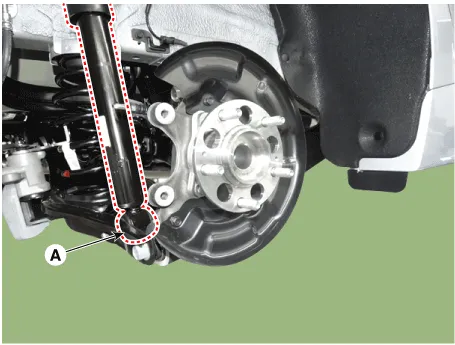
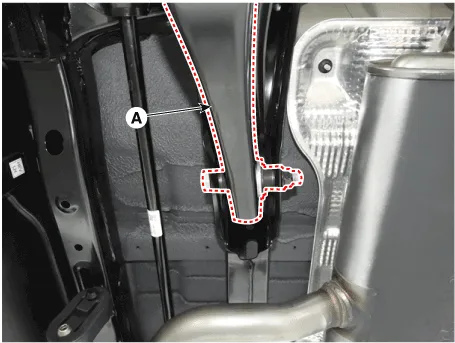
| 3. | Loosen the bolt & nut and then remove the rear shock absorber (A) from the rear lower arm.
|
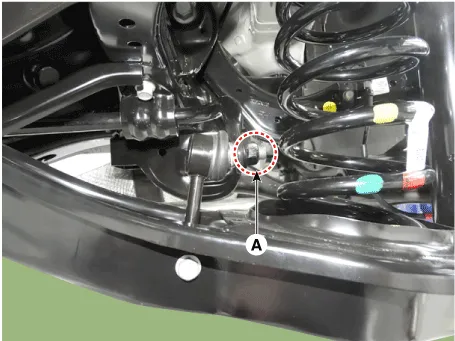
| 4. | Loosen the nut and then remove the rear stabilizer link (A).
|
| 5. | Loosen the bolt & nut and then remove the rear lower arm from the rear axle.
|
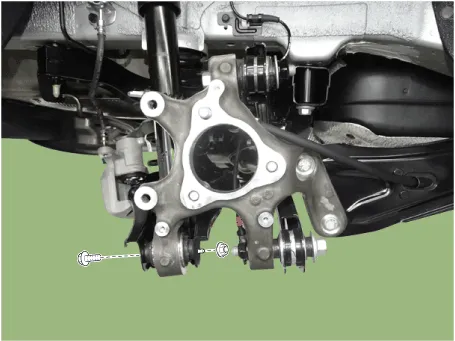
| 6. | Loosen the bolt & nut and then remove the rear lower arm (A) from the rear cross member.
|
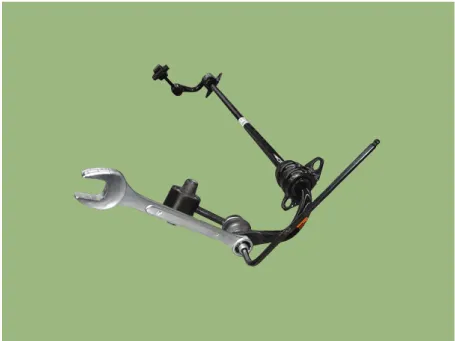
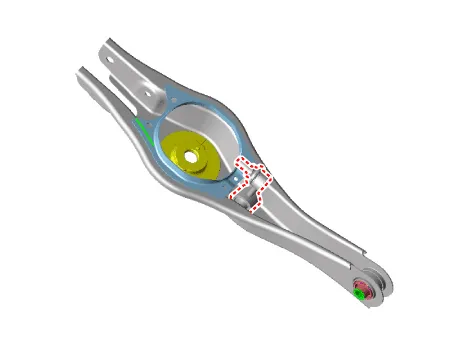
| 7. | Remove the stabilizer link from the rear lower arm.
|
| 8. | Install in the reverse order of removal. |
| 9. | Check the alignment. (Refer to Tires/Wheels - "Alignment") |
| Inspection |
| 1. | Check the bushing for wear and deterioration. |
| 2. | Check the rear lower arm for deformation. |
| 3. | Check for all bolts and nut. |
| 4. | Check the cracks or the cutting of the lower . |
Removal1.Loosen the wheel nuts slightly.Raise the vehicle, and make sure it is securely supported.2.Remove the rear wheel and tire (A) from the rear hub.
Removal1.Loosen the wheel nuts slightly.Raise the vehicle, and make sure it is securely supported.2.Remove the rear wheel and tire (A) from the rear hub.
Other information:
Hyundai Ioniq (AE) 2017-2022 Service & Repair Manual: Auto Defoging Actuator. Repair procedures
Inspection1.Turn the ignition switch OFF. 2.Disconnect the auto defogging connector. 3.Verify that the auto defogging actuator operates to the open position when connecting 12V to terminal 3 and grounding terminal 4. Verify that the auto defogging actuator operates to the close position when connected in reverse.
Hyundai Ioniq (AE) 2017-2022 Service & Repair Manual: Climate Control Air Filter. Repair procedures
Replacement1.Disconnect the air damper (A) from the glove box (B).2.Remove the stopper (B) from the glove box (A).3.Remove the filter cover (A) by pressing the knob.4.Replace the air filter (A) with a new one according to the direction of air filter. • To remove the filter easily, press the right side inwa
Categories
- Manuals Home
- Hyundai Ioniq Owners Manual
- Hyundai Ioniq Service Manual
- Hybrid Control System
- Body (Interior and Exterior)
- General Information
- New on site
- Most important about car
