Hyundai Ioniq: Fender / Repair procedures
Hyundai Ioniq (AE) 2017-2025 Service Manual / Body (Interior and Exterior) / Fender / Repair procedures
| Replacement |
|
|
| 1. | Remove the front bumper. (Refer to Front Bumper - "Front Bumper Cover") |
| 2. | Remove the head lamps. (Refer to Body Electrical System - "Head Lamps") |
| 3. | Remove the front wheel guard. (Refer to Body Side Molding - "Front Wheel Guard") |
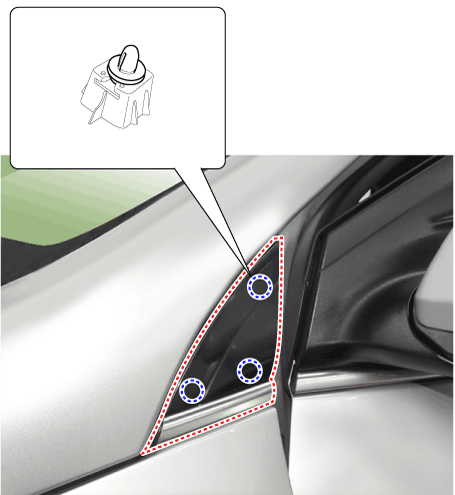
| 4. | Using a screwdriver or remover, remove the delta garnish (A).
|
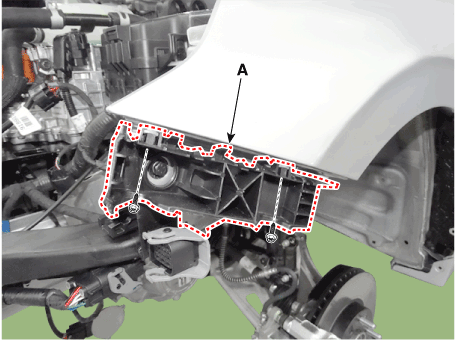
| 5. | Remove the front bumper side mounthing bracket (A) after loosening the bolts.
|
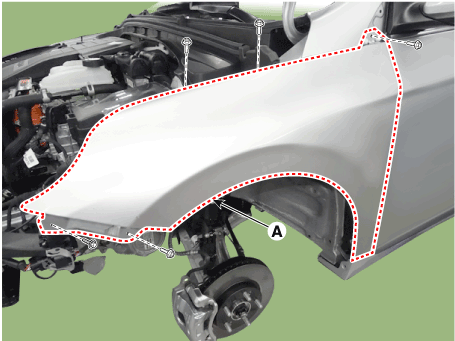
| 6. | After loosening the mounting bolts, remove the fender assembly (A).
|
| 7. | To install, reverse the removal procedure.
|
 Hood
Hood
..
Other information:
Hyundai Ioniq (AE) 2017-2025 Service Manual: Description and operation
Description– AEB system is designed to help avoid a potential collision or reduce its impact when drivers applies inadequate, delayed or no brakes at all to avoid a collision.– The system detects the risk factors on the road by using the frontal impact sensor and warn the driver and activate the emergency brake to prevent collision or reduce collision speed...
Hyundai Ioniq (AE) 2017-2025 Owner's Manual: When the Hybrid Vehicle Shuts Off
When the high voltage battery is discharged, when the 12-volt battery is discharged, or when the fuel tank is empty, the hybrid system may not operate while driving. When the Hybrid system does not operate, do the followings: 1. Gradually reduce the vehicle speed...
Categories
- Manuals Home
- 1st Generation Ioniq Owners Manual
- 1st Generation Ioniq Service Manual
- Reverse Parking Aid Function
- Check brakes/Check regenerative brakes, Check Virtual Engine Sound System
- Hybrid battery SOC (State of Charge) gauge
- New on site
- Most important about car
Driver Position Memory System

The Driver Position Memory System is provided to store and recall the following memory settings with a simple button operation.
- Driver's seat position
- Side view mirror position
- Instrument panel illumination intensity
Copyright © 2025 www.hioniqae.com


