Hyundai Ioniq (AE): Windshield Glass / Repair procedures
Hyundai Ioniq (AE) 2017-2022 Service & Repair Manual / Body (Interior and Exterior) / Windshield Glass / Repair procedures
| Replacement |
[Removal]
|

|

| 1. | Remove the roof side molding. (Refer to Body Side Molding - "Roof Side Molding") |
| 2. | Remove the front pillar trim. (Rear to Interior Trim - "Front Pillar Trim") |
| 3. | Remove the inside rear view mirror assembly. (Refer to Mirror - "Inside Rear View Mirror") |
| 4. | Remove the cowl top cover. (Refer to "Cowl Top Cover") |
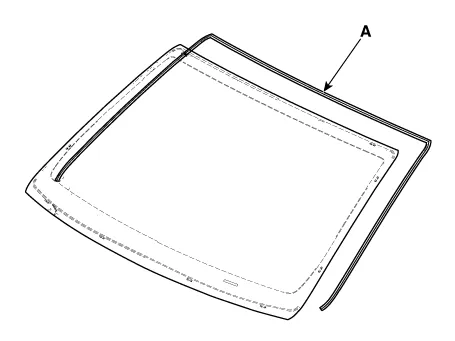
| 5. | Using a screwdriver or remover, remove the windshield glass upper molding (A).
|
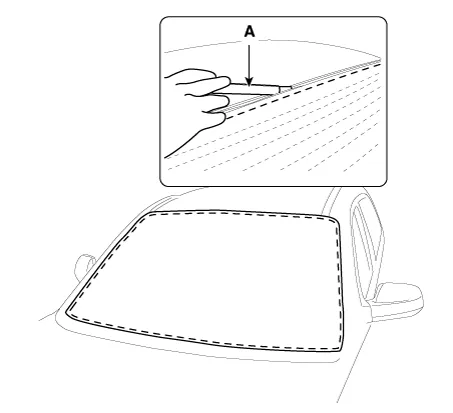
| 6. | Using a cutter (A) knife, carefully remove the windshield glass molding.
|

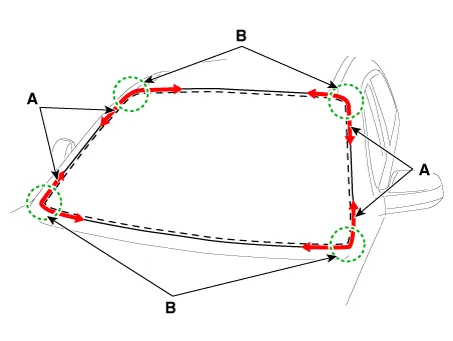
| 7. | Cut off the sealant on the edge (B) while pulling the piano wire (A) to the left and right.
|
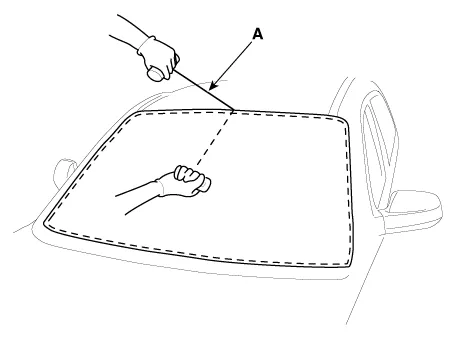
| 8. | Put in a piano wire (A) through the corner of the windshield glass and insert wire grips into both ends of the wire.
|
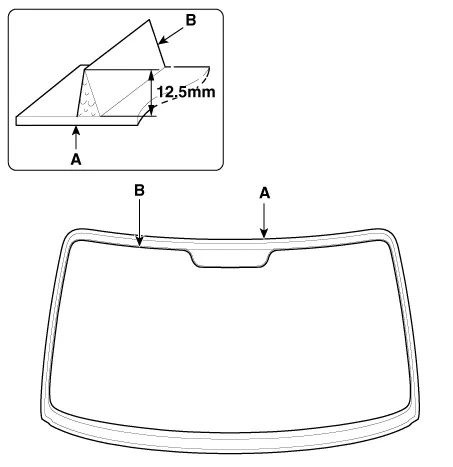
| 9. | Cut off the sealant on (A-A), (B-B), (C-C), while pulling a piano wire (A) to the left and right.
|
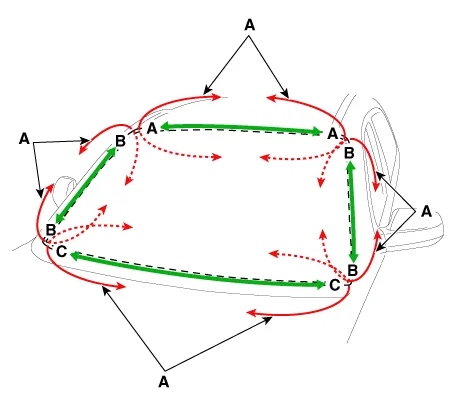
| 10. | Remove the windshield glass (B) carefully using the glass holder (A).
|
[Installtion]
| 1. | Using a knife, scrape the remaining sealant around the body panel leaving about 2mm-thick sealant (0.0079 in.) on the bonding surface. If installing a new windshield glass, make alignment marks on the windshield glass and the body.
|
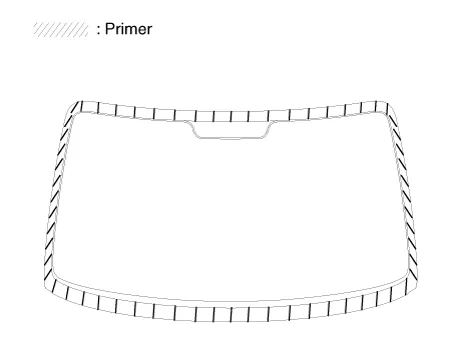
| 2. | Clean the edges of body panel and windshield glass with alcohol. Apply glass primer to the edges of windshield glass and attach the molding onto the edges. |
| 3. | Apply the body primer to the bonding surface of body panel.
|
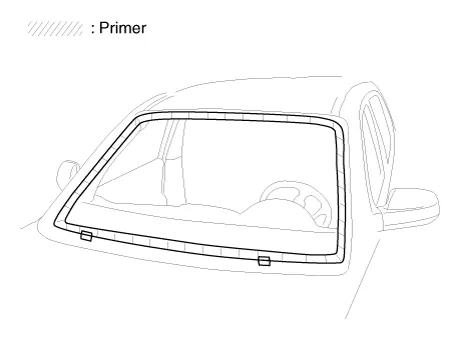
| 4. | Apply the glass primer to the outer edge of windshield glass.
|
| 5. | Apply a bead of sealant (B) around the windshield glass (A).
|
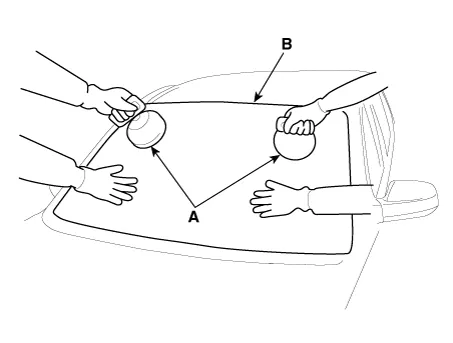
| 6. | Using the glass holder (A), adjust the windshield glass (B) to fit the alignment marks (C) on the body and lightly push the windshield glass to make the edges fully seated on the bonding surface of body.
|

| 7. | Install the windshield glass upper molding (A).
|
| 8. | To make sure that the applied sealant is completely hardened, leave the car on a flat surface for at least 4 hours after installing the windshield glass.
|
| 9. | Conduct a leak testing.
|
| 10. | Install the cowl top cover. (Refer to "Cowl Top Cover") |
| 11. | Install the inside rear view mirror assembly. (Refer to Mirror - "Inside Rear View Mirror") |
| 12. | Install the front pillar trim. (Rear to Interior Trim - "Front Pillar Trim") |
| 13. | Install the roof side molding. (Refer to Body Side Molding - "Roof Side Molding") |
Components1. Windshield glass2. Windshield glass upper molding
Other information:
Hyundai Ioniq (AE) 2017-2022 Service & Repair Manual: Auto Defoging Actuator. Description and operation
DescriptionThe auto defogging sensor is installed on front window glass. The sensor judges and sends signal if moisture occurs to blow out wind for defogging. The air conditioner control module receives a signal from the sensor and restrains moisture and eliminates defog by the intake actuator, A/C, auto defogging actuator, blower motor rpm and mod
Hyundai Ioniq (AE) 2017-2022 Service & Repair Manual: General safety information and caution
Safety PrecautionPrecautions To Take Before Servicing High Voltage System • Since hybrid vehicles contain a high voltage battery, if the high voltage system or vehicles are handled incorrectly, this might lead to a serious accidents like electric shock and electric leakage.
Categories
- Manuals Home
- Hyundai Ioniq Owners Manual
- Hyundai Ioniq Service Manual
- Driving your vehicle
- Audio
- Body (Interior and Exterior)
- New on site
- Most important about car

Copyright © 2025 www.hioniqae.com - 0.0152