Hyundai Ioniq (AE): Dual Clutch Transmission Control System / Shift Lever. Repair procedures
| Removal |
| 1. | Remove the shift lever knob & boots (A) pull both of it up.
|

| 2. | Remove the floor console assembly. (Refer to Body - "Floor Console") |
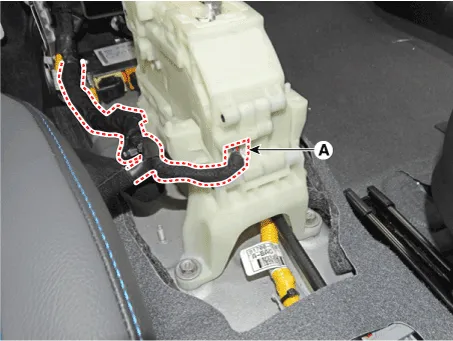
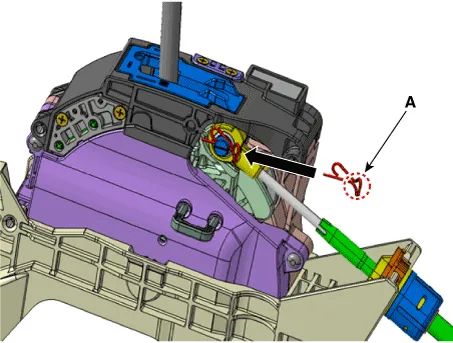
| 3. | Disconnect the connector (A).
|
| 4. | Disconnect the shift cable.
|
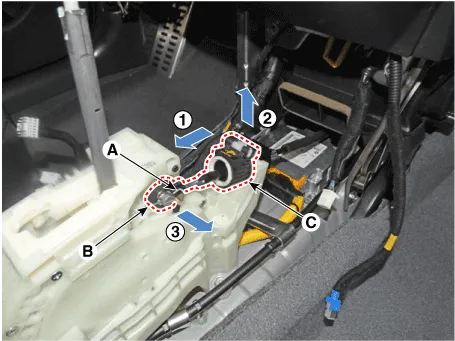
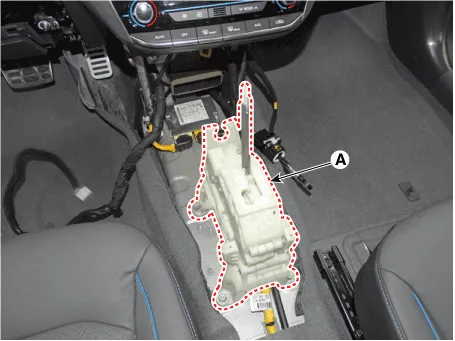
| 5. | Remove the shift lever assembly (A) after removing the bolts.
|
| Installation |
| 1. | Install in the reverse order of removal. |
|

|

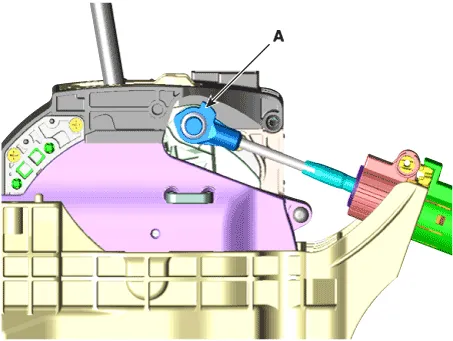
Components1. Shift lever knob & boots assembly2. Shift lever assembly3. Shift cable4. Manual control lever5. Shift cable retainer
Components1. Shift lever knob & boots assembly2. Shift lever assembly3. Shift cable4. Manual control lever5. Shift cable retainer
Other information:
Hyundai Ioniq (AE) 2017-2022 Service & Repair Manual: High voltage shut-off procedures
High Voltage Shut-off Procedures • Be sure to read and follow the "General Safety Information and Caution" before doing any work related with the high voltage system. Failure to follow the safety instructions may result in serious electrical injuries.
Hyundai Ioniq (AE) 2017-2022 Service & Repair Manual: Warning Indicator. Repair procedures
RemovalWarning Indicator1.Disconnect the negative (-) battery terminal.2.Remove the mirror (A).InstallationWarning Indicator1.Install the outside mirror.2.Connect the negative (-) battery terminal.Inspection1.Apply battery voltage to each terminal as shown in the table and verify that the mirror operates properly.
Categories
- Manuals Home
- Hyundai Ioniq Owners Manual
- Hyundai Ioniq Service Manual
- Repair procedures
- If the 12 Volt Battery is Discharged (Hybrid Vehicle)
- Body (Interior and Exterior)
- New on site
- Most important about car
