
Hyundai Ioniq (AE): Power Cable / Repair procedures
Hyundai Ioniq (AE) 2017-2022 Service & Repair Manual / Hybrid Control System / Power Cable / Repair procedures
| Removal |
|

| 1. | Shut off the high voltage circuit. (Refer to Hybrid Control System - "High Voltage Shutoff Procedure") |
| 2. | Remove the air cleaner assembly and air duct. (Refer to Engine Mechanical System - "Air Cleaner") |
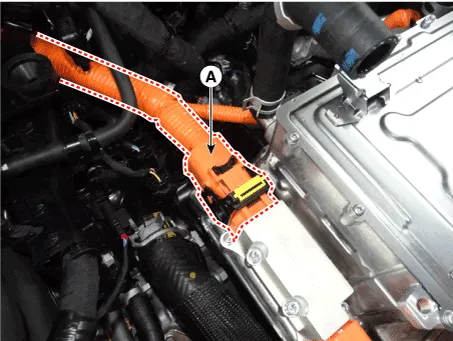
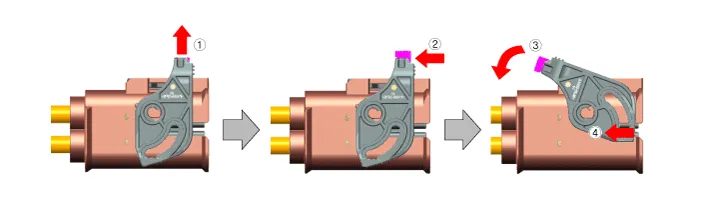
| 3. | Disconnect the power cable (A) from the HPCU.
|

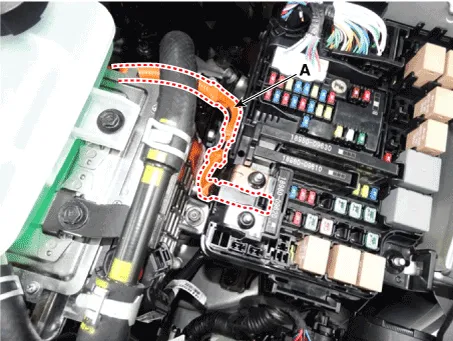
| 4. | Remove the positive (+) cable (A) after loosening the mounting nut.
|
| 5. | Remove the high voltage battery inlet cooling duct. (Refer to High Voltage Battery Cooling System - "Cooling Duct") |
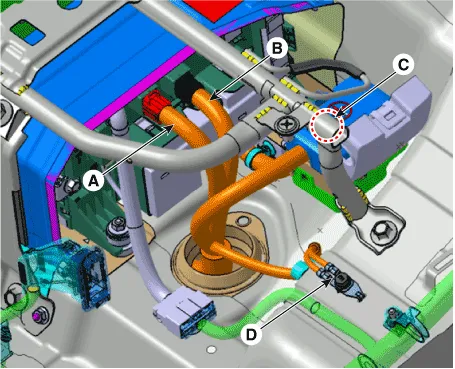
| 6. | Disconnect the power cable connector (-) (A) and power cable connector (+) (B). |
| 7. | Disconnect the auxiliary 12V battery positive (+) cable after loosening the mounting nut (C). |
| 8. | Disconnect the ground cable (D) after loosening the mounting bolt.
|
| 9. | Lift the vehicle. |
| 10. | Remove the side under cover (A) after loosening the mounting bolts and nuts.
|

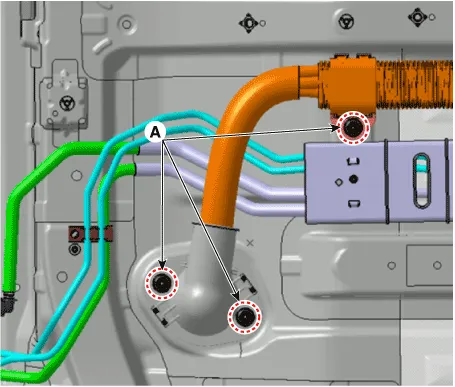
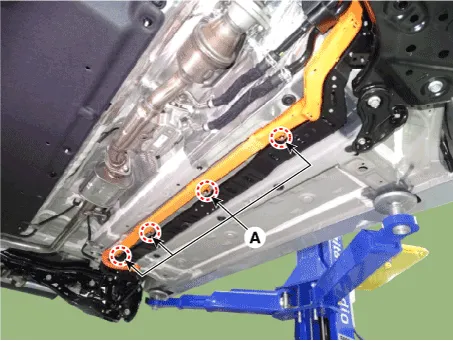
| 11. | Remove the power cable after loosening the mounting nuts (A).
|
| Installation |
|
| 1. | Install in the reverse order of removal.
|
Components1. Power Cable (Main)2. Power Cable (Inverter ↔ HSG & A/C Electric Compressor)
Other information:
Hyundai Ioniq (AE) 2017-2022 Service & Repair Manual: Mode Control Actuator. Repair procedures
Inspection1.Turn the ignition switch OFF.2.Disconnect the mode control actuator connector.3.Verify that the mode control actuator operates to the defrost mode when connecting 12V to terminal 3 and grounding terminal 4.Verify that the mode control actuator operates to the vent mode when connected in reverse.
Hyundai Ioniq (AE) 2017-2022 Service & Repair Manual: Special service tools
Special Service Tools Tool Name / Number Illustration Description LKA Compensator(09964-C1100)Used for compensating front view camera unitBCW Sensor Correction Tool Set(09958-3T500)Used to correct the blind-spot radar unit.
Categories
- Manuals Home
- Hyundai Ioniq Owners Manual
- Hyundai Ioniq Service Manual
- Front Disc Brake. Repair procedures
- Jump starting procedure
- Brake System
- New on site
- Most important about car

Copyright © 2026 www.hioniqae.com - 0.018