Hyundai Ioniq (AE): Sunroof / Sunroof Assembly. Repair procedures
Hyundai Ioniq (AE) 2017-2022 Service & Repair Manual / Body (Interior and Exterior) / Sunroof / Sunroof Assembly. Repair procedures
| Replacement |
|

| 1. | Remove the roof trim. (Refer to Roof Trim - "Roof Trim Assembly") |
| 2. | Remove the sunroof glass. (Refer to Sunroof - "Sunroof Glass") |
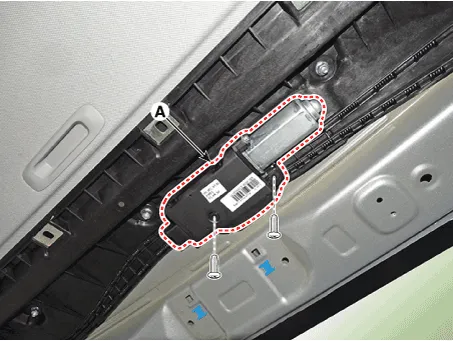
| 3. | Loosen the mounting screws and remove the sunroof motor (A).
|
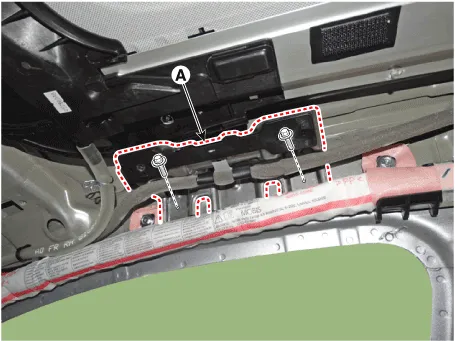
| 4. | After loosening the mounting bolts, then remove the assist handle bracket (A).
|
| 5. | Disconnect the drain tubes (B). |
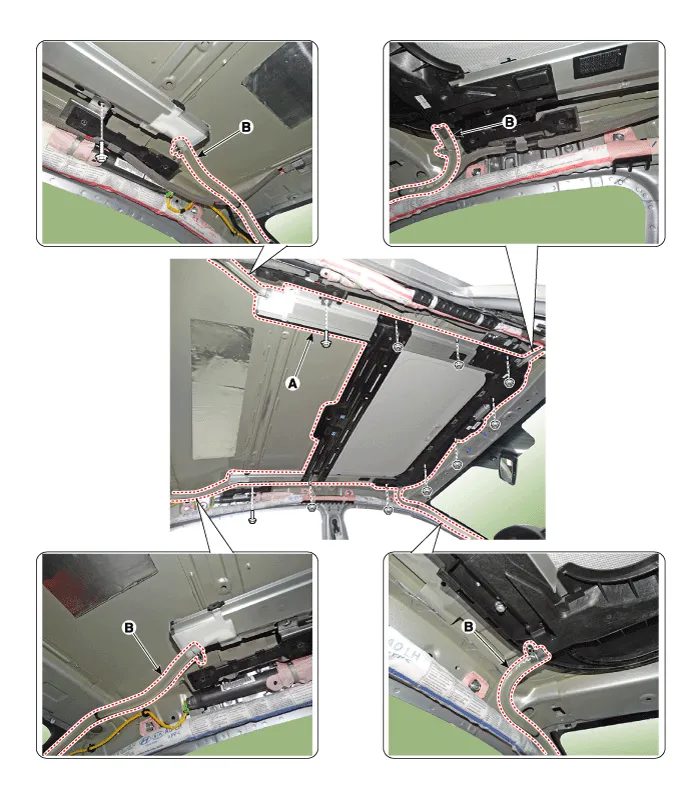
| 6. | After loosening the mounding nuts and bolts, remove the sunroof assembly (A).
|
| 7. | To install, reverse the removal procedure.
|

Components Location1. Sunroof assembly
Replacement1.Remove the sunroof assembly.(Refer to Sunroof - "Sunroof Assembly") 2.After loosening the mounting screws, remove the drip rail assembly (A).
Other information:
Hyundai Ioniq (AE) 2017-2022 Service & Repair Manual: PTC Heater. Description and operation
DescriptionThe PTC (Positive Temperature Coefficient) heater is installed at the exit or the backside of the heater core.The PTC heater is an electric heater using a PTC element as an auxiliary heating device that supplements deficiency of interior heat source in highly effective hybrid engine.
Hyundai Ioniq (AE) 2017-2022 Service & Repair Manual: Blower Unit. Components and components location
Component Location1. Blower unit assembly Components1. Duct Seal2. Intake duct case3. Air intake door assembly4. Intake door5. Seal6. Intake duct case (A)7. Air filter cover (A)8. Intake actuator9. Air filter cover10. Air filter 11. Blower unit pad12.
Categories
- Manuals Home
- Hyundai Ioniq Owners Manual
- Hyundai Ioniq Service Manual
- Body (Interior and Exterior)
- Jump Starting
- Heating, Ventilation and Air Conditioning
- New on site
- Most important about car

Copyright © 2026 www.hioniqae.com - 0.0171