
Hyundai Ioniq (AE): Crash Pad / Cluster Fascia Panel. Repair procedures
Hyundai Ioniq (AE) 2017-2022 Service & Repair Manual / Body (Interior and Exterior) / Crash Pad / Cluster Fascia Panel. Repair procedures
| Replacement |
|

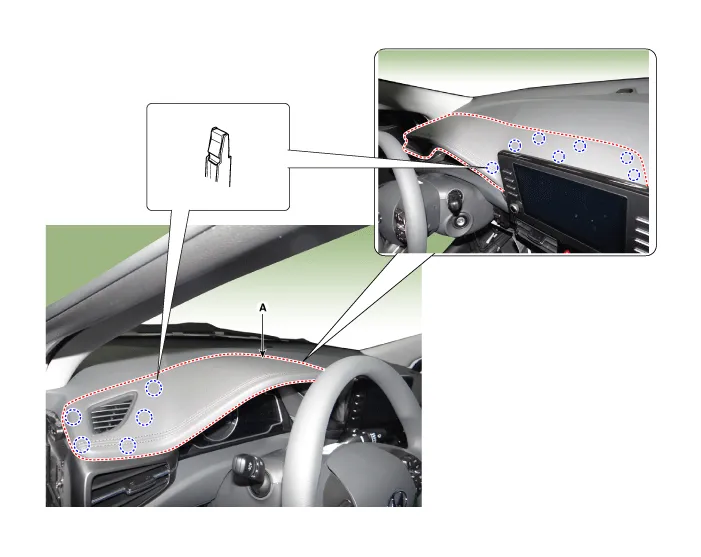
| 1. | Using a remover and remove the cluster fascia upper garnish (A).
|
| 2. | Remove the crash pad lower panel. (Refer to Crash Pad - "Crash Pad Lower Panel") |
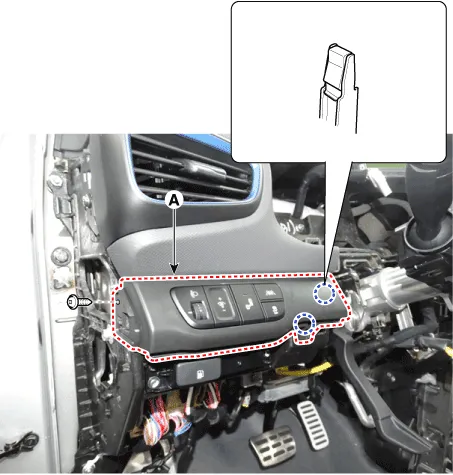
| 3. | Loosen the mounting screw and remove the crash pad side garnish [LH] (A).
|
| 4. | Press the lock pin and separate the crash pad side garnish connector (A).
|
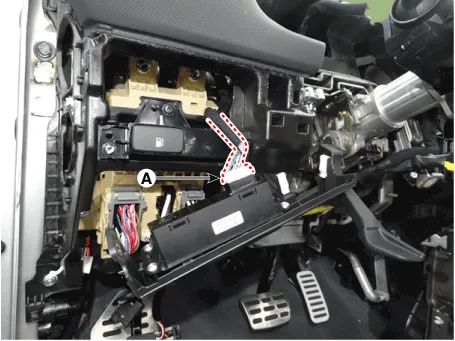
| 5. | Looseh the mounting screws and remove the cluster fascia panel (A).
|

| 6. | To install, reverse the removal procedure.
|

Component Location 1. Cluster fascia panel
Component Location 1. Crash pad lower panel
Other information:
Hyundai Ioniq (AE) 2017-2022 Service & Repair Manual: Special service tools
Special Service Tools Tool Name / Number Illustration Description LKA Compensator(09964-C1100)Used for compensating front view camera unitBCW Sensor Correction Tool Set(09958-3T500)Used to correct the blind-spot radar unit.
Hyundai Ioniq (AE) 2017-2022 Service & Repair Manual: Front View Camera Unit. Repair procedures
Removal1.Disconnect the negative (-) battery terminal.2.Remove the front view camera cover (A).3.Disconnect the front view camera connector (A).4.Remove the front view camera after disengaging the mounting bracket (A).Installation1.Align front view camera with windshield bracket using forward edge point (A).
Categories
- Manuals Home
- Hyundai Ioniq Owners Manual
- Hyundai Ioniq Service Manual
- Maintenance
- Troubleshooting
- Description and operation
- New on site
- Most important about car

Copyright © 2026 www.hioniqae.com - 0.0103