Hyundai Ioniq (AE): ESP(Electronic Stability Program) System / Front Wheel Speed Sensor. Repair procedures
| Removal |
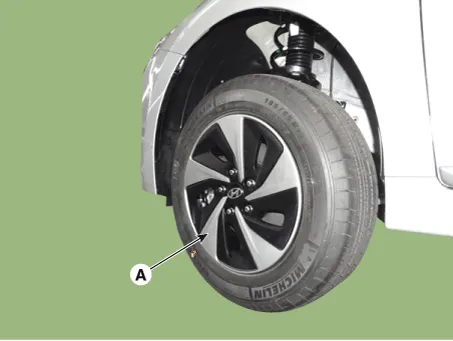
| 1. | Loosen the wheel nuts slightly. Raise the vehicle, and make sure it is securely supported. |
| 2. | Remove the front wheel and tire (A) from the front hub.
|

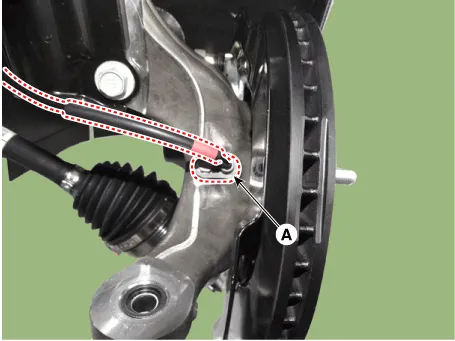
| 3. | Loosen the bolt and then remove the wheel speed sensor (A).
|
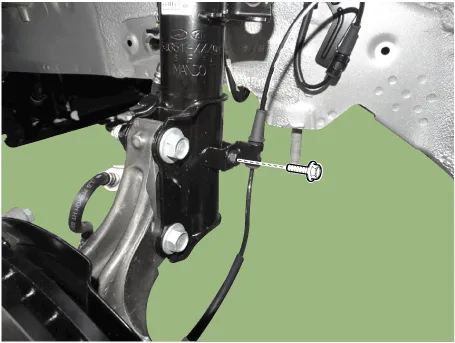
| 4. | Loosen the mounting holt and then remove the brake hose from the strut assembly.
|
| 5. | Remove the front wheel guard. (Refer to Body - "Front Wheel Guard") |
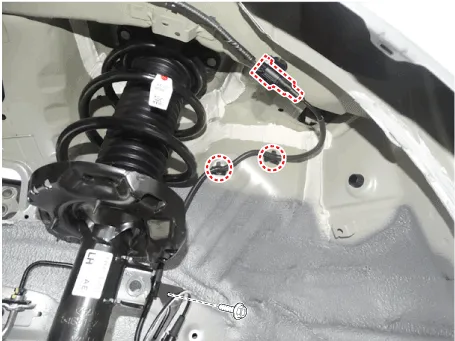
| 6. | Disconnect the connector after removing the cable bracket mouniting bolt and fixed clip.
|
| 7. | Installation in the reverse of removal. |
| Inspection |
| 1. | Measure the output voltage between the terminal of the wheel speed sensor and the body ground.
|
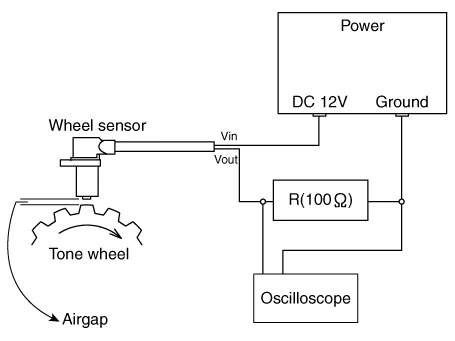
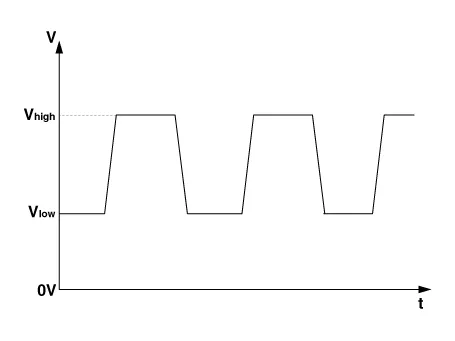
| 2. | Compare the change of the output voltage of the wheel speed sensor to the normal change of the output voltage as shown below.
|
Components1. Front wheel speed sensor2. Front wheel speed sensor cable
Components1. Rear wheel speed sensor cable2. Rear wheel speed sensor connector
Other information:
Hyundai Ioniq (AE) 2017-2022 Service & Repair Manual: Description and operation
DescriptionIn ordinary cars, the mechanical water pump mounted on the engine for heating purposes is activated to circulate the cooling water, but in hybrid cars, AEWP is used to circulate the cooling water when the engine is not operating. Classification System Cooling water used
Hyundai Ioniq (AE) 2017-2022 Service & Repair Manual: Troubleshooting
Trouble Symptom ChartsTrouble Symptom 1Trouble Symptom 2 Trouble symptom Probable cause Remedy The set vehicle speed varies greatly upward or downward"Surging" (repeated alternating acceleration and deceleration) occurs after settingMalfunction of the vehicle speed se
Categories
- Manuals Home
- Hyundai Ioniq Owners Manual
- Hyundai Ioniq Service Manual
- General Information
- Theft-alarm System
- Hybrid Vehicle Engine Compartment
- New on site
- Most important about car
