Hyundai Ioniq (AE): Lighting System / High Mounted Stop Lamp. Repair procedures
| Removal |
| 1. | Disconnect the negative (-) battery terminal. |
| 2. | Remove the rear spoiler assembly. (Refer to Body - "Tail Gate Trim") |
| 3. | Disconnect the high mounted stop lamp connector.
|
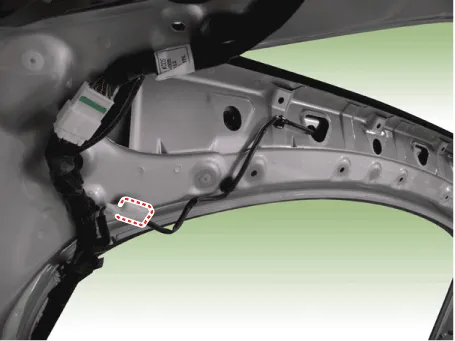
| 4. | Remove the high mounted stop lamp cover by pulling forward in the direction of the arrow using screw driver or remover.
|
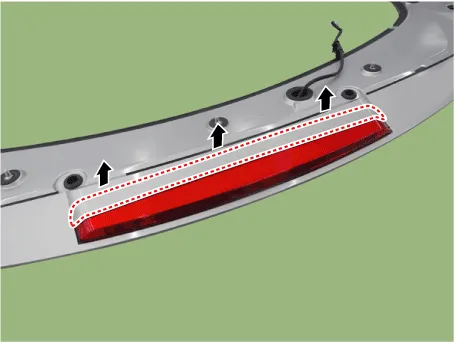

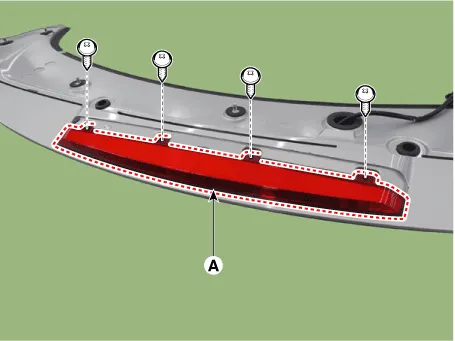
| 5. | Remove the high mounted stop lamp assembly (A) after loosening the mounting screws.
|
| Installation |
| 1. | Install the rear high mounted stop lamp. |
| 2. | Install the package tray trim. |
| 3. | Connect the negative (-) battery terminal. |
Removal1.Disconnect the negative (-) battery terminal.2.Remove the license lamp (A) after disengaging the license lamp mounting clip (B).3.Replace the bulb (A) after removing a lens.
Removal1.Disconnect the negative (-) battery terminal.2.Remove the outside rear combination lamp assembly (B) after disconnecting the connector (A).3.Remove the bulb (A) after turning it in the counter clock-wise direction.
Other information:
Hyundai Ioniq (AE) 2017-2022 Service & Repair Manual: PTC Heater. Repair procedures
InspectionOperating Logic Test (Manual only)Inspect the PTC operation by confirmation logic as follows.1.Entering(1)Set the Floor mode and maximum heating position.(2)Turn off the blower switch.(3)Press the intake (recirculation) button 5 times or more.
Hyundai Ioniq (AE) 2017-2022 Service & Repair Manual: Description and operation
DescriptionRear view monitor (RVM) will activate when the backup light is ON with the ignition switch ON and the shift lever in the R position.This system is a supplemental system that shows behind the vehicle through the AV monitor while backing-up. • This system is a supplementary function only.
Categories
- Manuals Home
- Hyundai Ioniq Owners Manual
- Hyundai Ioniq Service Manual
- Transmission Gear Oil. Repair procedures
- Theft-alarm System
- Suspension System
- New on site
- Most important about car
