Hyundai Ioniq (AE): Motor Driven Power Steering / MDPS Assembly. Repair procedures
Hyundai Ioniq (AE) 2017-2022 Service & Repair Manual / Steering System / Motor Driven Power Steering / MDPS Assembly. Repair procedures
| Removal |
| 1. | Disconnect the battery negative cable from the battery and then wait for at least 30 seconds. |
| 2. | Turn the steering wheel so that the front wheels are placed in the straight ahead position. |
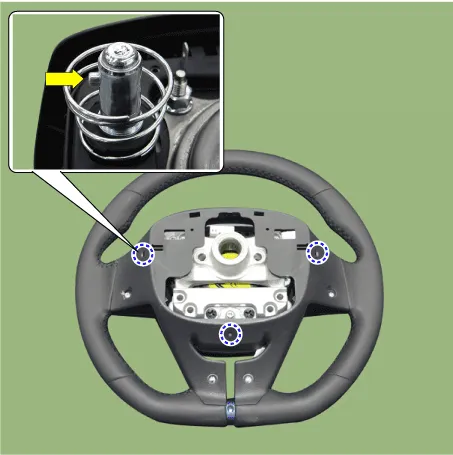
| 3. | Remove the driver airbag module(DAB).
|

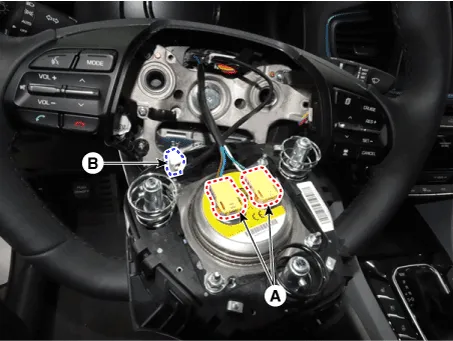
| 4. | Disconnect the airbag module connector (A) and horn connector (B).
|
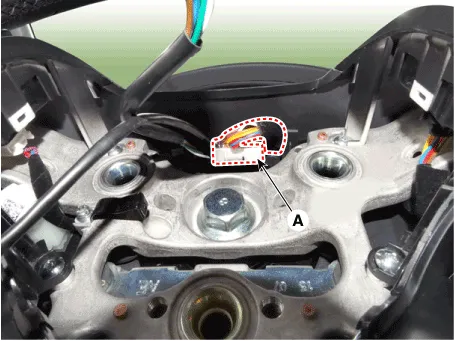
| 5. | Disconnect the connector (A).
|
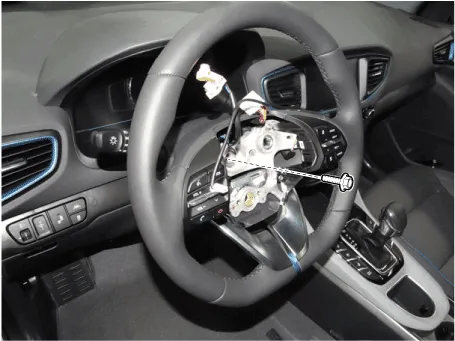
| 6. | Remove the steering wheel by loosening the lock bolt.
|
| 7. | Loosen the screw and then remove the steering column upper (A) and lower shroud (B).
|
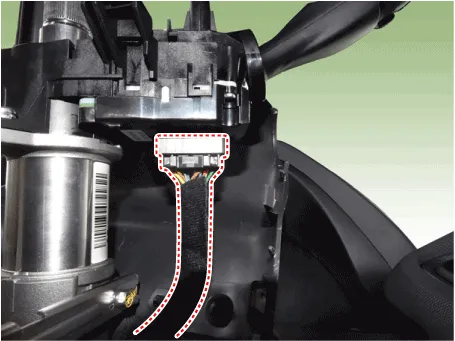
| 8. | Disconnect the connector and then sepearte the clock spring (A).
|
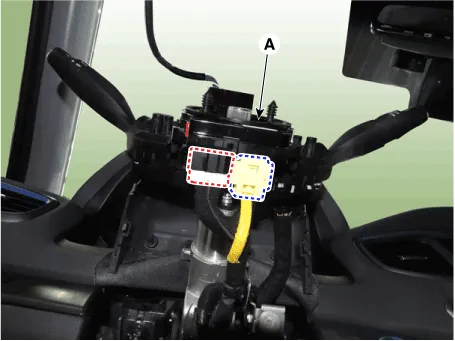
| 9. | Disconnect the multifunction switch connector.
|
| 10. | Loosen the screw and then remove the multifunction switch.
|
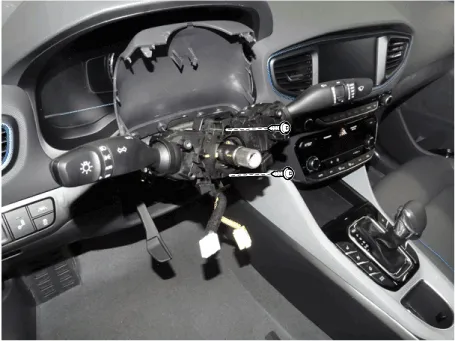
| 11. | Remove the fixed clip (A) from the steering column.
|
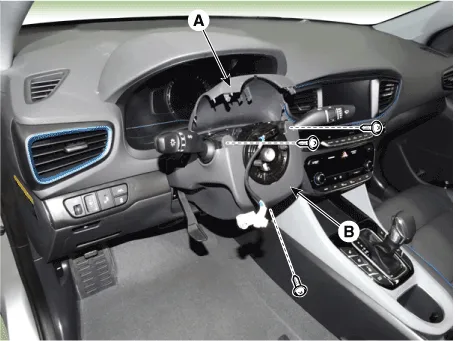
| 12. | Remove the crash pad lower panel. (Refer to Body - "Crash Pad") |
| 13. | Remove the knee airbag.
|
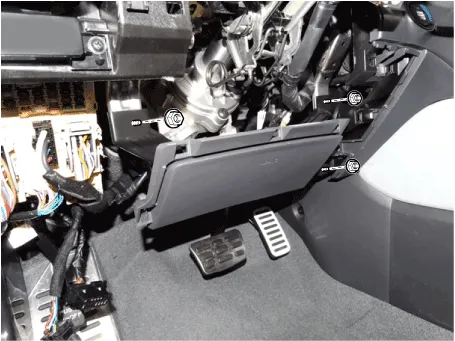
| 14. | Disconnect the knee airbag connector.
|
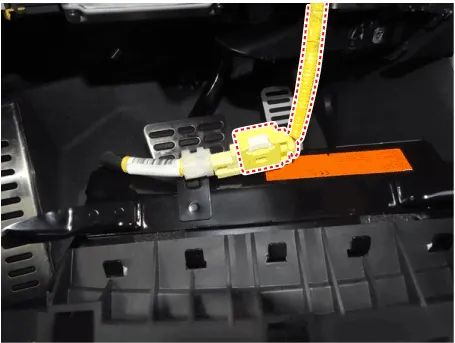
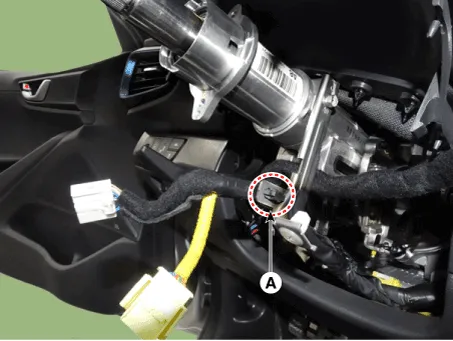
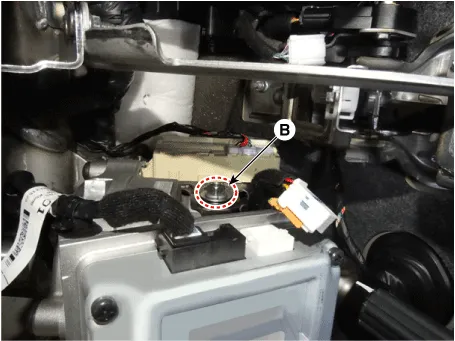
| 15. | Disconnect MDPS ECU connector.
|
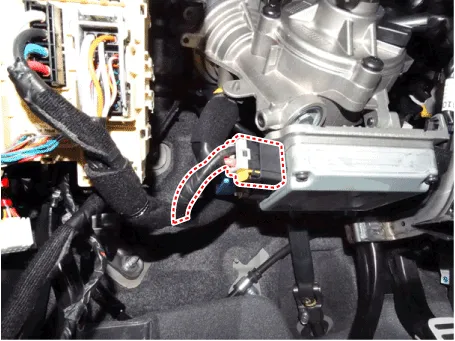
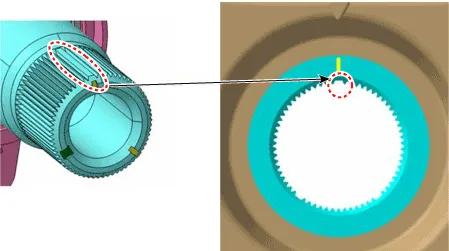
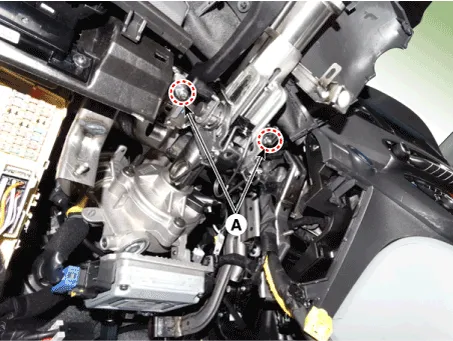
| 16. | Loosen the bolt (A) and then disconnect the universal joint assembly from the pinion of the steering gear box.
|
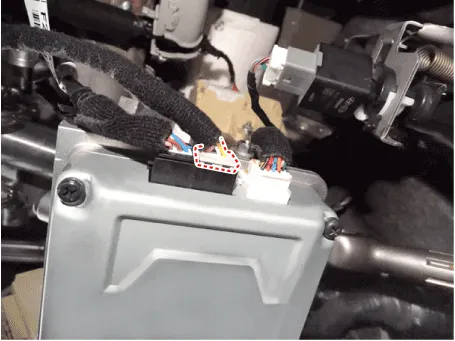
| 17. | Remove the steering column & EPS unit assembly by loosening the mounting bolt (B) and nuts (A).
|
| Disassembly |
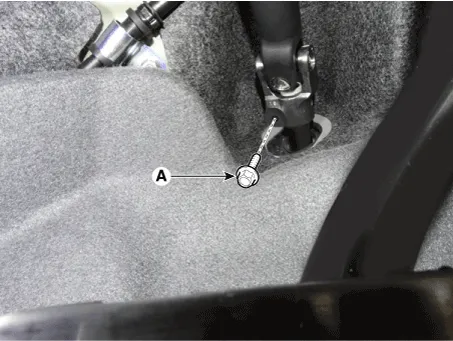
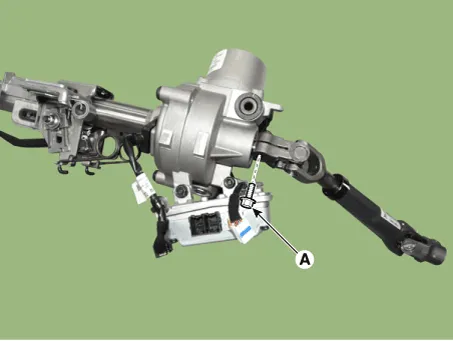
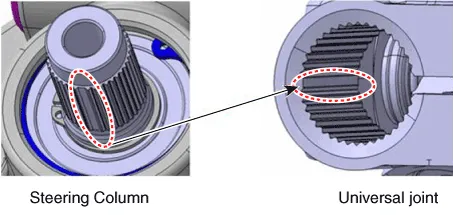
| 1. | Loosen the bolt (A) and then disconnect the universal joint assembly from the steering column assembly.
|
| 2. | To reassembly, reverse the disassembly procedure. |
| 3. | Reassembly is the reverse of the disassembly.
|
| Installation |
| 1. | To install, reverse the removal procedure. |
| 2. | Connect self-diagnosis connector(16pins) located in the lower of driver side crash pad to self-diagnosis devic. |
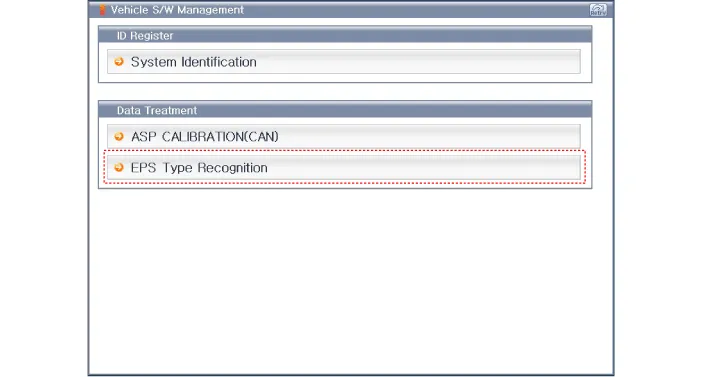
| 3. | Conduct the "ASP Calibration".
|
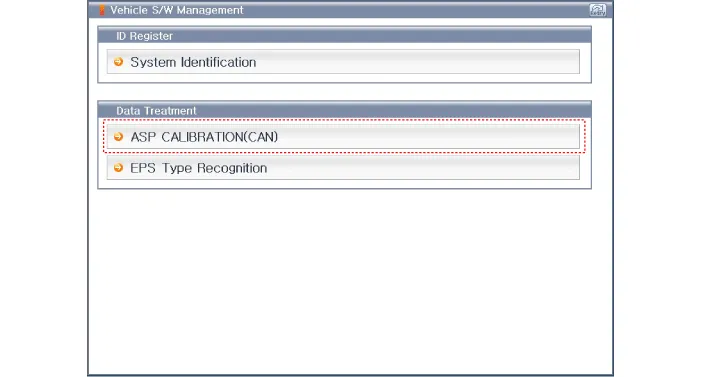
| 4. | Conduct the "EPS Type Recognition".
|
Removal1.Remove the MDPS assembly.(Refer to Steering System - "MDPS Assembly")2.Remove the MDPS control unit.(Refer to Steering System - "MDPS Control Unit")3.
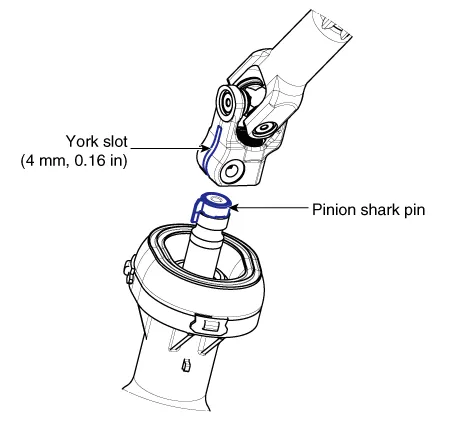
Removal1.Loosen the bolt (A) and then disconnect the universal joint assembly from the pinion of the steering gear box. Tightening torque : M8 BOLT : 32.
Other information:
Hyundai Ioniq (AE) 2017-2022 Service & Repair Manual: Climate Control Air Filter. Repair procedures
Replacement1.Disconnect the air damper (A) from the glove box (B).2.Remove the stopper (B) from the glove box (A).3.Remove the filter cover (A) by pressing the knob.4.Replace the air filter (A) with a new one according to the direction of air filter. • To remove the filter easily, press the right side inwa
Hyundai Ioniq (AE) 2017-2022 Service & Repair Manual: Front Radar Unit. Specifications
S
Categories
- Manuals Home
- Hyundai Ioniq Owners Manual
- Hyundai Ioniq Service Manual
- Brake System
- Suspension System
- Checking the Coolant Level
- New on site
- Most important about car

Copyright © 2026 www.hioniqae.com - 0.0174