Hyundai Ioniq (AE): Lighting System / Overhead Console Lamp. Repair procedures
| Inspection |
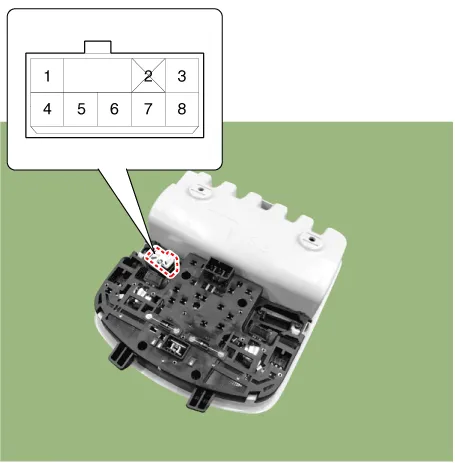
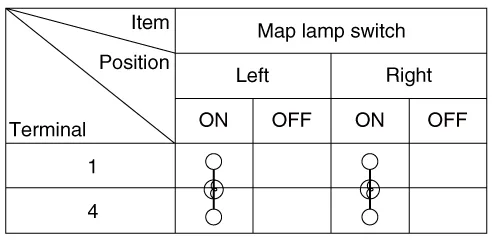
| 1. | Remove the overhead console lamp assembly then check for continuity between terminals. If the continuity is not as specified, replace the map lamp switch.
|
| Removal |
| 1. | Disconnect the negative (-) battery terminal. |
| 2. | Remove the mounting screws (2EA). and then remove the overhead console (A).
|
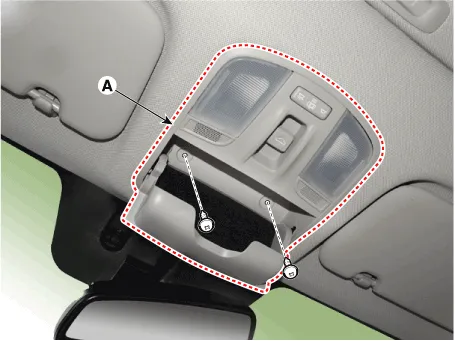
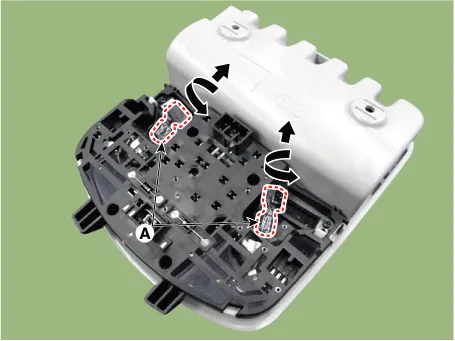
| 3. | Remove the overhead console after disconnect the connector (A).
|
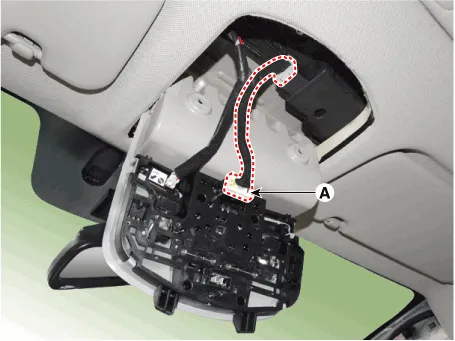
| 4. | Remove the overhead console lamp (B) by turning the socket.
|
| Installation |
| 1. | Install the overhead console lamp after connecting the connector. |
| 2. | Install the lens after tightening 2 screws. |
Removal[Room Lamp]1.Disconnect the negative (-) battery terminal.2.Using a screwdriver or remover, Separate the room lamp lens (A) from the room lamp. • Put on gloves to prevent hand injuries.
Inspection1.The SJB can be diagnosed by using the GDS. The SJB communicates with the GDS which then displays inputs and outputs along with codes. It will be able to diagnose defects of hazard lamp switch with GDS quickly.
Other information:
Hyundai Ioniq (AE) 2017-2022 Service & Repair Manual: Repair procedures
Replacement1.Remove the battery (-) terminal.2.Remove the engine room under cover.(Refer to Engine Mechanical System - "Engine Room Under Cover")3.Remove the heater hose (A) and AEWP hose (B).4.Disconnect the lock pin to remove the heater hose pump connector (A).
Hyundai Ioniq (AE) 2017-2022 Service & Repair Manual: Description and operation
DescriptionBlcok DiagramFunctions of Front View CameraFront View Camera supports the following functions using the information (lane, light source, vehicle and pedestrian) detected by the front view camera and the vehicle's signal information (CAN communication).
Categories
- Manuals Home
- Hyundai Ioniq Owners Manual
- Hyundai Ioniq Service Manual
- Engine Mechanical System
- Maintenance
- Checking the Coolant Level
- New on site
- Most important about car
