
Hyundai Ioniq (AE): Horn / Repair procedures
Hyundai Ioniq (AE) 2017-2022 Service & Repair Manual / Body Electrical System / Horn / Repair procedures
| Removal |
| 1. | Remove the front bumper cover. (Refer to Body - "Front Bumper Cover") |
| 2. | Remove the horn after loosening the mounting the bolt. |
[Low Pitch Horn]
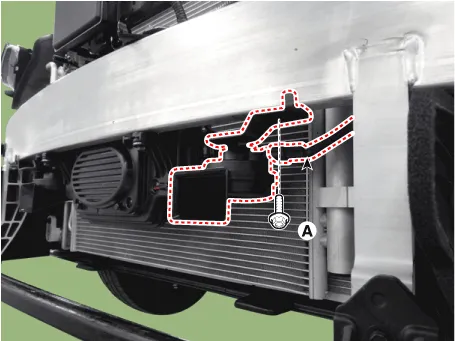
[High Pitch Horn]
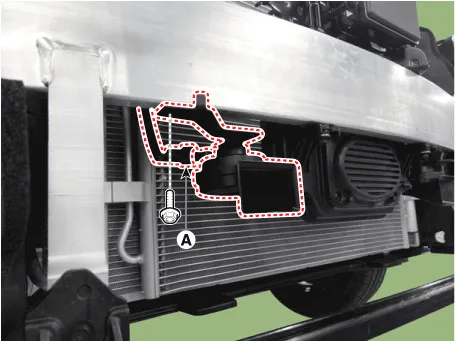
| Installation |
| 1. | Install the horns after connect the horn connectors. |
| 2. | Install the front bumper cover. |
| Inspection |
| 1. | In this vehicle, the horn relay is mounted in the PCB block of the engine compartment relay block. |
|

Component Location1. Horn switch2. Horn relay (Built - in PCB Block)3. Horn (Low)4. Horn (High)5. Clock spring
Other information:
Hyundai Ioniq (AE) 2017-2022 Service & Repair Manual: Ambient Temperature Sensor. Description and operation
DescriptionThe ambient temperature sensor is located at the front of the condenser and detects ambient air temperature. It is a negative type thermistor; resistance will increase with lower temperature, and decrease with higher temperature.The sensor output will be used for discharge temperature control, temperature regulation door contrl, blower m
Hyundai Ioniq (AE) 2017-2022 Service & Repair Manual: Description and operation
DescriptionRear corner radar is a system that uses two magnetic wave radar sensors attached on the rear panel to measure the distance from the following vehicles and provides the sensing and (visual and auditory) alarm of any vehicle coming into the blind spot.
Categories
- Manuals Home
- Hyundai Ioniq Owners Manual
- Hyundai Ioniq Service Manual
- Engine Mechanical System
- Components and components location
- Repair procedures
- New on site
- Most important about car

Copyright © 2026 www.hioniqae.com - 0.0158