Hyundai Ioniq (AE): Body (Interior and Exterior) / Special service tools
| Special Service Tools |
|
Tool (Number and name)
|
Illustration
|
Use
|
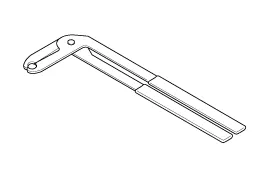
| 09880-4F000 Hog ring clip installer |
| Hog ring clip installation |
Specifications Items Specification HoodTypeFront openine type, rear hinged, stay rod typeFront DoorConstructionFront hinged, frame door constructionRegulator systemWire drum typeLocking systemPin-fork systemRear DoorConstructionFront hinged, frame door constructionRegulator systemWire drum typeLocking systemPin-fork systemTailgateTypeFront hinged, gas lifter typeSeat BeltsFront3 point type with Emergency Locking Retractor (E.
Troubleshooting Symptom Passible Cause Remedy (Refer to page) Water leaks from panorama sunroofDeteriorated roof lid weatherstripReplaceExcessive roof lid-to-body clearance and improperly fitted weatherstripAdjustWind noise around sunroof Loose or deformed deflector, gaps in body workRetighten adjust or replaceNoise created by moving sunroof lidForeign particles lodged in guide railCheck drive cable and guide rails for foreign particlesLoose guide rails and lidRetightenMotor runs but sunroof does not move or moves only partiallyForeign particles lodged in guide railAdjust or replaceIncorrect engagement of motor pinion with drive cableDecrease in motor's clutch slipping forceIncreased sunroof sliding resistance or interference of sunroof with drive cables, weatherstrip, etc.
Other information:
Hyundai Ioniq (AE) 2017-2022 Service & Repair Manual: Auto Defogging Sensor. Repair procedures
Diagnosis With GDS1.The heating, ventilation and air conditioning can be quickly diagnosed failed parts with vehicle diagnostic system (GDS).※ The diagnostic system (GDS) provides the following information.(1) Self diagnosis : Checking the failure code (DTC) and display.
Hyundai Ioniq (AE) 2017-2022 Service & Repair Manual: Specifications
S
Categories
- Manuals Home
- Hyundai Ioniq Owners Manual
- Hyundai Ioniq Service Manual
- DCT(Dual Clutch Transmission) System
- Heating, Ventilation and Air Conditioning
- Engine Mechanical System
- New on site
- Most important about car
