Hyundai Ioniq (AE): Cooling System / Water pump. Repair procedures
Hyundai Ioniq (AE) 2017-2022 Service & Repair Manual / Engine Mechanical System / Cooling System / Water pump. Repair procedures
| Removal |
| 1. | Loosen the drain plug, and drain the engine coolant. Remove the reservoir cap to help drain the coolant faster. (Refer to Cooling System - "Coolant") |
| 2. | Remove the drive belt. (Refer to Timing System - "Drive Belt") |
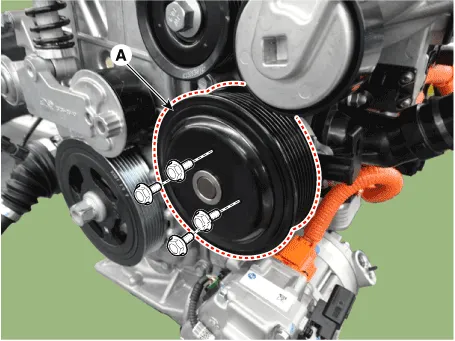
| 3. | Remove the water pump pulley (A).
|
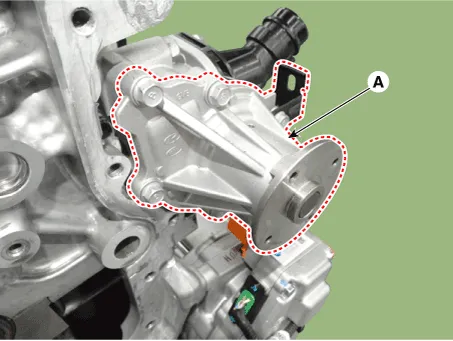
| 4. | Remove the water pump (A).
|
| Inspection |
| 1. | Check each part for cracks, damage or wear, and replace the water pump assembly if necessary. |
| 2. | Check the bearing for damage, abnormal noise and sluggish rotation, and replace the water pump assembly if necessary. |
| 3. | Check for coolant leakage. If coolant leaks from hole, the seal is defective. Replace the water pump assembly.
|

| Installation |
| 1. | Install the water pump (A) with the new gasket.
|
| 2. | Install the water pump pulley (A).
|
| 3. | Install the drive belt. (Refer to Timing System - "Drive Belt") |
| 4. | Fill the radiator with coolant and check for leaks. (Refer to Cooling System - "Coolant") |
| 5. | Start engine and check for leaks. |
| 6. | Recheck the coolant level. |
Components1. Water pump pulley2. Water pump3. Gasket
TroubleshootingWater Pump Symptoms Possible Causes Remedy Coolant leakage• From the bleed hole of the water pumpVisually check• Check leaks after about ten-minute warming up.
Categories
- Manuals Home
- Hyundai Ioniq Owners Manual
- Hyundai Ioniq Service Manual
- Engine Mechanical System
- Hybrid Control System
- Suspension System
- New on site
- Most important about car

Copyright © 2026 www.hioniqae.com - 0.0226