Hyundai Ioniq (AE): Driveshaft Assembly / BJ Boot. Repair procedures
Hyundai Ioniq (AE) 2017-2022 Service & Repair Manual / Driveshaft and axle / Driveshaft Assembly / BJ Boot. Repair procedures
| Replacement |
| 1. | Remove the front driveshaft. (Refer to Driveshaft Assembly - "Front Driveshaft") |
| 2. | Remove the TJ joint assembly. (Refer to Driveshaft Assembly - "TJ Joint") |
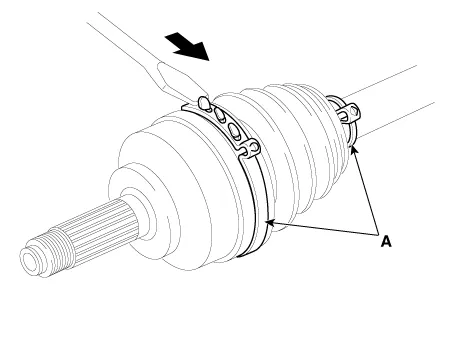
| 3. | Using a plier or flat-tipped (-) screwdriver, remove the BJ boot bands (A).
|
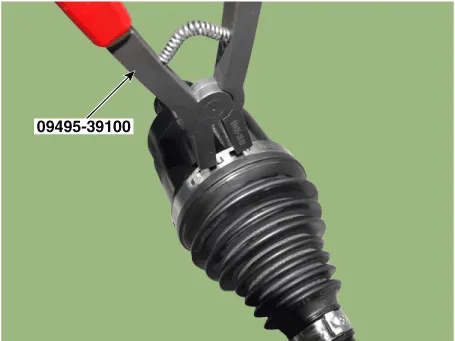
| 4. | Using the SST, secure the BJ boot bands. [Hook type]
[Ear type]
|


| 5. | Install the TJ joint assembly. (Refer to Driveshaft Assembly - "TJ joint") |
| 6. | Install the front driveshaft. (Refer to Driveshaft Assembly - "Front Driveshaft") |
| 7. | Check the front alignment. (Refer to Suspension System - "Front Alignment") |
Components1. BJ assembly 2. Circlip 3. BJ boot band 4. BJ boot 5. Shaft6. TJ boot band7. TJ boot8. Spider assembly9. Snap ring10. TJ Case11. Clip
Other information:
Hyundai Ioniq (AE) 2017-2022 Service & Repair Manual: Duct Sensor. Repair procedures
Inspection1.Check that the voltage values of No. 1, 2 duct sensors change1. Sensor (+ 5V)2. Sensor groundSpecification Ambient temperature [°C (°F)] Resistance (kΩ) Voltage (V) 50 (122)1.
Hyundai Ioniq (AE) 2017-2022 Service & Repair Manual: Specifications
S
Categories
- Manuals Home
- Hyundai Ioniq Owners Manual
- Hyundai Ioniq Service Manual
- Engine Control/Fuel System
- Jump Starting
- What to do in an emergency
- New on site
- Most important about car

Copyright © 2026 www.hioniqae.com - 0.0134