Hyundai Ioniq (AE): Hood / Hood Latch. Repair procedures
Hyundai Ioniq (AE) 2017-2022 Service & Repair Manual / Body (Interior and Exterior) / Hood / Hood Latch. Repair procedures
| Replacement |
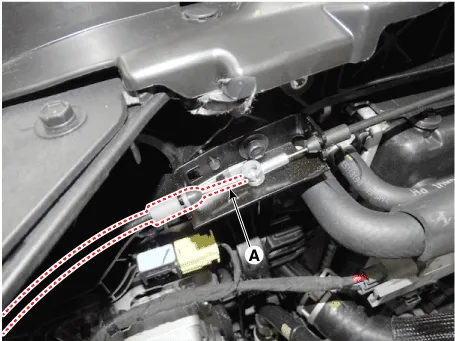
| 1. | Disconnect the connector (A), then remove the wiring mounting clips.
|
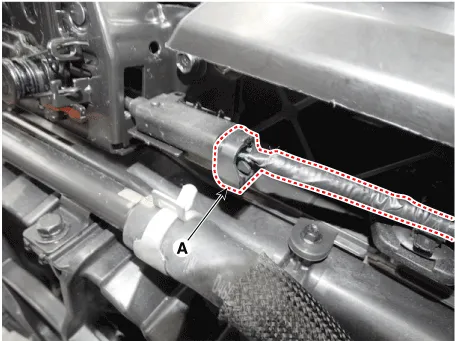
| 2. | Disconnect the hood latch release cable (A).
|
| 3. | Loosen the mounting bolts and remove the hood latch assembly (A).
|
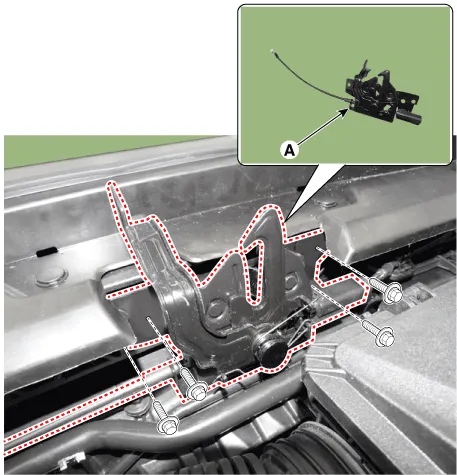
| 4. | To install, reverse the removal procedure.
|

Component Location1. Hood latch assembly
Other information:
Hyundai Ioniq (AE) 2017-2022 Service & Repair Manual: Components and components location
C
Hyundai Ioniq (AE) 2017-2022 Service & Repair Manual: Repair procedures
Diagnosis with GDS1.REAR CORENER RADAR system defects can be quickly diagnosed with the GDS. GDS operates actuator quickly to monitor, input/output value and self diagnosis.2.Connect the cable of GDS to the data link connector in driver side crash pad lower panel, turn the power on GDS.
Categories
- Manuals Home
- Hyundai Ioniq Owners Manual
- Hyundai Ioniq Service Manual
- Body (Interior and Exterior)
- Troubleshooting
- Jump Starting
- New on site
- Most important about car

Copyright © 2026 www.hioniqae.com - 0.0117