Hyundai Ioniq (AE): Trickle Charge / How to Connect Portable Charger (ICCB: In-Cable Control Box)
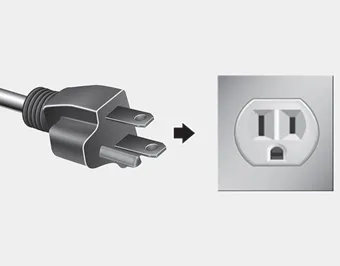
1. Connect the plug to a household electric outlet.
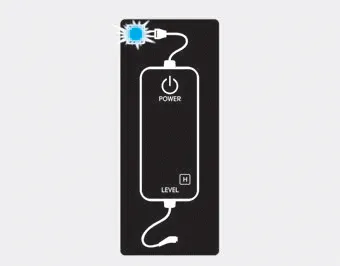
2. Check if the power lamp (green) illuminates on the control box.
3. Depress the brake pedal and apply the parking brake.
4. Turn OFF all switches, shift to P (Park), and turn OFF the vehicle.

5. Press center edge of the charging door to open the charging door.
Information
The charging door opens only when the door is unlocked.
6. Check if there is dust on the charging connector and charging inlet.
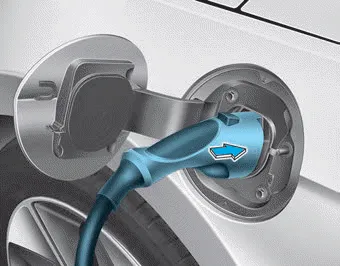
7. Hold the charging connector handle and connect it to the vehicle normal charging inlet. Push the connector until you hear a "clicking" sound. If the charging connector and charging terminal are not connected properly, this may i cause a fire.
Information
Charging connector AUTO/LOCK mode
The charging connector is locked in the inlet at a different period according to which mode is selected.
- LOCK mode : The connector locks when the charging connector is plugged into the charging inlet.
- AUTO mode : The connector locks when charging starts.
For more details, refer to "Charging Connector AUTO/LOCK Mode" in this chapter.
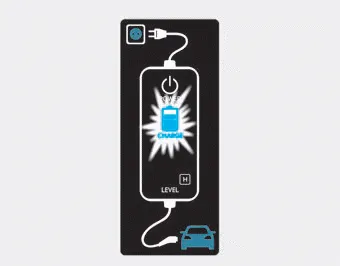
8. Charging starts automatically (charging lamp blinks).

9. Check if the charging indicator light of the high voltage battery on the instrument cluster is turned ON. Charging is not done when the charging indicator lamp is OFF.
When the charging connector is not connected properly, reconnect the charging cable to charge it again.
Information
- Even though charging is possible with the Engine Start/Stop button in the ON/START position, for your safety, start charging when the Engine Start/Stop button is in the OFF position and the vehicle shifted to P (Park). After charging has started, you can use electrical components such as the radio by pressing the Engine Start/Stop button to ACC or ON position.
- Moving the shift lever from P (Park) to R (Reverse)/N (Neutral)/D (Drive) stops the charging process. To restart the charging process, move the shift lever to P (Park), place the Engine Start/Stop button to the OFF position, and disconnect the charging cable. Then, connect the charging cable.
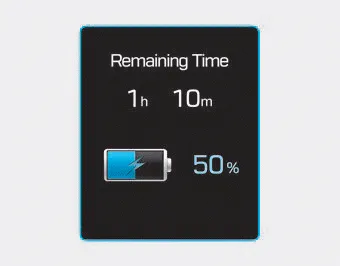
10. After charging has started, the estimated charging time is displayed on the instrument cluster for about 1 minute. If you open the driver seat door while charging, the estimated charging time is also displayed on the instrument cluster for about 1 minute. When scheduled charging is set, the estimated charging time is displayed as "--".
Information
Depending on the condition and durability of the high voltage battery, charger specifications, and ambient temperature, the time required for charging the battery may vary.
1. Check the rated current of the electric outlet prior to connecting the plug to the outlet. 2. Connect the plug to a household electric outlet. 3. Check the display window on the control box.
When charging the high voltage battery, the charge level can be checked from outside the vehicle.
Other information:
Hyundai Ioniq (AE) 2017-2022 Service & Repair Manual: Ambient Temperature Sensor. Components and components location
C
Hyundai Ioniq (AE) 2017-2022 Service & Repair Manual: Ambient Temperature Sensor. Repair procedures
Inspection1.Check the resistance of the ambient temperature sensor between terminals 1 and 2 whether it changes by changing the ambient temperature.1. Ambient Sensor (+)2. Sensor groundSpecification Ambient temperature [°C (°F)] Resistance between terminal 1 and 2 (
Categories
- Manuals Home
- Hyundai Ioniq Owners Manual
- Hyundai Ioniq Service Manual
- Body (Interior and Exterior)
- Jump starting procedure
- Brake Fluid
- New on site
- Most important about car
