Hyundai Ioniq (AE): Rear Seat / Rear Seat Back Cover. Repair procedures
Hyundai Ioniq (AE) 2017-2022 Service & Repair Manual / Body (Interior and Exterior) / Rear Seat / Rear Seat Back Cover. Repair procedures
| Replacement |
| [LH] |
|

|

| 1. | Remove the rear seat assembly [LH]. (Refer to Rear Seat - "Rear Seat Assembly") |
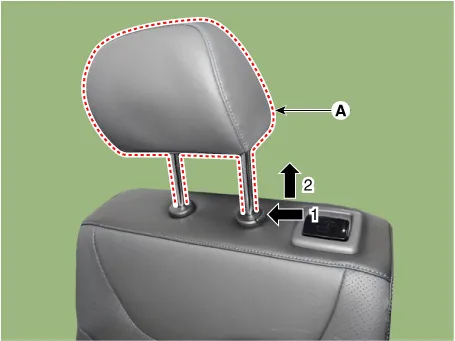
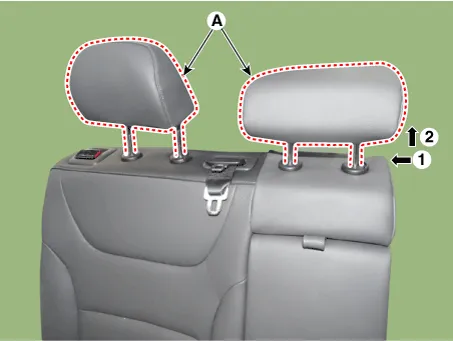
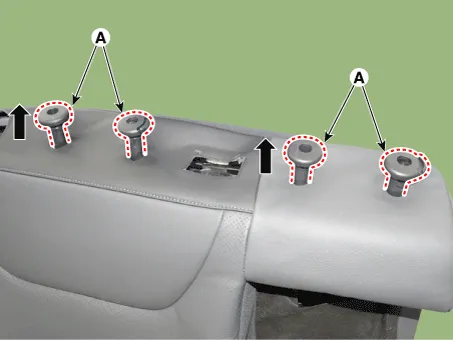
| 2. | Push the lock pins, and remove the rear seat headrest (A).
|
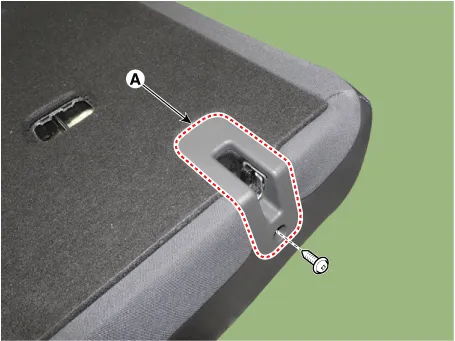
| 3. | Using a screwdriver or remover, remove the rear seat folding bezel (A).
|
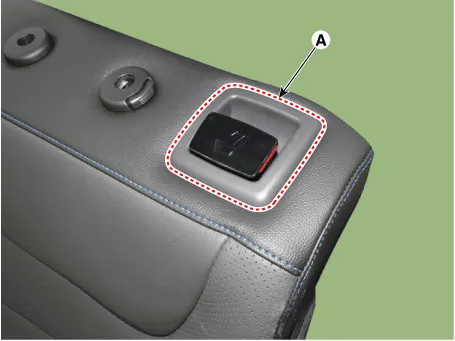
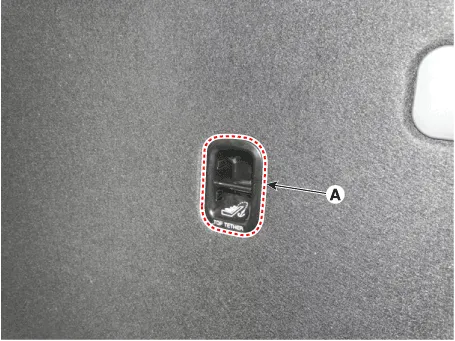
| 4. | Using a screwdriver or remover, remove the teddy anchor garnish (A).
|
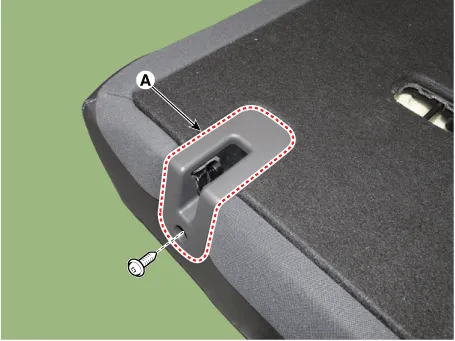
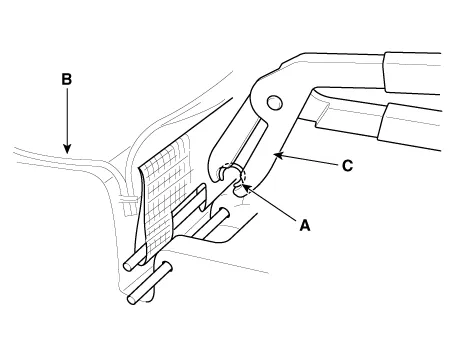
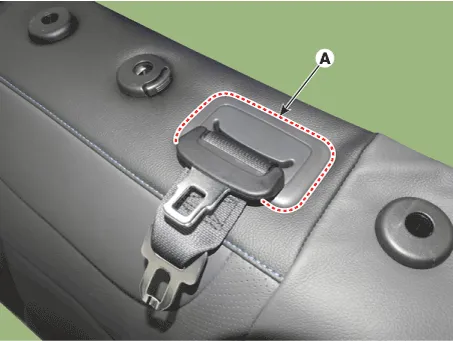
| 5. | After loosening the mounting screws, remove the rear seat back latch cover (A).
|
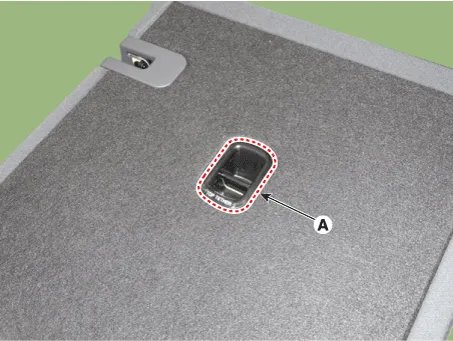
| 6. | Using a screwdriver or remover, remove the cap (A).
|

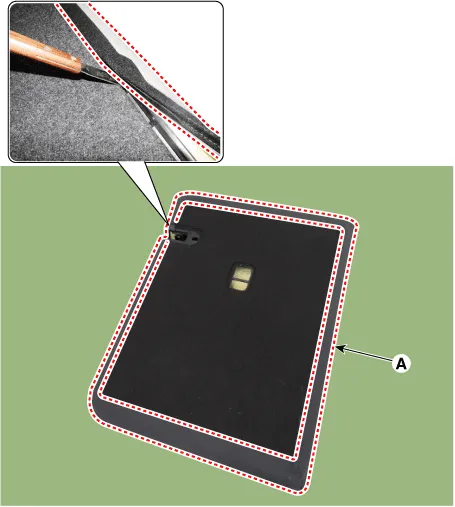
| 7. | Using a screwdriver or remover, remove the rear seat back cover (A).
|
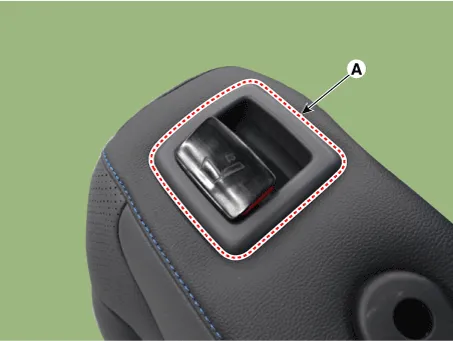
| 8. | Pull out the rear seat headrest guides (A) while pinching both sides of the lower part of the guides, and remove them.
|
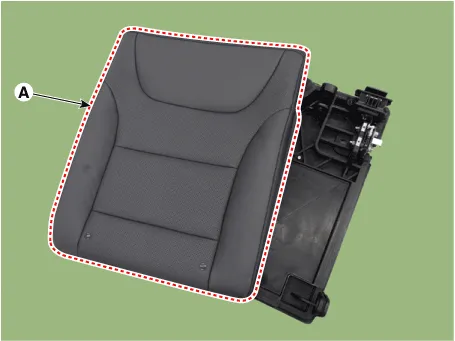
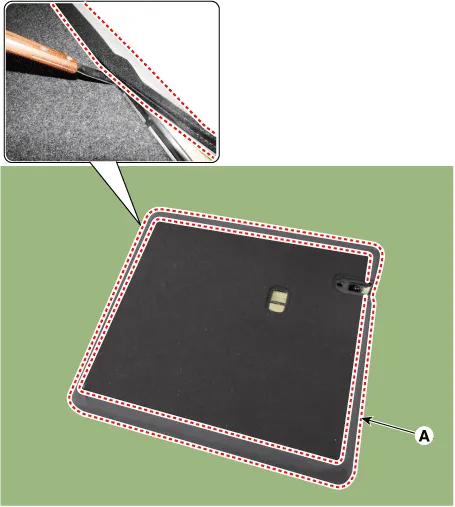
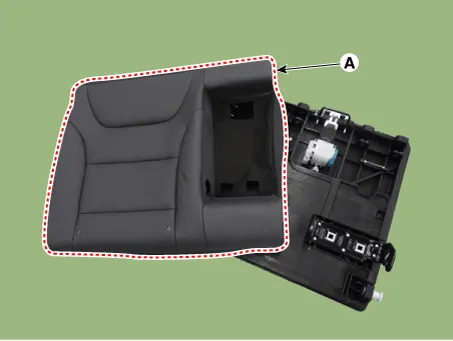
| 9. | Remove the rear seat back cover assembly (A) from the rear seat back frame.
|
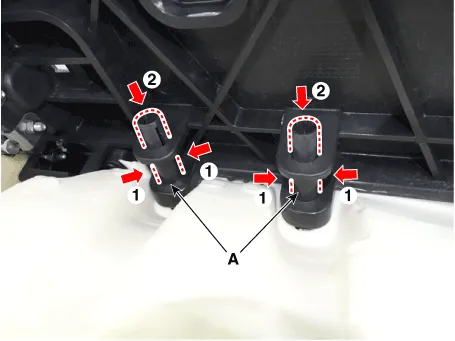
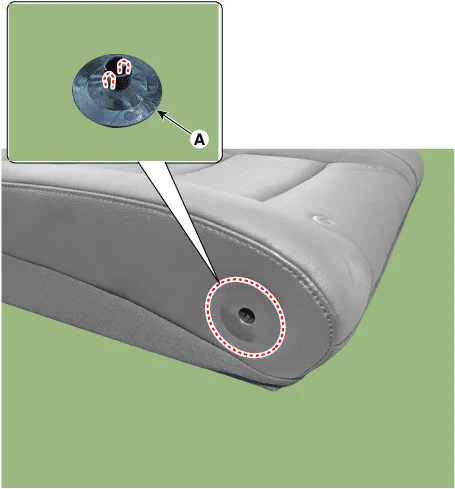
| 10. | After removing the Velcro tape (A) and hog-ring clips (B) inside the rear seat cushion cover, remove the seat back cover (C).
|
| 11. | To install, reverse the removal procedure.
|
| [RH] |
|
|

| 1. | Remove the rear seat assembly [RH]. (Refer to Rear Seat - "Rear Seat Assembly") |
| 2. | Remove the rear back armrest. (Refer to Rear Seat - "Rear Back Armrest") |
| 3. | Push the lock pins, and remove the rear seat headrest (A).
|
| 4. | Remove the rear seat armrest board (A).
|

| 5. | Using a screwdriver or remover, remove the cap (A).
|
| 6. | Using a screwdriver or remover, remove the rear seat folding bezel (A).
|
| 7. | Using a screwdriver or remover, remove the rear seat belt center cover (A).
|
| 8. | Using a screwdriver or remover, remove the teddy anchor garnish (A).
|
| 9. | After loosening the mounting screws, remove the rear seat back latch cover (A).
|
| 10. | Using a screwdriver or remover, remove the rear seat back cover (A).
|
| 11. | Pull out the rear seat headrest guides (A) while pinching both sides of the lower part of the guides, and remove them.
|

| 12. | Remove the rear seat back cover assembly (A) from the rear seat back frame.
|
| 13. | After removing the Velcro tape (A) and hog-ring clips (B) inside the rear seat cushion cover, remove the seat cushion cover (C).
|

| 14. | To install, reverse the removal procedure.
|
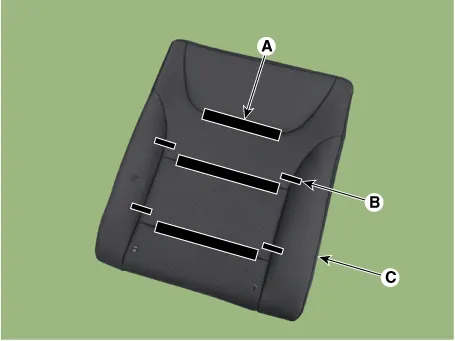
Component Location 1. Rear seat back cover [LH]2. Rear seat back cover [RH]
Component Location 1. Rear seat cushion cover
Other information:
Hyundai Ioniq (AE) 2017-2022 Service & Repair Manual: Front View Camera Unit. Repair procedures
Removal1.Disconnect the negative (-) battery terminal.2.Remove the front view camera cover (A).3.Disconnect the front view camera connector (A).4.Remove the front view camera after disengaging the mounting bracket (A).Installation1.Align front view camera with windshield bracket using forward edge point (A).
Hyundai Ioniq (AE) 2017-2022 Service & Repair Manual: Description and operation
DescriptionThe smart cruise control system allows a driver to program the vehicle to control the speed and following distance by detecting the vehicle ahead without depressing the brake pedal and the accelerator pedal.1.Cruise speed control : The vehicle maintains the selected speed if there are not vehicles ahead.
Categories
- Manuals Home
- Hyundai Ioniq Owners Manual
- Hyundai Ioniq Service Manual
- Jump starting procedure
- How to Connect Portable Charger (ICCB: In-Cable Control Box)
- If the 12 Volt Battery is Discharged (Hybrid Vehicle)
- New on site
- Most important about car

Copyright © 2026 www.hioniqae.com - 0.0134