Hyundai Ioniq (AE): Rear Suspension System / Rear Upper Arm. Repair procedures
| Removal |
| 1. | Loosen the wheel nuts slightly. Raise the vehicle, and make sure it is securely supported. |
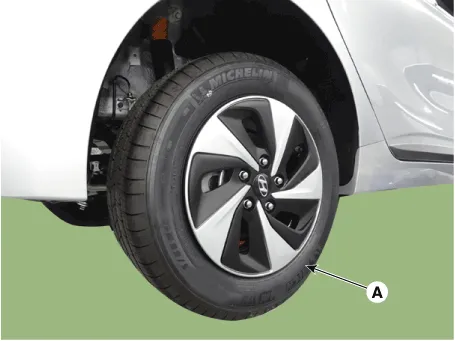
| 2. | Remove the rear wheel and tire (A) from the rear hub.
|

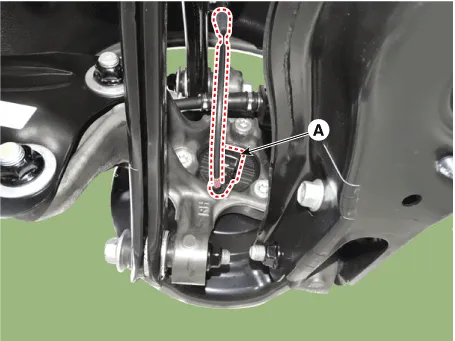
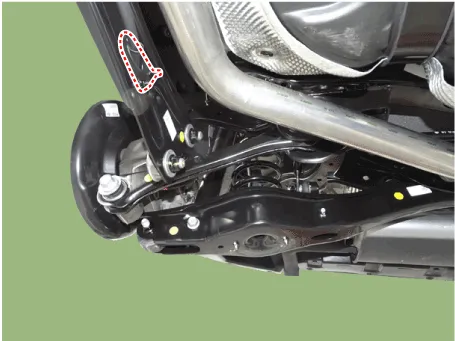
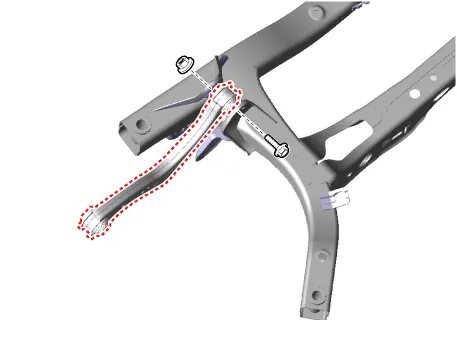
| 3. | Loosen the rear upper arm mounting bolt and then remove the rear upper arm (A).
|
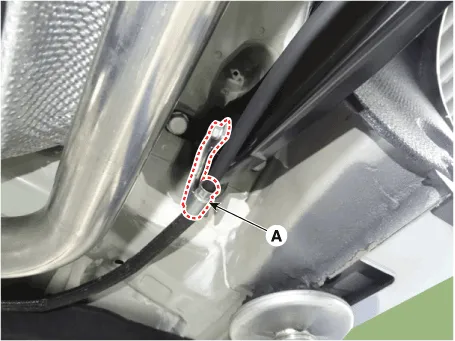
| 4. | Disconnect the rear wheel speed sensor connector (A).
|
| 5. | Remove the wheel speed sensor cable bracket.
|
| 6. | Remove the parking brake cable fromt the rear caliper. (Refer to Brake System - "Rear disc brake") |
| 7. | Loosen the wheel speed sensor cable bracket nut and then separate the cables from the trailing arm.
|
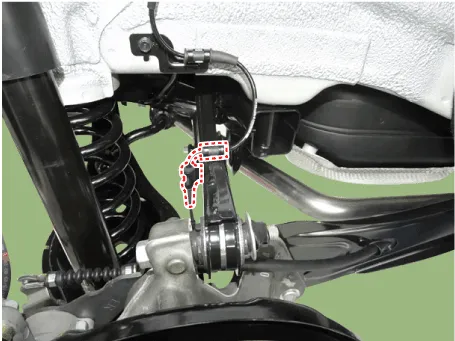
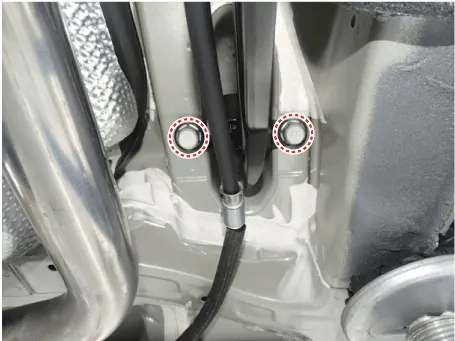
| 8. | Remove the parking brake cable bracket (A) and then separate the cables from the trailing arm.
|
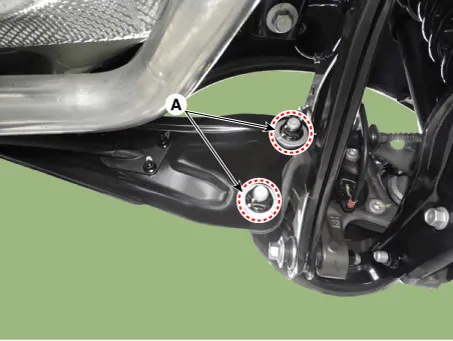
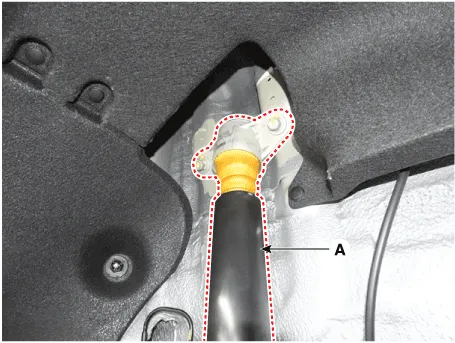
| 9. | Remove the rear shock absorber (A) from the frame by loosening the bolt.
|
| 10. | Loosen the mounting bolt and then remove the trailing arm with the frame.
|
| 11. | Remove the main muffler. (Refer to Engine Mechanical System - Muffler") |
| 12. | After setting a jack, loosen the bolts and then remove the rear cross member.
|

| 13. | Loosen the bolt & nut then remove the rear upper arm with the sub frame.
|
| 14. | Install in the reverse order of removal. |
| Inspection |
| 1. | Check the bushing for wear and deterioration. |
| 2. | Check for all bolts and nut. |
Removal1.Loosen the wheel nuts slightly.Raise the vehicle, and make sure it is securely supported.2.Remove the rear wheel and tire (A) from the rear hub.
Removal1.Loosen the wheel nuts slightly.Raise the vehicle, and make sure it is securely supported.2.Remove the rear wheel and tire (A) from the rear hub.
Other information:
Hyundai Ioniq (AE) 2017-2022 Service & Repair Manual: Front Radar Unit. Repair procedures
Removal1.Remove the front bumper.(Refer to Body - "Front Bumper")2.Disconnect the smart cruise control unit connector (A).3.Remove the smart cruise control nuit assembly (B) from thevehicle after loosening mounting bolts.Installation1.Install in the reverse order of removal.
Hyundai Ioniq (AE) 2017-2022 Service & Repair Manual: Troubleshooting
Trouble Symptom ChartsTrouble Symptom 1Trouble Symptom 2 Trouble symptom Probable cause Remedy The set vehicle speed varies greatly upward or downward"Surging" (repeated alternating acceleration and deceleration) occurs after settingMalfunction of the vehicle speed se
Categories
- Manuals Home
- Hyundai Ioniq Owners Manual
- Hyundai Ioniq Service Manual
- Jump Starting
- Suspension System
- Engine Mechanical System
- New on site
- Most important about car
