
Hyundai Ioniq (AE): Active Air Flap (AAF) / Schematic diagrams
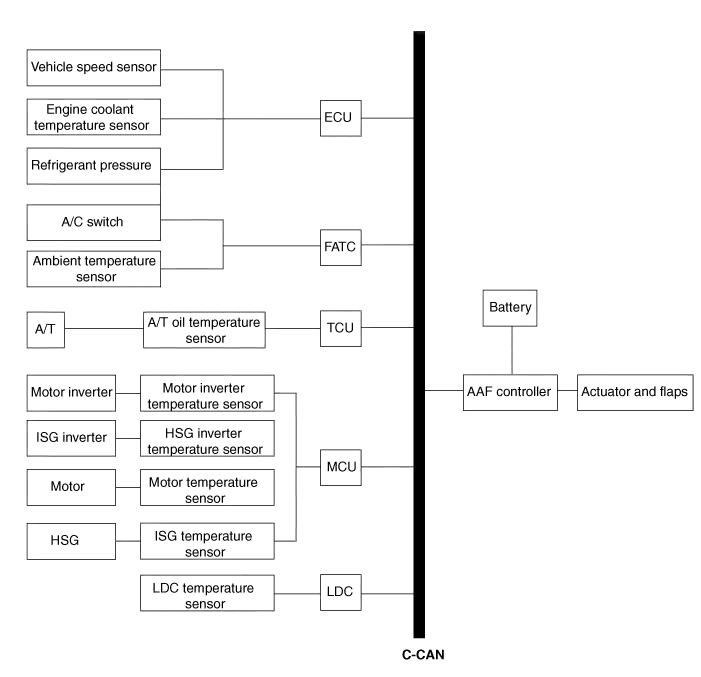
| Schematic Diagram |
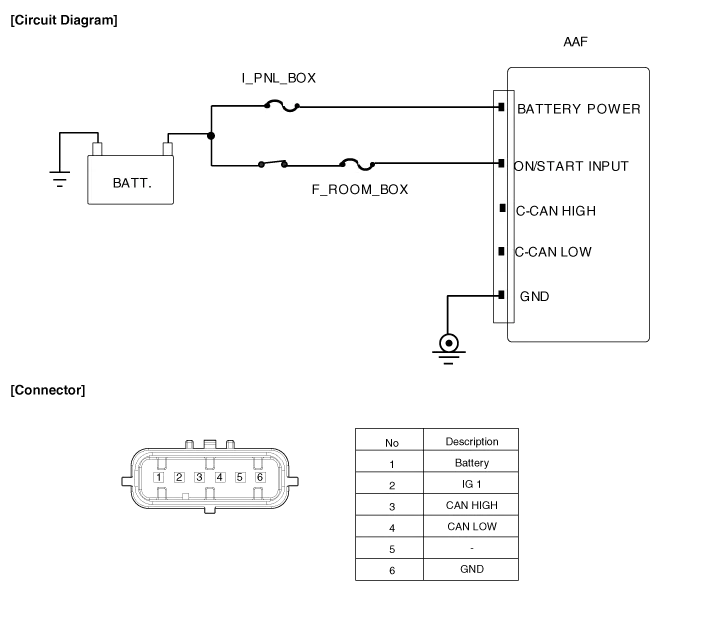
| Circuit Diagram |
Components1. Air duct2. Flap3. Housing4. Actuator assembly
Removal and installation • Check for foreign objects caught in the flap and linkage area.1.Disconnect the battery negative terminal.
Other information:
Hyundai Ioniq (AE) 2017-2022 Service & Repair Manual: A/C Pressure Transducer. Description and operation
DescriptionThe A/C Pressure Transducer (APT) converts the pressure value of high pressure line into voltage value after measuring it. By converted voltage value, engine ECU controls the cooling fan by operating it high speed or low speed. Engine ECU stops the operation of the compressor when the temperature of refrigerant line is very high or very
Hyundai Ioniq (AE) 2017-2022 Service & Repair Manual: In-car Sensor. Description and operation
DescriptionThe In-car air temperature sensor is built in the heater & A/C control unit.The sensor contains a thermistor which measures the temperature of the inside. The signal decided by the resistance value which changes in accordance with perceived inside temperature, is delivered to heater control unit and according to this signal the contr
Categories
- Manuals Home
- Hyundai Ioniq Owners Manual
- Hyundai Ioniq Service Manual
- If the 12 Volt Battery is Discharged (Hybrid Vehicle)
- DCT(Dual Clutch Transmission) System
- Engine Mechanical System
- New on site
- Most important about car
