
Hyundai Ioniq (AE): Tires/Wheels / Wheel. Repair procedures
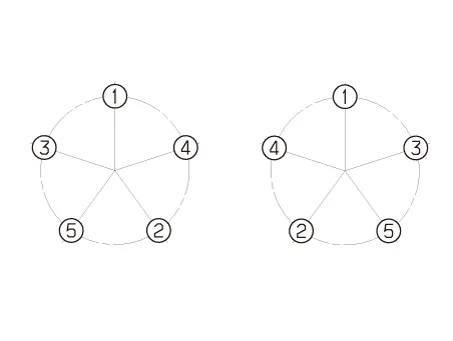
| Hub nut tightening sequence |
Tightening torque : 107.9 - 127.5 N.m (11.0 - 13.0 kgf.m, 79.6 - 94.0 lb-ft) |
|

If the vehicle starts within 19 minutes after the replacement of the wheel of the stopped vehicle, the TPMS Malfunction Indicator on the instrument cluster illuminates.
|

| 1. | Jack up the vehicle. |
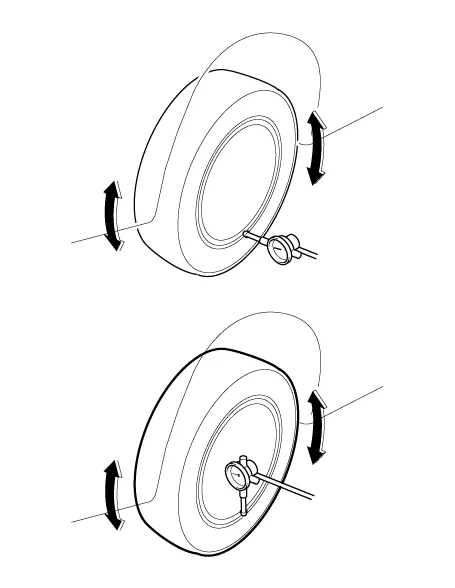
| 2. | Measure the wheel Run-out by using a dial indicator as illustration below.
| ||||||||||||
| 3. | If measured value exceeds the standard value, replace the wheel.
|
• Using tires and wheel other than the recommended sizes could cause unusual handling characteristics and poor vehicle control, resulting in a serious accident.
AdjustmentFront Wheel Alignment • When using a commercially available computerized wheel alignment equipment to inspect the front wheel alignment, always position the vehicle on a level surface with the front wheels facing straight ahead.
Other information:
Hyundai Ioniq (AE) 2017-2022 Service & Repair Manual: A/C Pressure Transducer. Repair procedures
Inspection • Before measuring the pressure of the refriferant line, check whether the refrigerant amount is charged in accordance with the specified charging amount.(Refer to Heating, Ventilation, Air Conditioning - "Specifications")1.
Hyundai Ioniq (AE) 2017-2022 Service & Repair Manual: General safety information and caution
General Safety Information and CautionBe careful of the following precautions when driving the vehicle using the smart cruise control system. • The smart cruise control system may have limits in detecting distance to the vehicle ahead due to road and traffic conditions.
Categories
- Manuals Home
- Hyundai Ioniq Owners Manual
- Hyundai Ioniq Service Manual
- Maintenance
- Engine Mechanical System
- Hybrid Vehicle Engine Compartment
- New on site
- Most important about car
