Hyundai Ioniq (AE): Timing System / Drive Belt. Repair procedures
| 1. | Remove the engine room under cover. (Refer to Engine and Transaxle Assembly - "Engine Room Under Cover") |
| 2. | Remove the drive belt. | (1) | Using the wrench, turning the mechanical tensioner (A) counterclockwise and then insert a stopper pin into the hole. |
| (2) | Install the SST (09244-G2100) to hydraulic tensioner (B) and then compress the hydraulic tensioner by tightening the adjusting bolt (C). |
| (3) | Remove the drive belt (D). 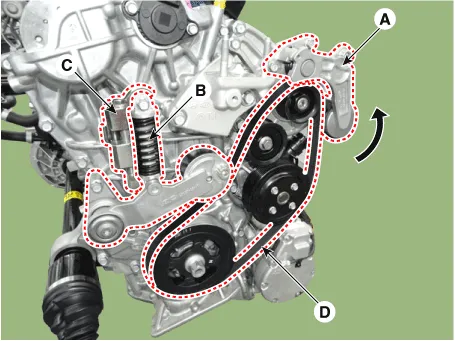
| •
| To prevent damage the hydraulic tensioner, slowly must work by using the hand tool. |
|
| •
| Before proceeding, check whether the safety pin (A) of the SST (09244-G2100) is located inside the SST as shown in the figure. 
|
|
|
|
Visually check the belt for excessive wear, frayed cords etc.
If any defect has been found, replace the drive belt.
| •
| Cracks on the rib side of a belt are considered acceptable. If the belt has chunks missing from the ribs, it should be replaced. 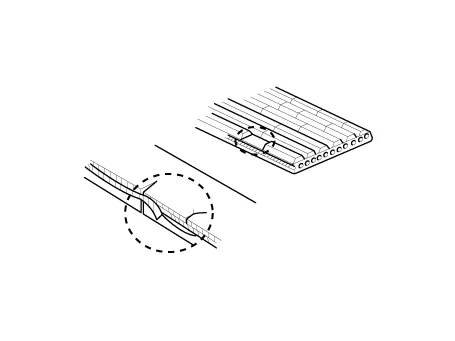
|
|
| 1. | Install the drive belt. | (1) | Install the drive belt (D). |
| (2) | Using the wrench, slightly lift the mechanical tensioner (A) and then remove the stopper pin. Slowly place the mechanical tensioner (A). |
| (3) | Remove the SST (09244-G2100) from the hydraulic tensioner (B) by loosening the adjusting bolt (C).
| •
| To prevent damage the hydraulic tensioner, slowly must work by using the hand tool. |
|
|
|
| 2. | Install the engine room under cover. (Refer to Engine and Transaxle Assembly - "Engine Room Under Cover") |
Removal and Installation1.Remove the drive belt.(Refer to Timing System - "Drive Belt")2.Remove the idler (A). Tightening torque : 39.2 - 49.
Other information:
C
Removal1.Disconnect the negative (-) battery terminal.2.Remove the tailgate lid trim.(Refer to Body - "TailGate Lid Trim")3.Disconnect the Rear view camera connector (A).4.Remove the Rear view camera assembly after loosening the mounting screws.Installation1.

