Hyundai Ioniq (AE): Front Door / Front Door Side Weatherstrip. Repair procedures
| Replacement |
| [Front door side weatherstrip] |
| 1. | Loosen the front door checker (B) mounting bolt.
|
| 2. | Detach the clips, then remove the front door side weatherstrip (A).
|
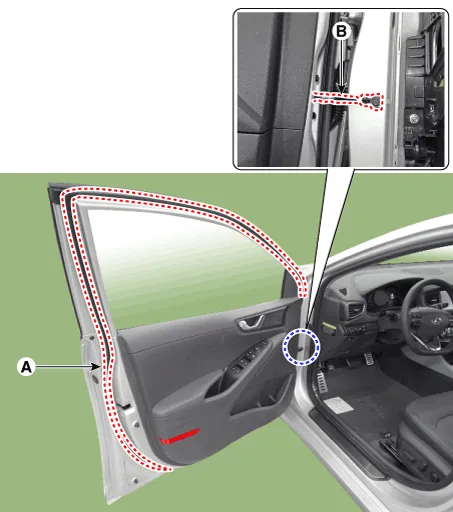
| 3. | To install, reverse the removal procedure.
|

| [Front door body side weatherstrip] |
| 1. | Detach the clips, then remove the front door body side weatherstrip (A).
|
| 2. | To install, reverse the removal procedure.
|
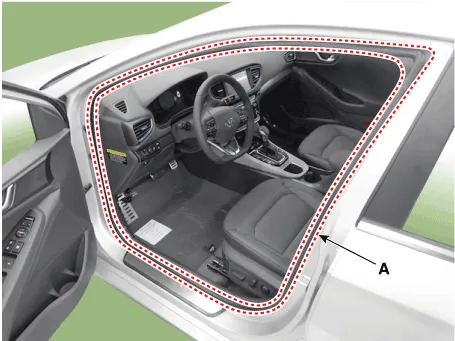
Replacement1.Remove the front door trim.(Refer to Front Door - "Front Door Trim")2.Remove the front door belt inside weatherstrip (A).3.To install, reverse the removal procedure.
Component Location 1. Front door latch
Other information:
Hyundai Ioniq (AE) 2017-2022 Service & Repair Manual: Photo Sensor. Repair procedures
Inspection1.Turn the ignition switch ON.2.Connect the GDS.3.Emit intensive light toward the photo sensor using a lamp, and check the output voltage change.4.The voltage will rise with higher intensive light and reduce with lower intensive light.1. Auto light signal2.
Hyundai Ioniq (AE) 2017-2022 Service & Repair Manual: Duct Sensor. Repair procedures
Inspection1.Check that the voltage values of No. 1, 2 duct sensors change1. Sensor (+ 5V)2. Sensor groundSpecification Ambient temperature [°C (°F)] Resistance (kΩ) Voltage (V) 50 (122)1.
Categories
- Manuals Home
- Hyundai Ioniq Owners Manual
- Hyundai Ioniq Service Manual
- Brake System
- DCT(Dual Clutch Transmission) System
- How to Connect Portable Charger (ICCB: In-Cable Control Box)
- New on site
- Most important about car
