Hyundai Ioniq (AE): Power Door Mirrors / Power Door Mirror Actuator. Repair procedures
| Removal |
| 1. | Disconnect (-) battery terminal. |
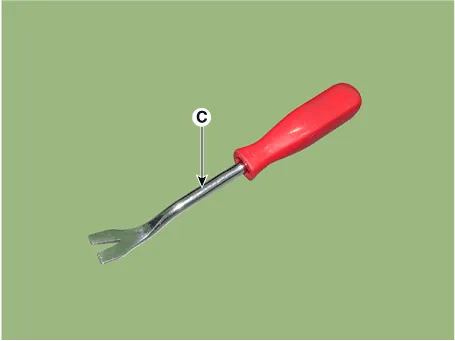
| 2. | Using a fastener remover (C), remove the mirror (A) as illustration below.
|
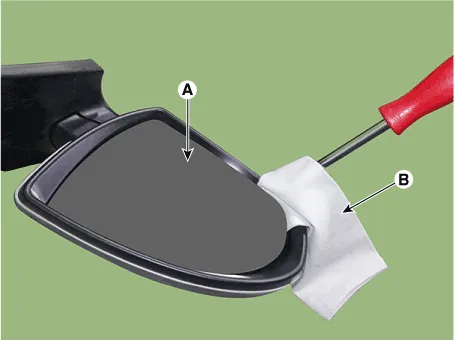

| 3. | Disconnect heat wire connectors (A) and then remove the mirror.
|
| 4. | Remove the mirror actuator mounting screw.
|
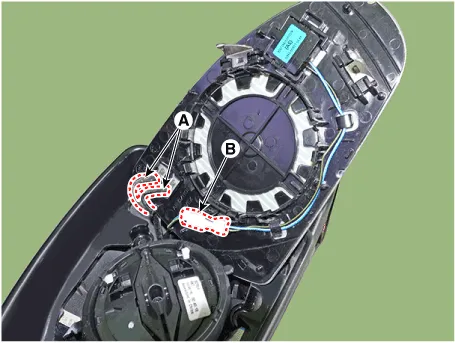
| 5. | Insert the fastener remover into the end of the mirror actuator (A) and lift it up.
|
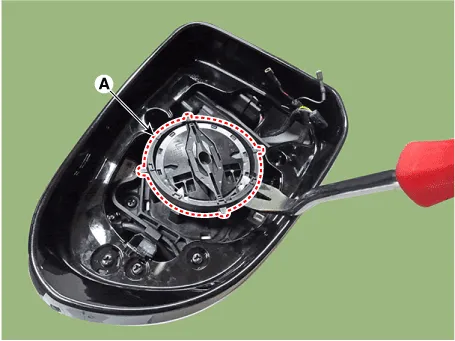
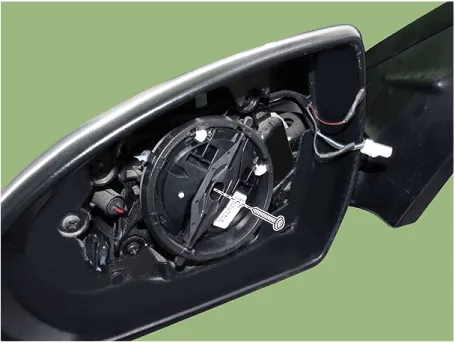
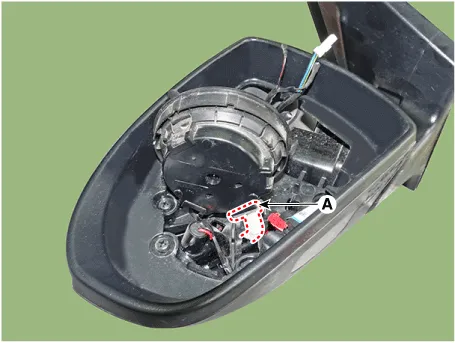
| 6. | Disconnect the connector (A) and then remove the mirror actuator.
|
| Installation |
| 1. | Connect the actuator connector and then install the mirror actuator. |
| 2. | Connect mirror heat wire connector and then install the mirror. |
| 3. | Connect (-) battery terminal then check if mirror works normally. |
Inspection[Power Window Switch]1.Disconnect the negative (-) battery terminal.2.Remove the driver door trim.(Refer to Body - "Front Door Trim")3.Disconnect the power mirror switch connector from the door trim.
Components1. BSD Indicator2. Side repeater lamp3. Puddle lamp
Other information:
Hyundai Ioniq (AE) 2017-2022 Service & Repair Manual: Front View Camera Unit. Repair procedures
Removal1.Disconnect the negative (-) battery terminal.2.Remove the front view camera cover (A).3.Disconnect the front view camera connector (A).4.Remove the front view camera after disengaging the mounting bracket (A).Installation1.Align front view camera with windshield bracket using forward edge point (A).
Hyundai Ioniq (AE) 2017-2022 Service & Repair Manual: Parking Distance Warning (PDW) Sensor. Repair procedures
Removal1.Disconnect the negative (-) battery terminal.2.Remove the front / rear bumper cover.(Refer to Body - "Front Bumper Cover")(Refer to Body - "Rear Bumper Cover")3.Disconnect the connector (A) from the parking assist sensor.4.Remove the sensor (A) by pulling out both ends of the sensor holder.
Categories
- Manuals Home
- Hyundai Ioniq Owners Manual
- Hyundai Ioniq Service Manual
- Suspension System
- Heating, Ventilation and Air Conditioning
- DCT(Dual Clutch Transmission) System
- New on site
- Most important about car
