Hyundai Ioniq (AE): Cooling System / Radiator. Repair procedures
| Removal and Installation |
| 1. | Loosen the drain plug, and drain the engine coolant. Remove the reservoir cap to help drain the coolant faster. (Refer to Cooling System - "Coolant") |
| 2. | Remove the cooling fan. (Refer to Cooling System - "Cooling Fan") |
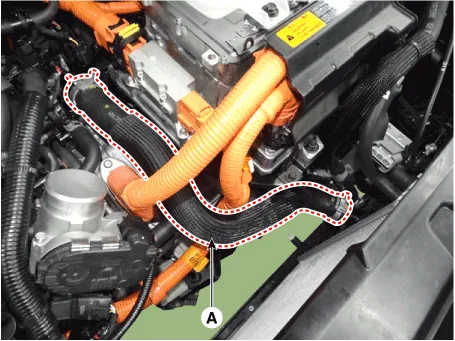
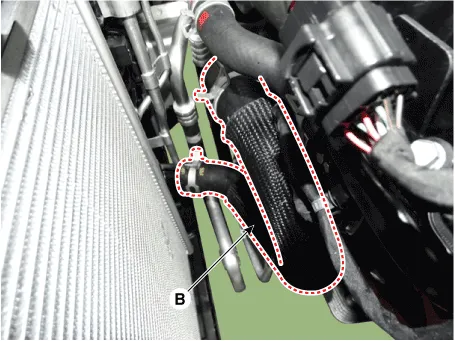
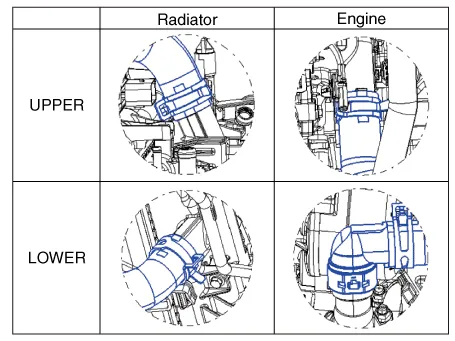
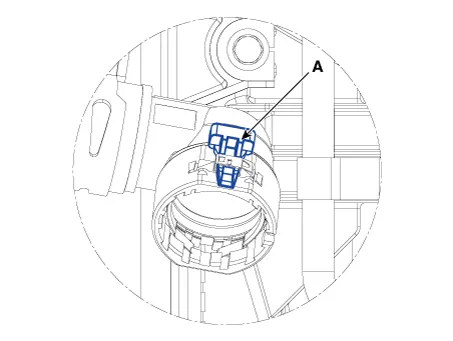
| 3. | Disconnect the radiator upper hose (A) and lower hose (B).
|

| 4. | Remove the radiator upper mounting bracket (A).
[LH]
[RH]
|
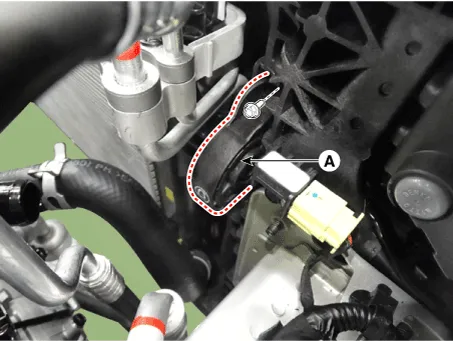
| 5. | Remove the radiator fixing bolts (A).
|
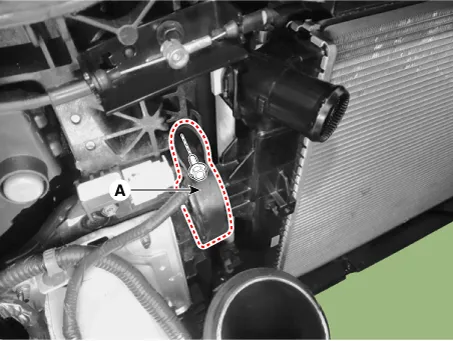
| 6. | Remove the A/C pipe fixing bolts (A).
|
| 7. | Remove the inverter reservoir hose bracket bolts. |
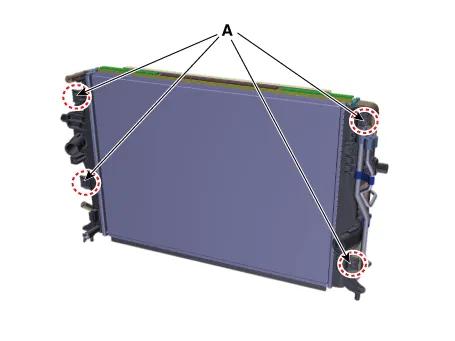
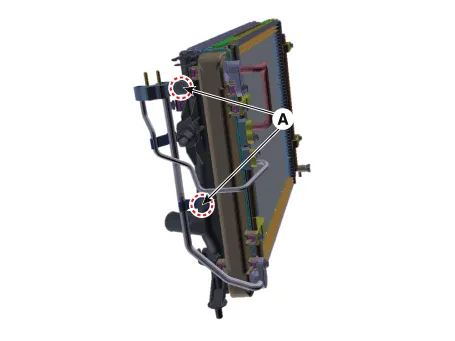
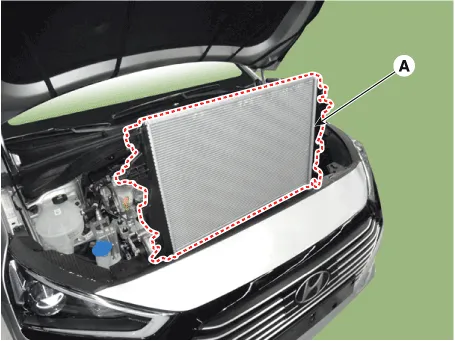
| 8. | Remove the radiator assembly (A) from the vehicle.
|
| 9. | Install in the reverse order of removal. |
| 10. | Fill the radiator with coolant and check for leaks. (Refer to Cooling System - "Coolant") |
| 11. | Start engine and check for leaks. |
| 12. | Recheck the coolant level. |
Components1. Radiator assembly2. Radiator upper mounting bracket3. Radiator lower hose4. Radiator upper hose5. Mounting insulator6. Clamp
Removal and installation1.Loosen the drain plug, and drain the engine coolant. Remove the reservoir cap to help drain the coolant faster.(Refer to Cooling System - "Coolant")2.
Other information:
Hyundai Ioniq (AE) 2017-2022 Service & Repair Manual: Description and operation
DescriptionThe smart cruise control system allows a driver to program the vehicle to control the speed and following distance by detecting the vehicle ahead without depressing the brake pedal and the accelerator pedal.1.Cruise speed control : The vehicle maintains the selected speed if there are not vehicles ahead.
Hyundai Ioniq (AE) 2017-2022 Service & Repair Manual: Warning Indicator. Repair procedures
RemovalWarning Indicator1.Disconnect the negative (-) battery terminal.2.Remove the mirror (A).InstallationWarning Indicator1.Install the outside mirror.2.Connect the negative (-) battery terminal.Inspection1.Apply battery voltage to each terminal as shown in the table and verify that the mirror operates properly.
Categories
- Manuals Home
- Hyundai Ioniq Owners Manual
- Hyundai Ioniq Service Manual
- Body (Interior and Exterior)
- Repair procedures
- Hybrid Vehicle Engine Compartment
- New on site
- Most important about car
