Hyundai Ioniq (AE): Fender / Repair procedures
Hyundai Ioniq (AE) 2017-2022 Service & Repair Manual / Body (Interior and Exterior) / Fender / Repair procedures
| Replacement |
|

|

| 1. | Remove the front bumper. (Refer to Front Bumper - "Front Bumper Cover") |
| 2. | Remove the head lamps. (Refer to Body Electrical System - "Head Lamps") |
| 3. | Remove the front wheel guard. (Refer to Body Side Molding - "Front Wheel Guard") |
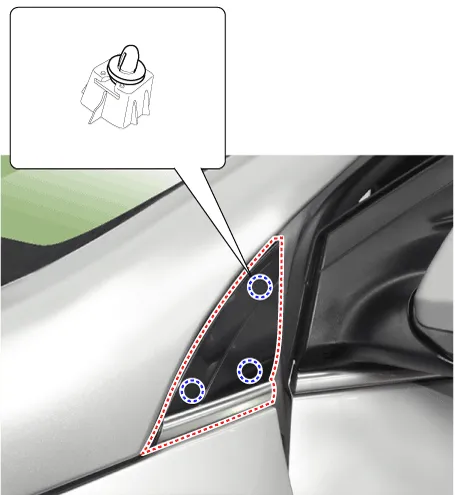
| 4. | Using a screwdriver or remover, remove the delta garnish (A).
|
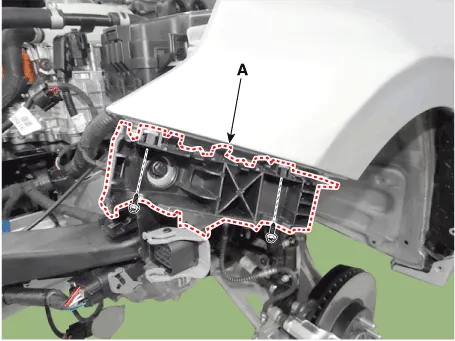
| 5. | Remove the front bumper side mounthing bracket (A) after loosening the bolts.
|
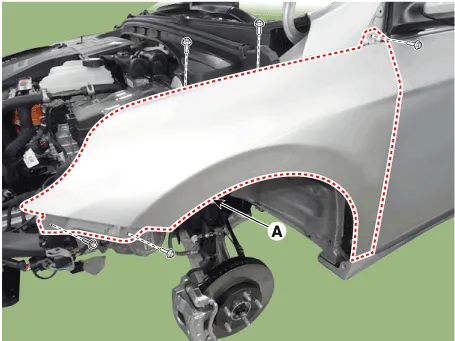
| 6. | After loosening the mounting bolts, remove the fender assembly (A).
|
| 7. | To install, reverse the removal procedure.
|
Component Location1. Fender assembly
Other information:
Hyundai Ioniq (AE) 2017-2022 Service & Repair Manual: Repair procedures
Self Diagnosis1.Self-diagnosis process. • When operating the self-diagnostics, the below fault (self-diagnostics code) will blink at 0.5 seconds interval on the temperature display settings (driver's side only) and the remaining symbols are OFF .
Hyundai Ioniq (AE) 2017-2022 Service & Repair Manual: Repair procedures
Removal1.Disconnect the negative (-) battery terminal.2.Remove the tailgate lid trim.(Refer to Body - "TailGate Lid Trim")3.Disconnect the Rear view camera connector (A).4.Remove the Rear view camera assembly after loosening the mounting screws.Installation1.
Categories
- Manuals Home
- Hyundai Ioniq Owners Manual
- Hyundai Ioniq Service Manual
- How to Connect Portable Charger (ICCB: In-Cable Control Box)
- General Information
- If the 12 Volt Battery is Discharged (Hybrid Vehicle)
- New on site
- Most important about car

Copyright © 2026 www.hioniqae.com - 0.0159