Hyundai Ioniq (AE): Active Air Flap (AAF) / Repair procedures
Hyundai Ioniq (AE) 2017-2022 Service & Repair Manual / Engine Mechanical System / Cooling System / Active Air Flap (AAF) / Repair procedures
| Removal and installation |
|

| 1. | Disconnect the battery negative terminal. |
| 2. | Remove the front bumper. (Refet to Body - "Front Bumper") |
| 3. | Remove the radiator grille. (Refet to Body - "Front Bumper") |
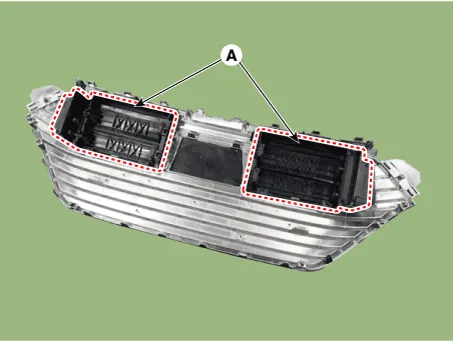
| 4. | Remove the active air flap (AAF) assembly (A).
|
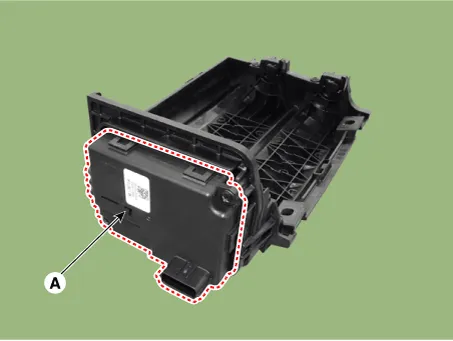
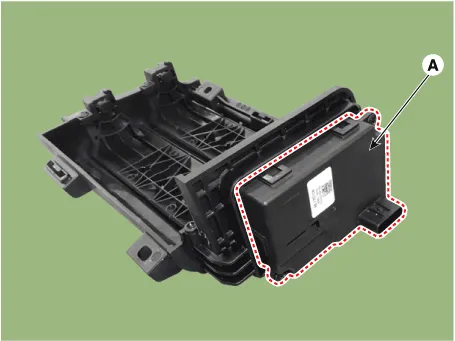
| 5. | Remove the active air flap (AAF) actuator (A).
|
| 6. | Install in the reverse order of removal. |
Schematic DiagramCircuit Diagram
Other information:
Hyundai Ioniq (AE) 2017-2022 Service & Repair Manual: A/C Pressure Transducer. Description and operation
DescriptionThe A/C Pressure Transducer (APT) converts the pressure value of high pressure line into voltage value after measuring it. By converted voltage value, engine ECU controls the cooling fan by operating it high speed or low speed. Engine ECU stops the operation of the compressor when the temperature of refrigerant line is very high or very
Hyundai Ioniq (AE) 2017-2022 Service & Repair Manual: Front Radar Unit. Description and operation
DescriptionThe smart cruise control unit is installed on the front right side of the chassis. A radar sensor is embedded in the front section of the unit. This sensor detects vehicles and objects in front of the vehicle. The radar sensor can detect up to 64 objects ahead of a vehicle.
Categories
- Manuals Home
- Hyundai Ioniq Owners Manual
- Hyundai Ioniq Service Manual
- Checking the Coolant Level
- Suspension System
- Transmission Gear Oil. Repair procedures
- New on site
- Most important about car

Copyright © 2026 www.hioniqae.com - 0.0242