Hyundai Ioniq (AE): Lighting System / High Mounted Stop Lamp. Repair procedures
| Removal |
| 1. | Disconnect the negative (-) battery terminal. |
| 2. | Remove the rear spoiler assembly. (Refer to Body - "Tail Gate Trim") |
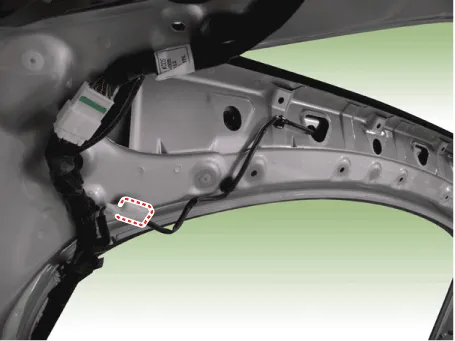
| 3. | Disconnect the high mounted stop lamp connector.
|
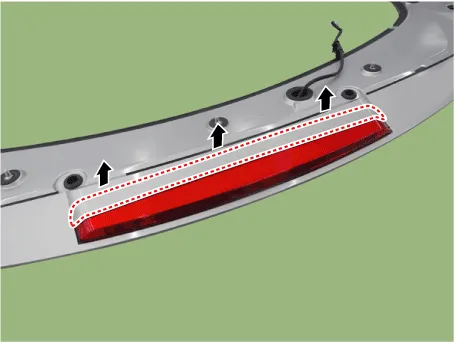
| 4. | Remove the high mounted stop lamp cover by pulling forward in the direction of the arrow using screw driver or remover.
|

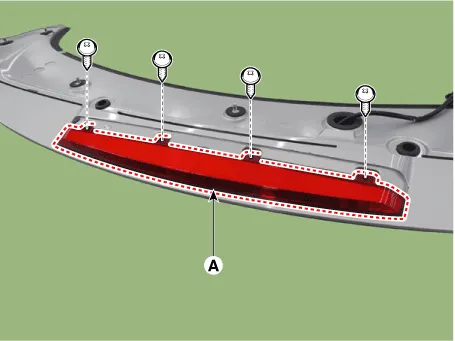
| 5. | Remove the high mounted stop lamp assembly (A) after loosening the mounting screws.
|
| Installation |
| 1. | Install the rear high mounted stop lamp. |
| 2. | Install the package tray trim. |
| 3. | Connect the negative (-) battery terminal. |
Removal1.Disconnect the negative (-) battery terminal.2.Remove the license lamp (A) after disengaging the license lamp mounting clip (B).3.Replace the bulb (A) after removing a lens.
Removal1.Disconnect the negative (-) battery terminal.2.Remove the outside rear combination lamp assembly (B) after disconnecting the connector (A).3.Remove the bulb (A) after turning it in the counter clock-wise direction.
Other information:
Hyundai Ioniq (AE) 2017-2022 Service & Repair Manual: Climate Control Air Filter. Repair procedures
Replacement1.Disconnect the air damper (A) from the glove box (B).2.Remove the stopper (B) from the glove box (A).3.Remove the filter cover (A) by pressing the knob.4.Replace the air filter (A) with a new one according to the direction of air filter. • To remove the filter easily, press the right side inwa
Hyundai Ioniq (AE) 2017-2022 Service & Repair Manual: Repair procedures
Removal1.Disconnect the negative (-) battery terminal.2.Remove the tailgate lid trim.(Refer to Body - "TailGate Lid Trim")3.Disconnect the Rear view camera connector (A).4.Remove the Rear view camera assembly after loosening the mounting screws.Installation1.
Categories
- Manuals Home
- Hyundai Ioniq Owners Manual
- Hyundai Ioniq Service Manual
- Jump Starting
- Engine Clutch System
- Hybrid Vehicle Engine Compartment
- New on site
- Most important about car
